You have to have been following us for a LONG time if you remember when we got our very first cart. If you weren’t around back then, you can read about it here. It was supposed to be a show cart, but it was on the cheaper side, therefore it was flawed. We obtained a much cheaper one shortly after this one and long ago decided to tear it down and refinish it. We disassembled it, sandblasted some of the smaller metal, purchased some new carriage bolts, screws, etc, and had big plans for pretty new paint and all the things. Then, life happened and it sat in pieces collecting dust for the last 11 or 12 years.
Well, it’s time. It’s time this thing is brought back to life and made into a beautiful cart that the boys will be proud to pull. Since we aren’t made of money around here, we have to create nice things instead of buy nice things.
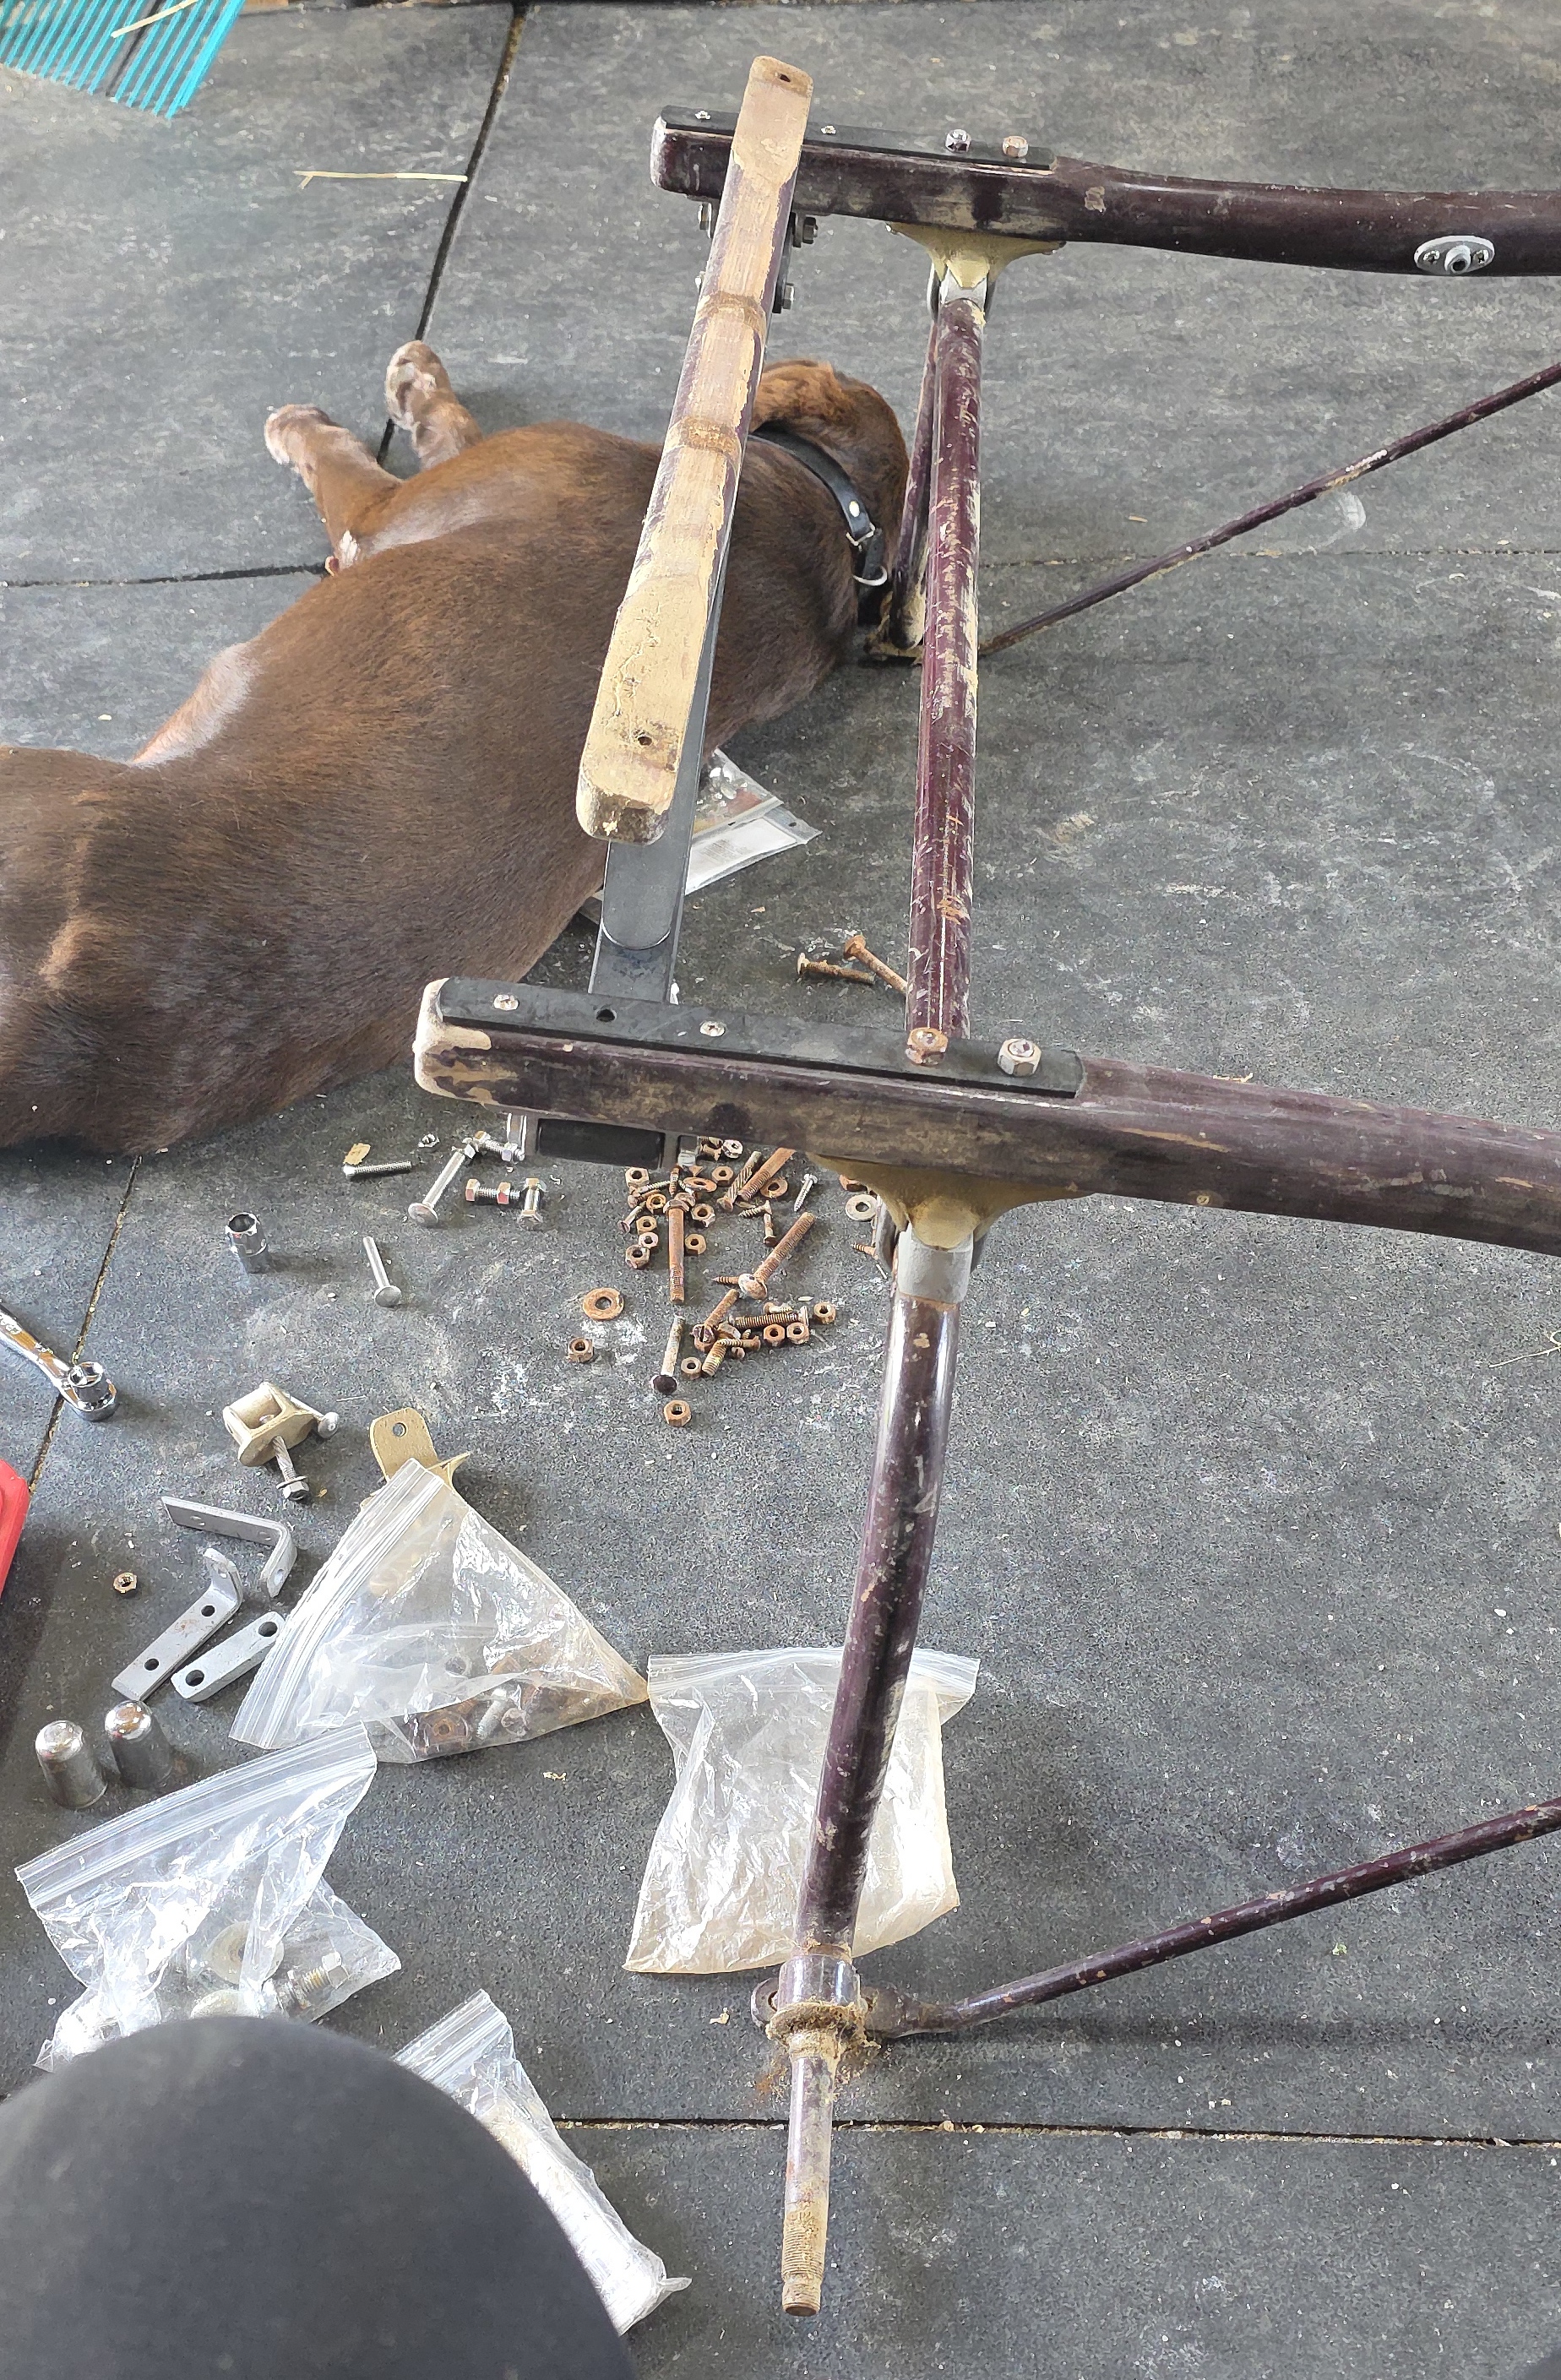
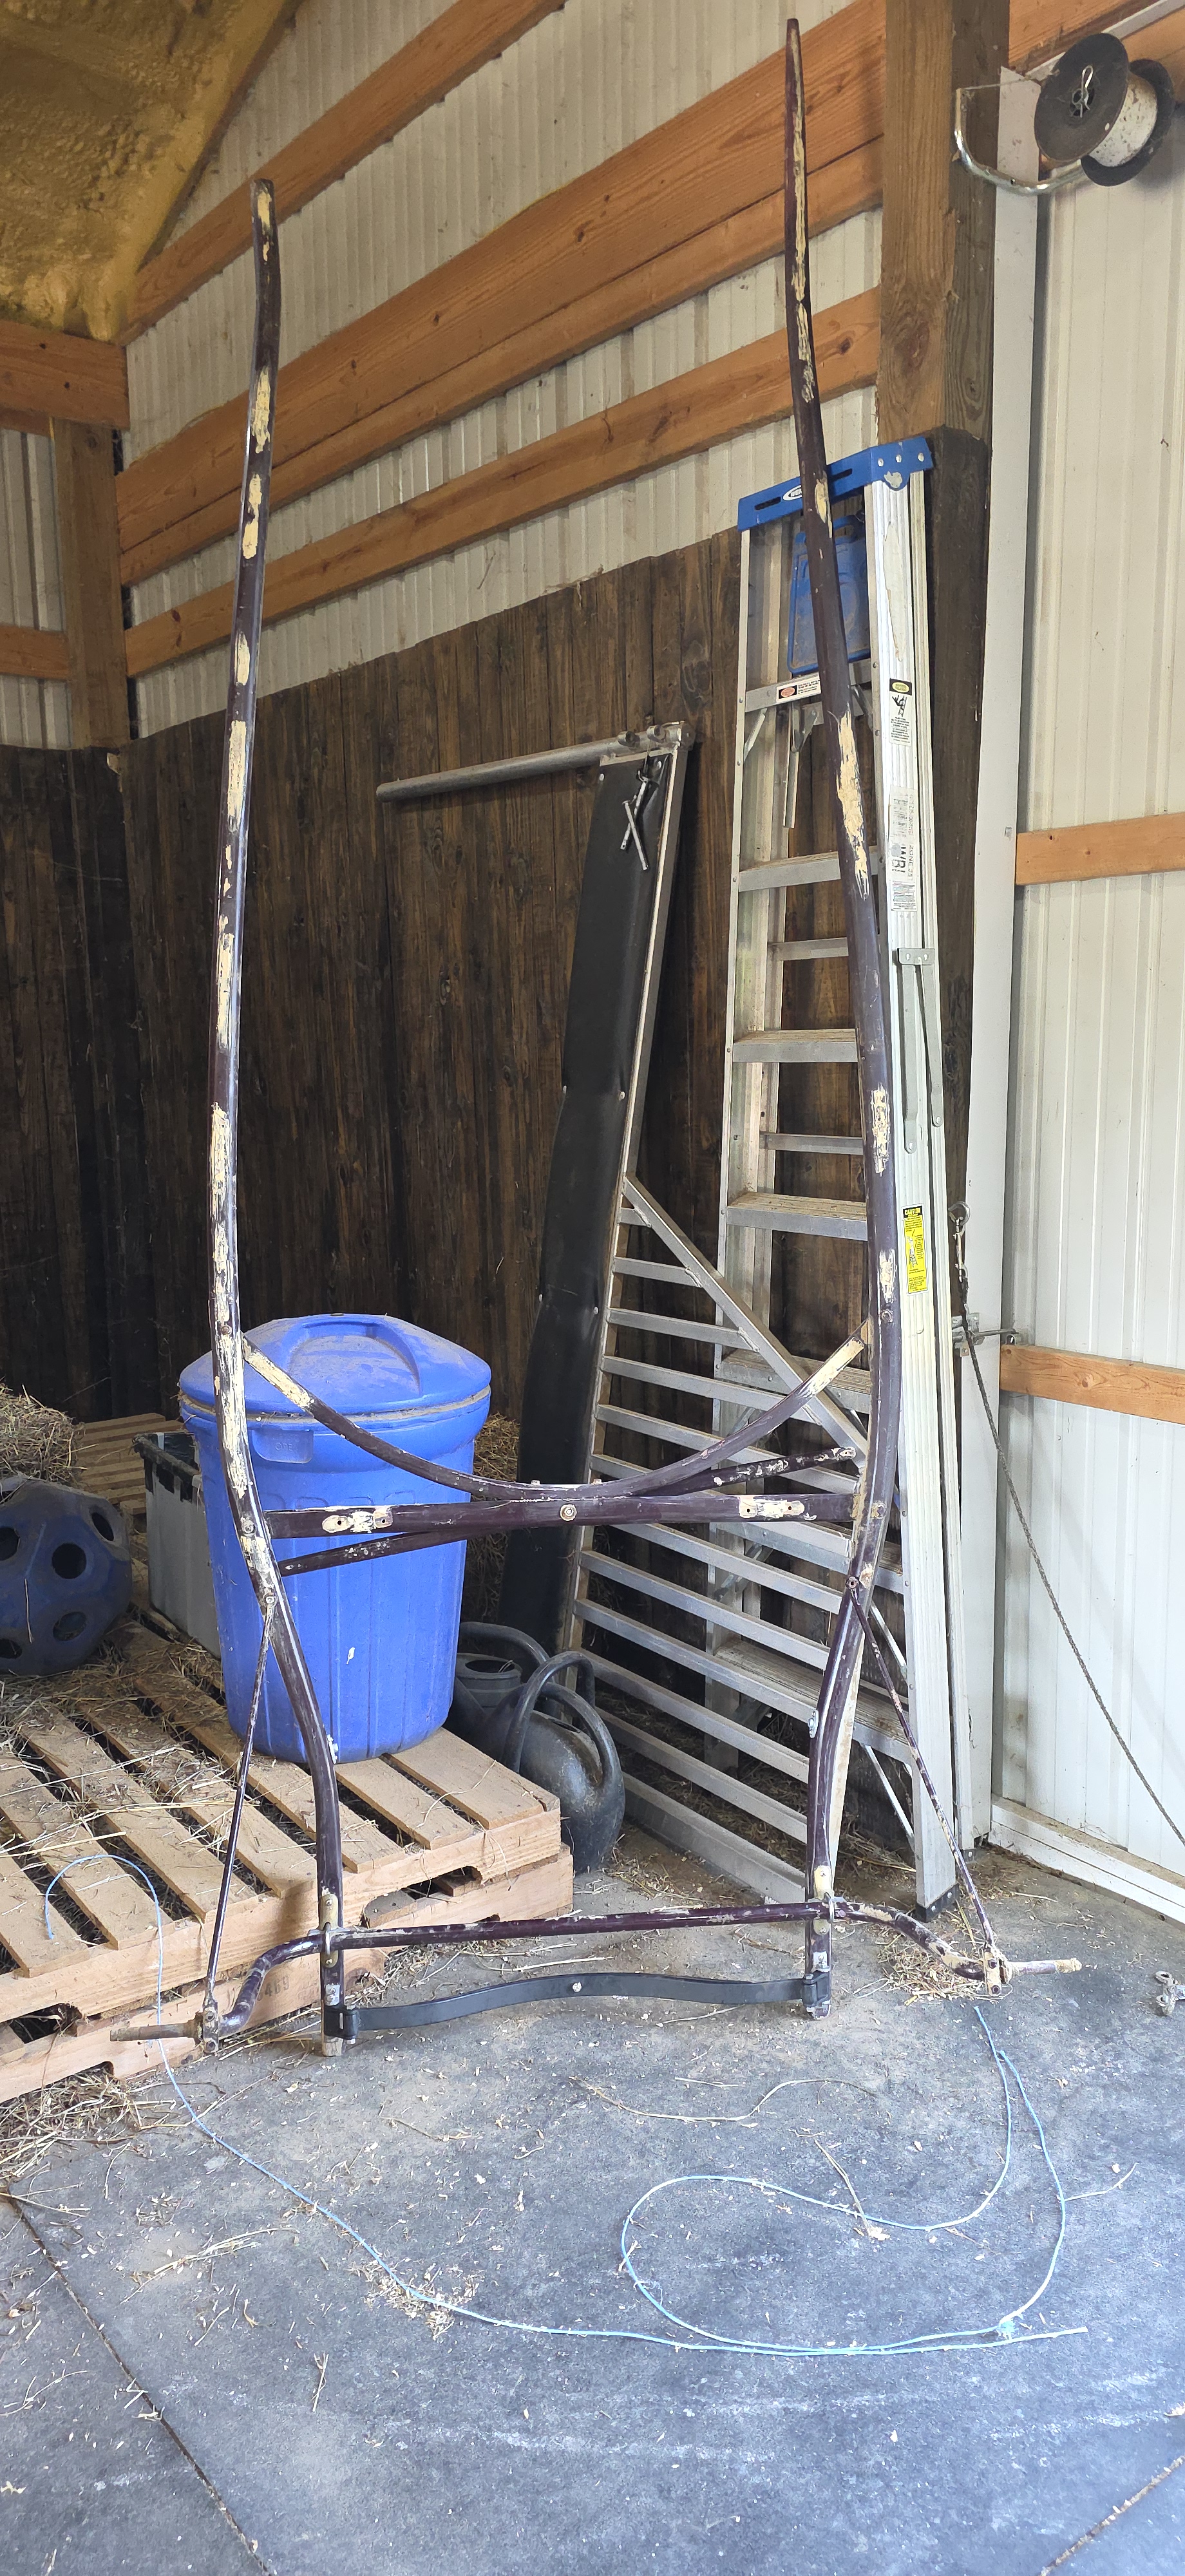
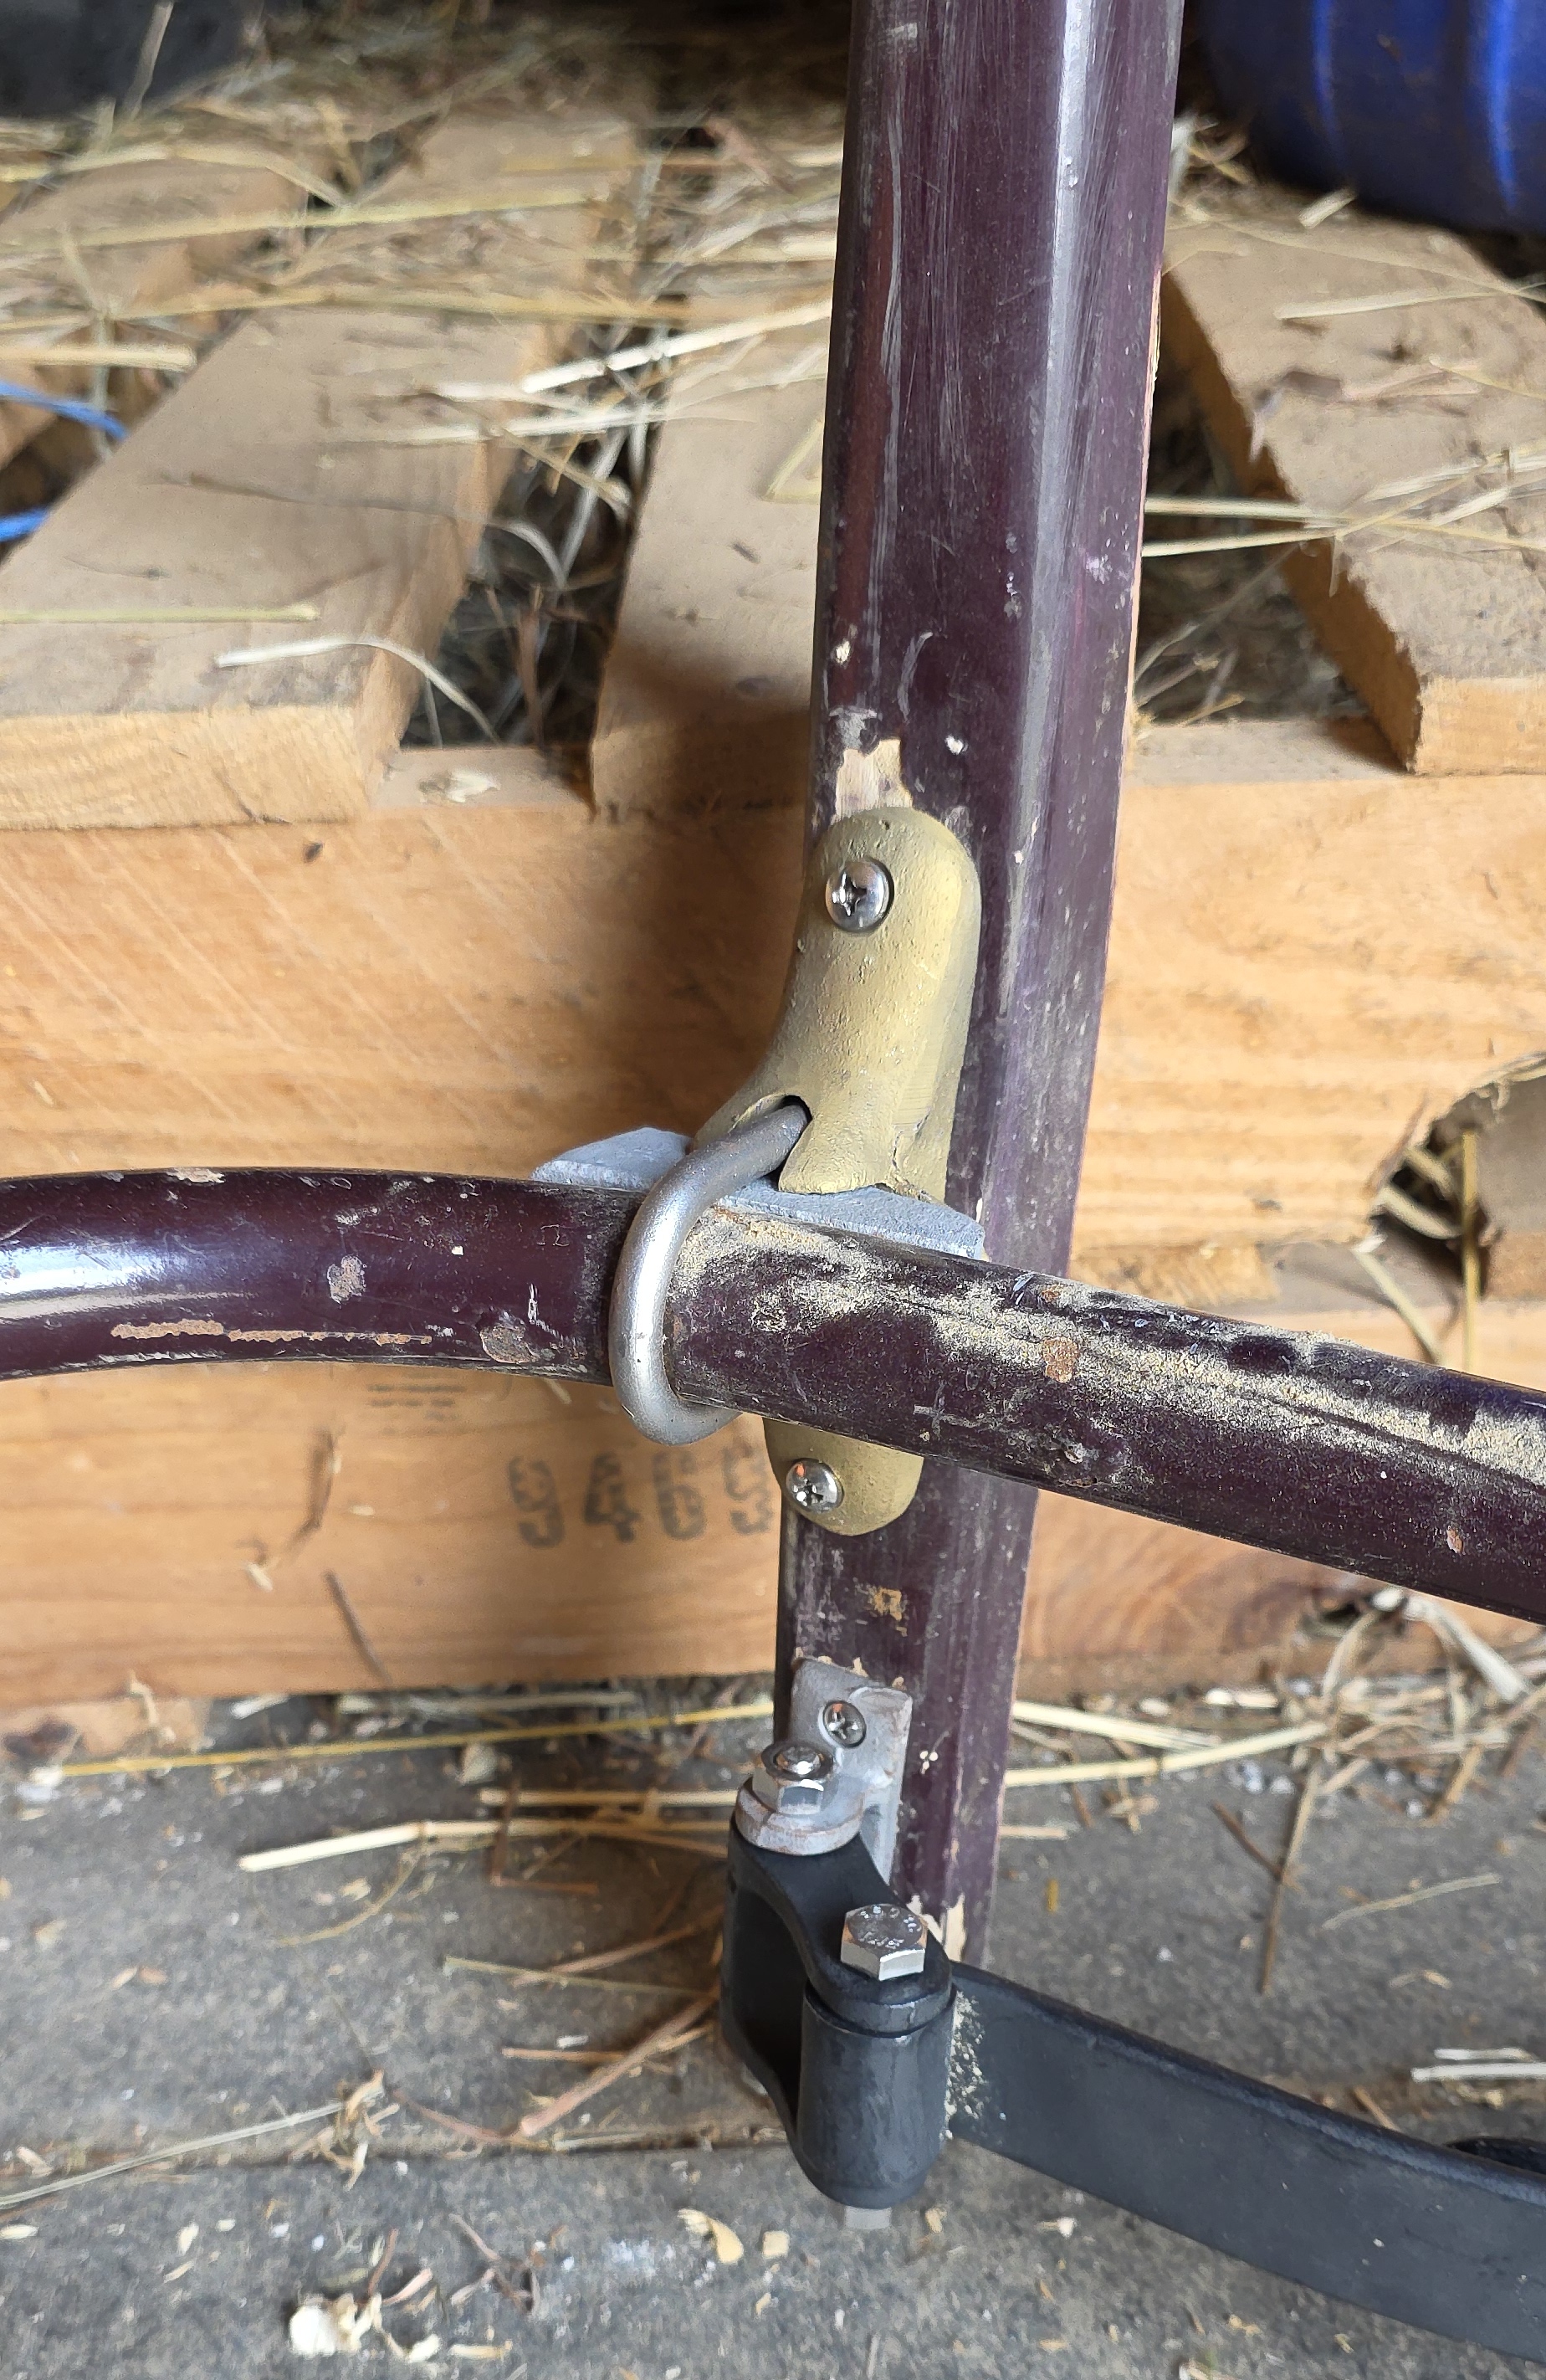
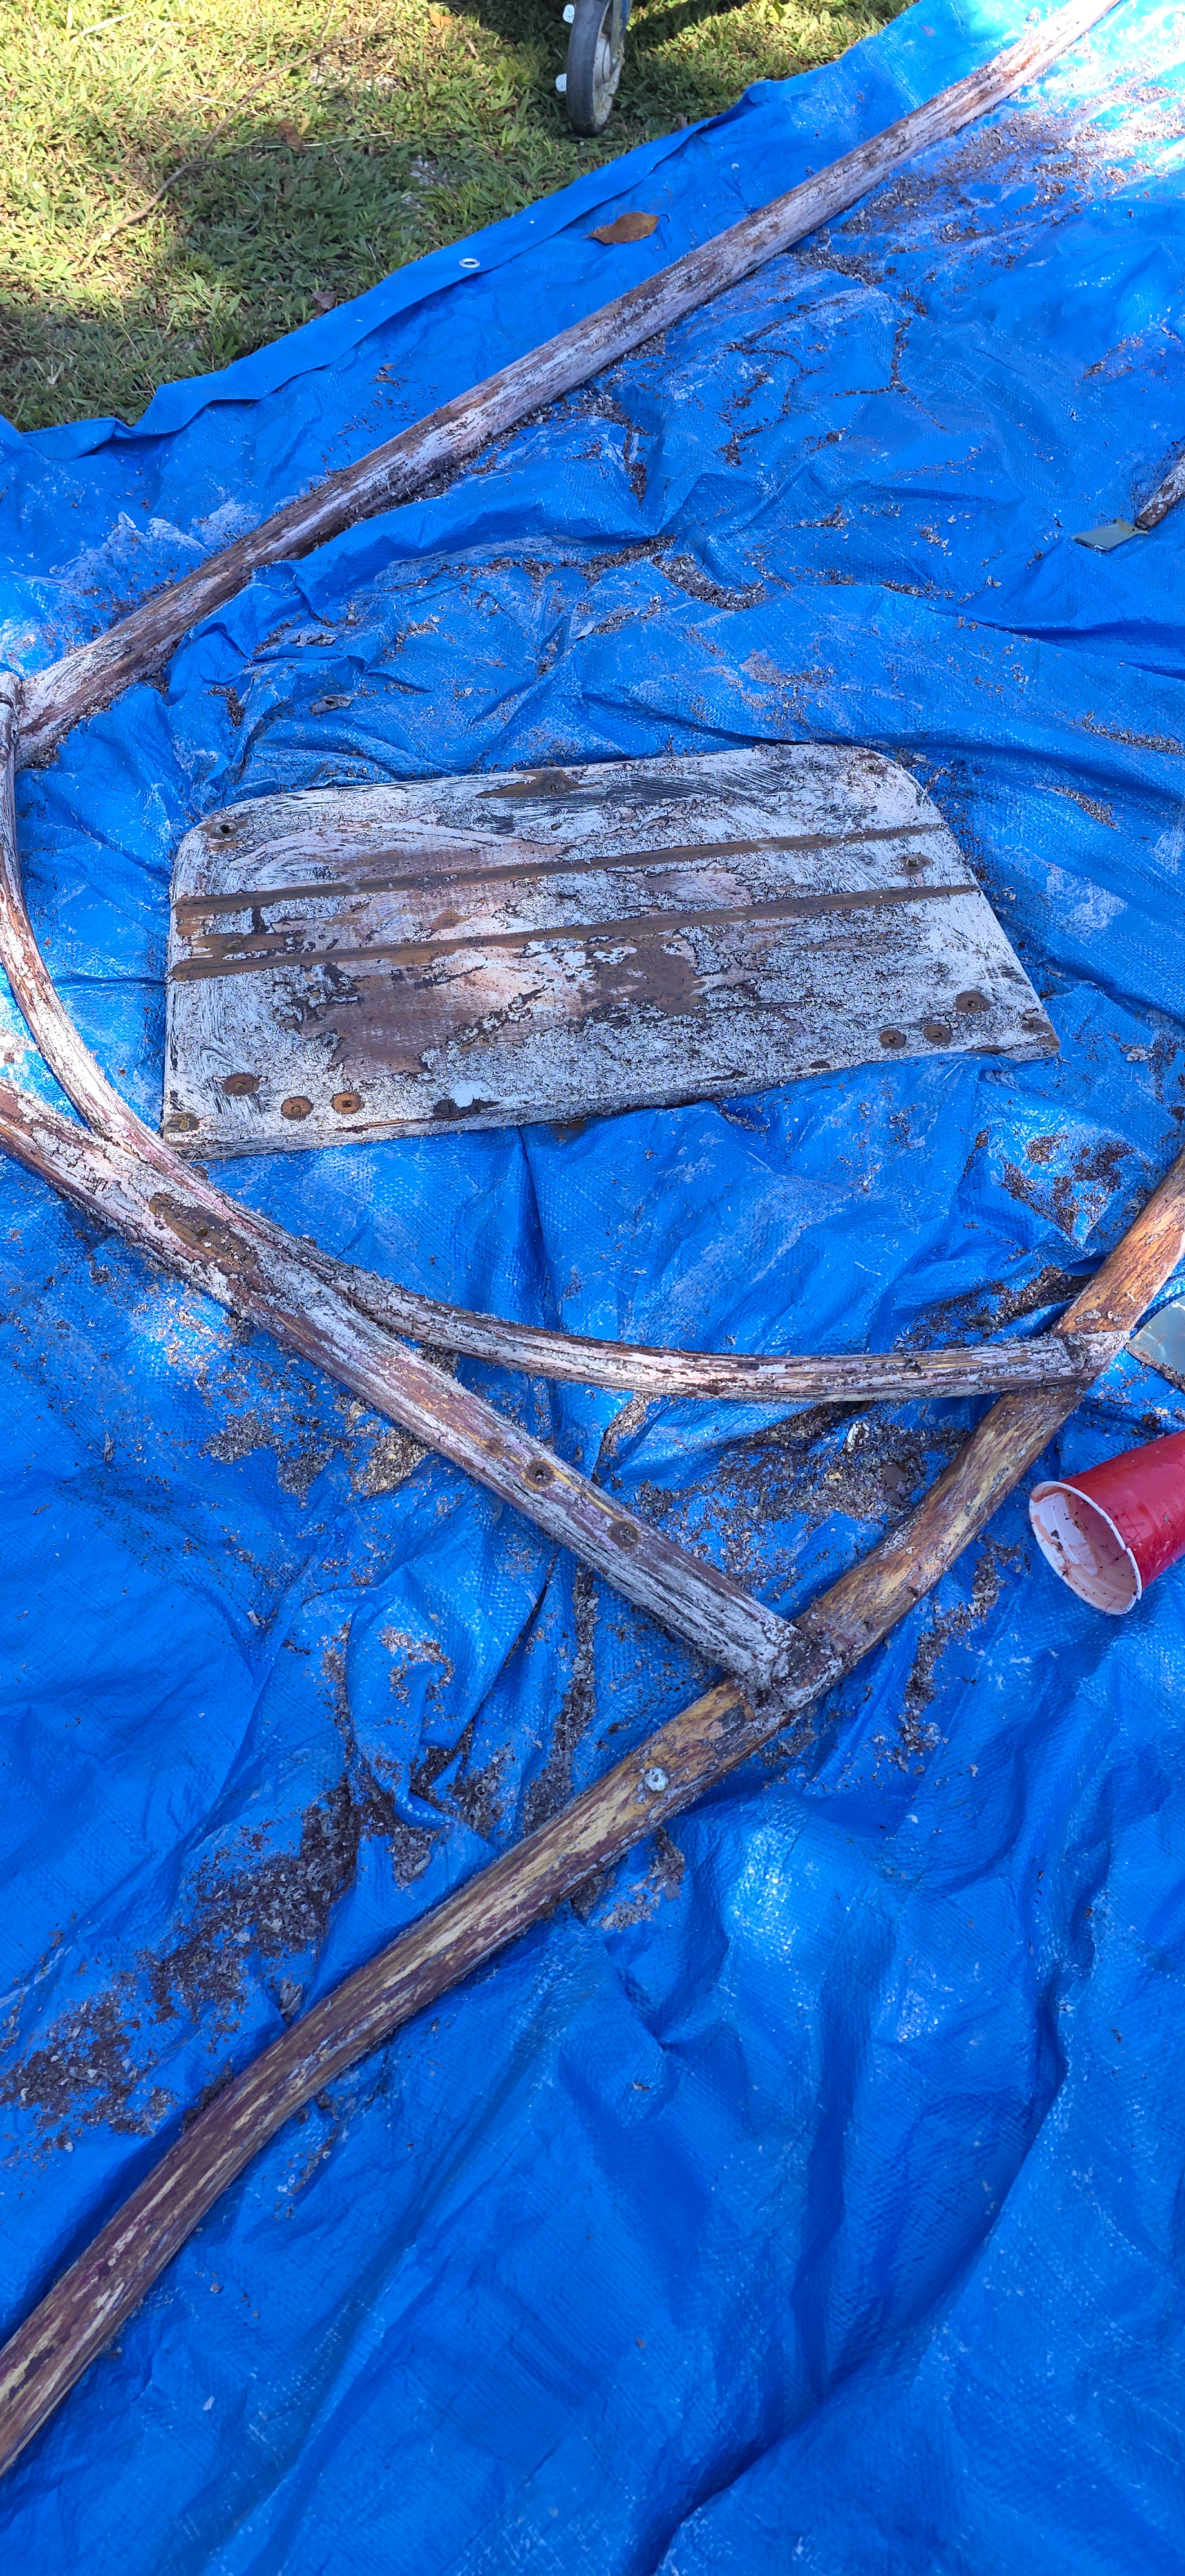
First things first, gather up all the pieces and see if I remember how they go back together. This was fun (NOT). Note to self, if you take something apart it’s probably smart to take photos of every detail before the disassembly. GOOD photos, clear and appropriately exposed ones not crappy, blurry, dark ones that I had printed on pieces of paper stuffed in with a box of parts and left to fade and die for over a decade. Somewhere, there may be digital copies, but not in any of my archives. With only those crappy paper photos and my memory to serve me, I managed to get far enough where I felt like I had all the pieces to make it into a cart again. (Spoiler Alert: I did NOT, in fact, have all the pieces needed…)
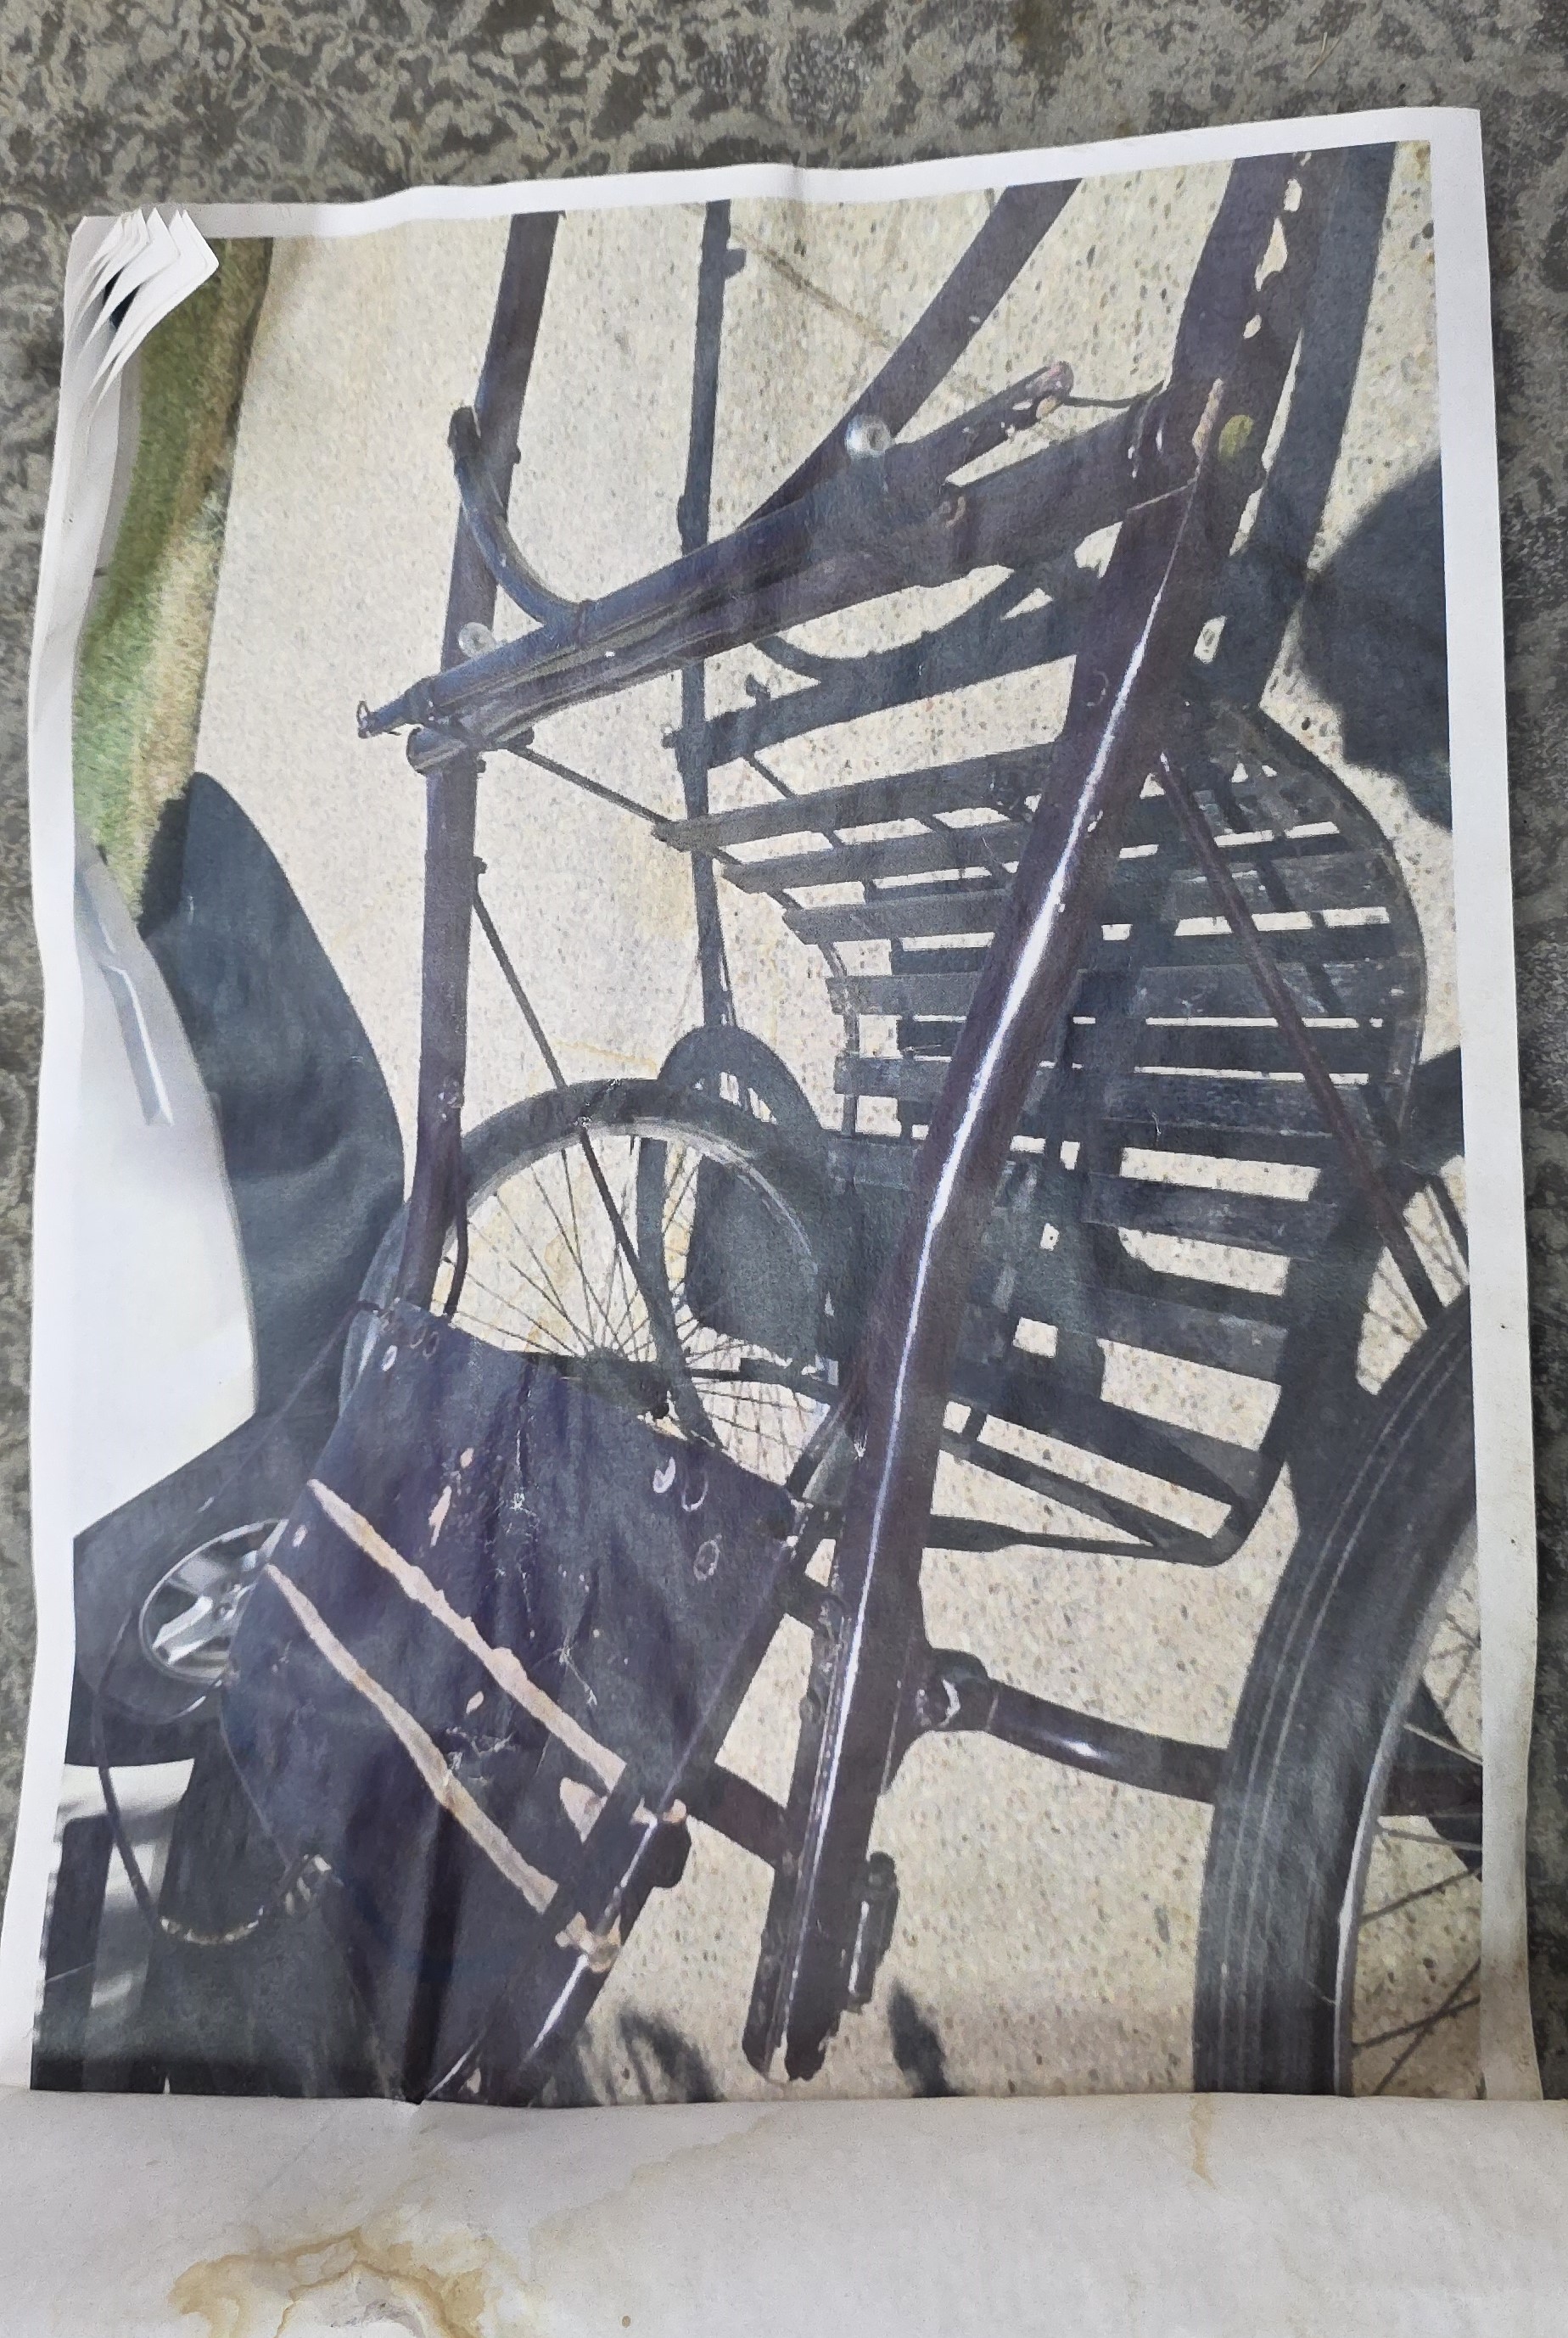
Check out this crappy paper packet and have a laugh at 2013 for this being the only option available back then. Sad, sad faded printouts. Lord have mercy, technology has come a long way since then.
Here’s as far as I got before I decided to pull it apart again.
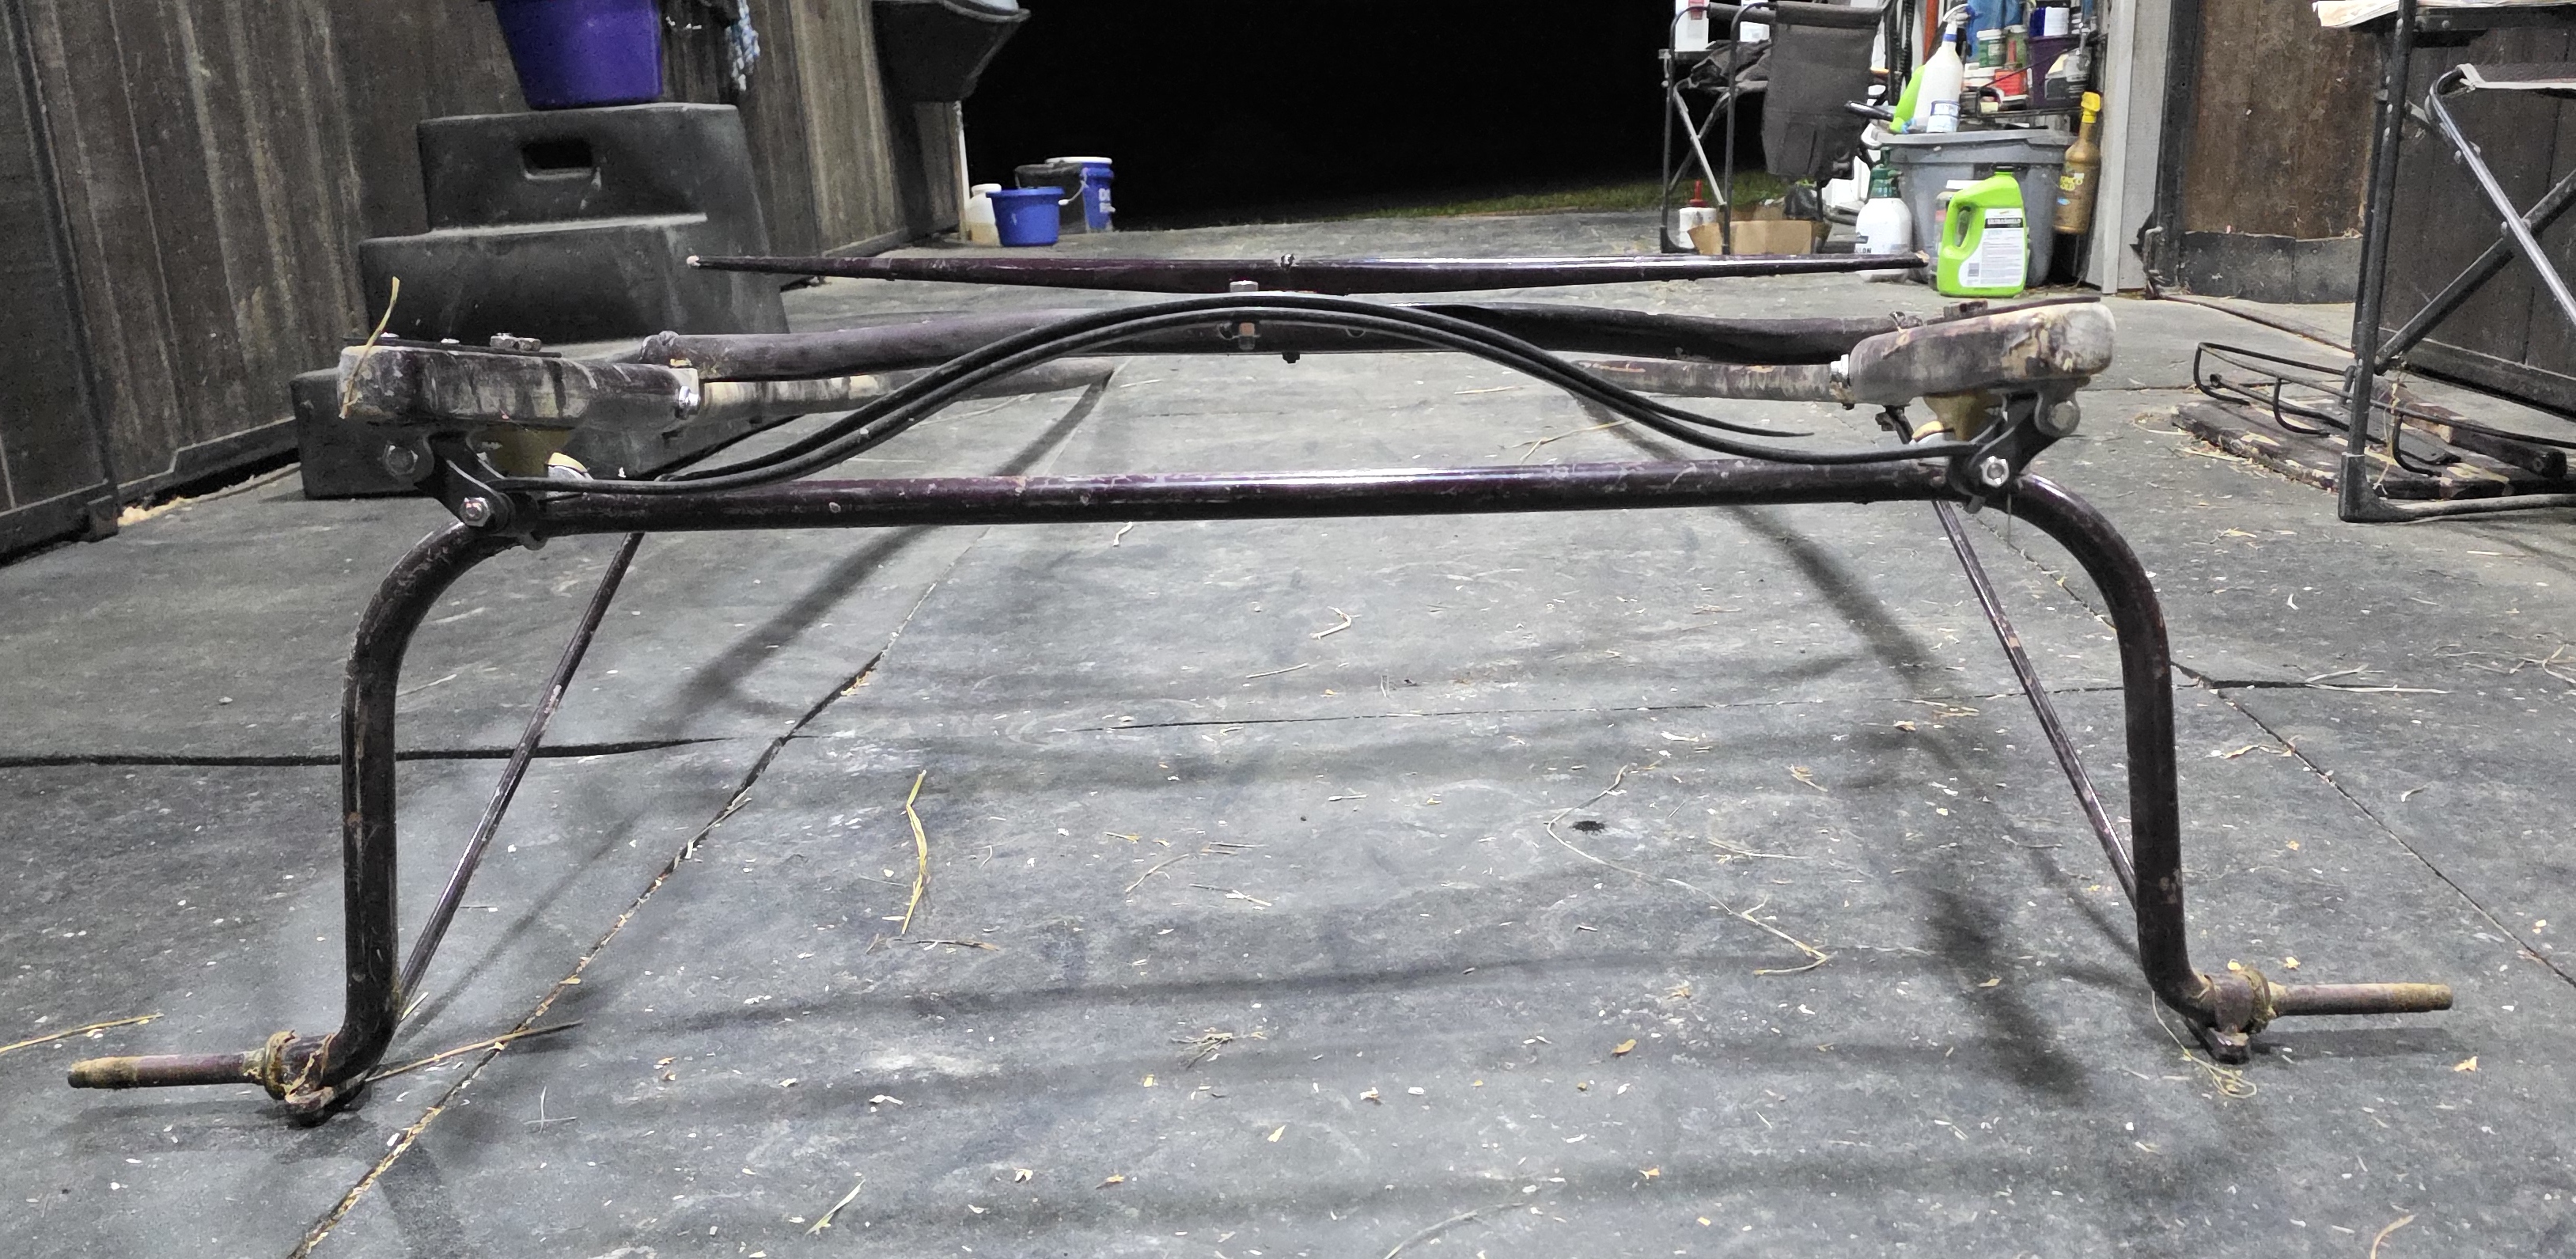
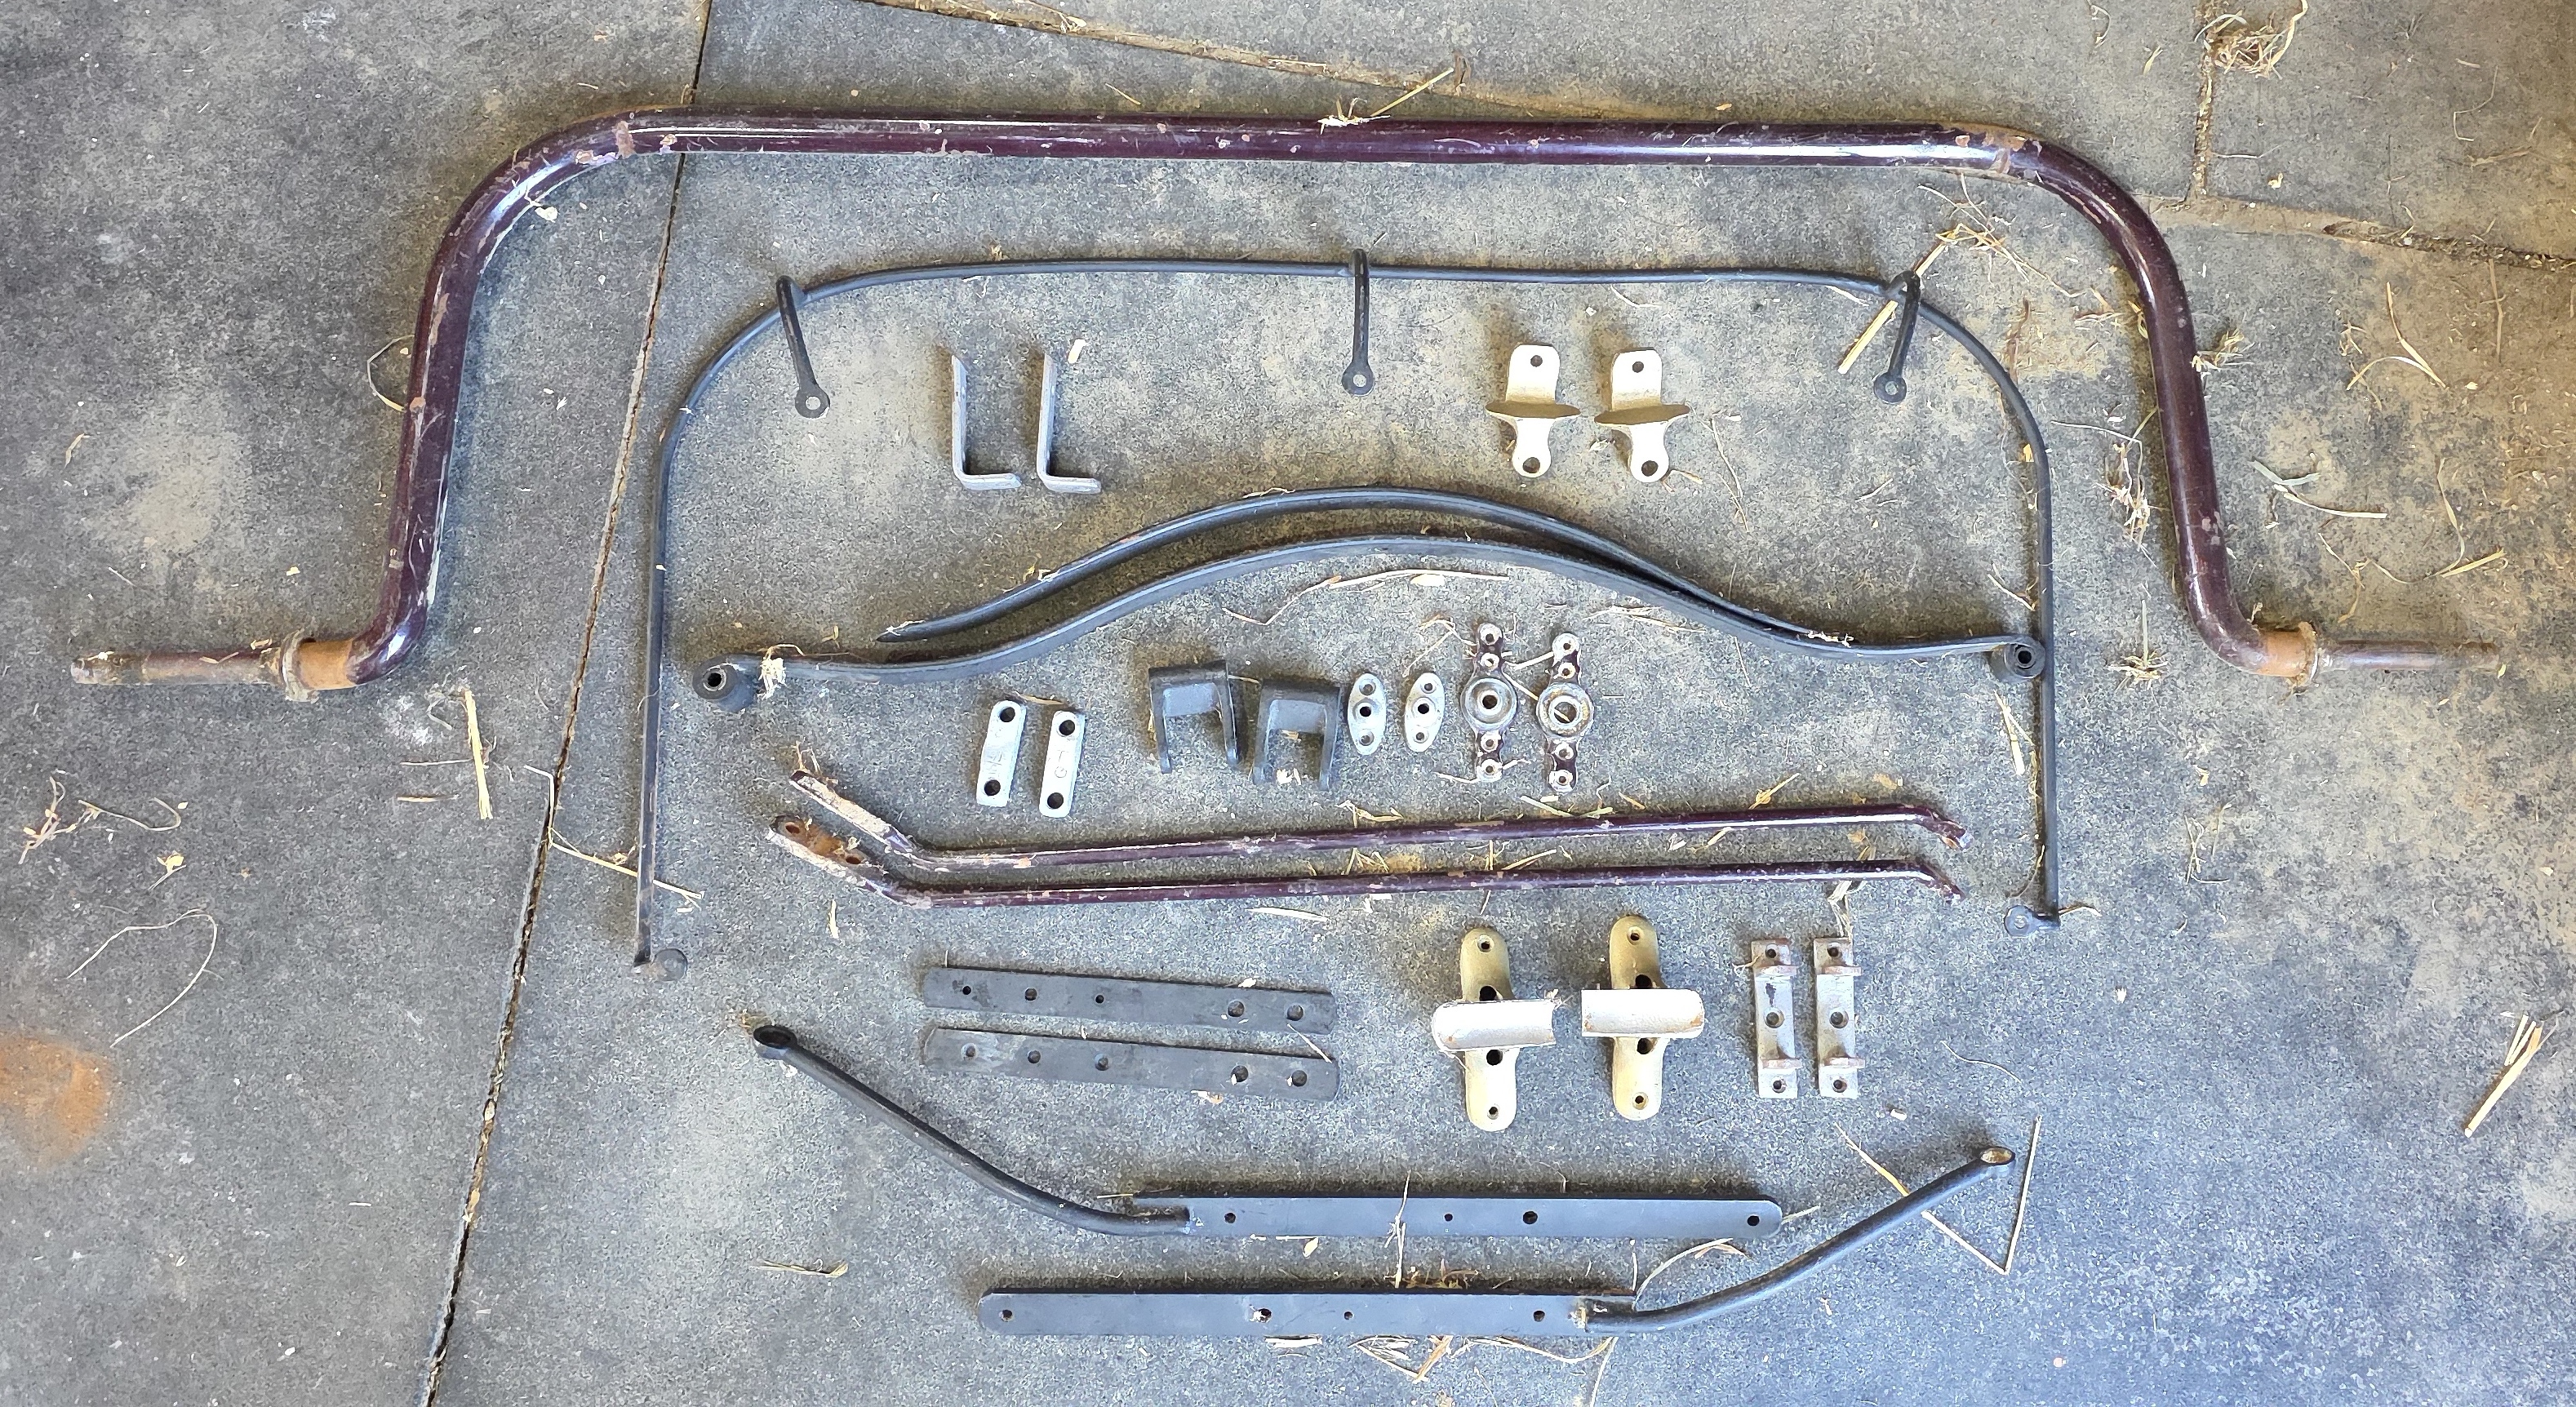
I opted to have all of the metal powdercoated for durability as opposed to trying to paint it myself. These are most of the items before being powdercoated.
To strip the paint, I used Citristrip. Just paint on with a paintbrush and wait a while (far left photo), then scrape with a scraper, repeat if needed. I had to repeat the citristrip application a second time (middle photo) to get some of the thicker spots of paint off. This process is MESSY. Do not wear nice clothes. Wear gloves and eye protection if you’re smarter than me. Anyway, after all the paint was stripped, I cleaned it up with mineral spirits afterwards and started sanding it down to remove anything that was left (far right photo). Fair warning, this creates an enormous mess, but the good news is it is not difficult to do. I suggest doing this outside in the open as opposed to in a building. A lot of my mess was contained on the tarp, so I just folded that up and threw it away when I was finished with scraping the paint. The tarp was probably one of my better ideas during this process.
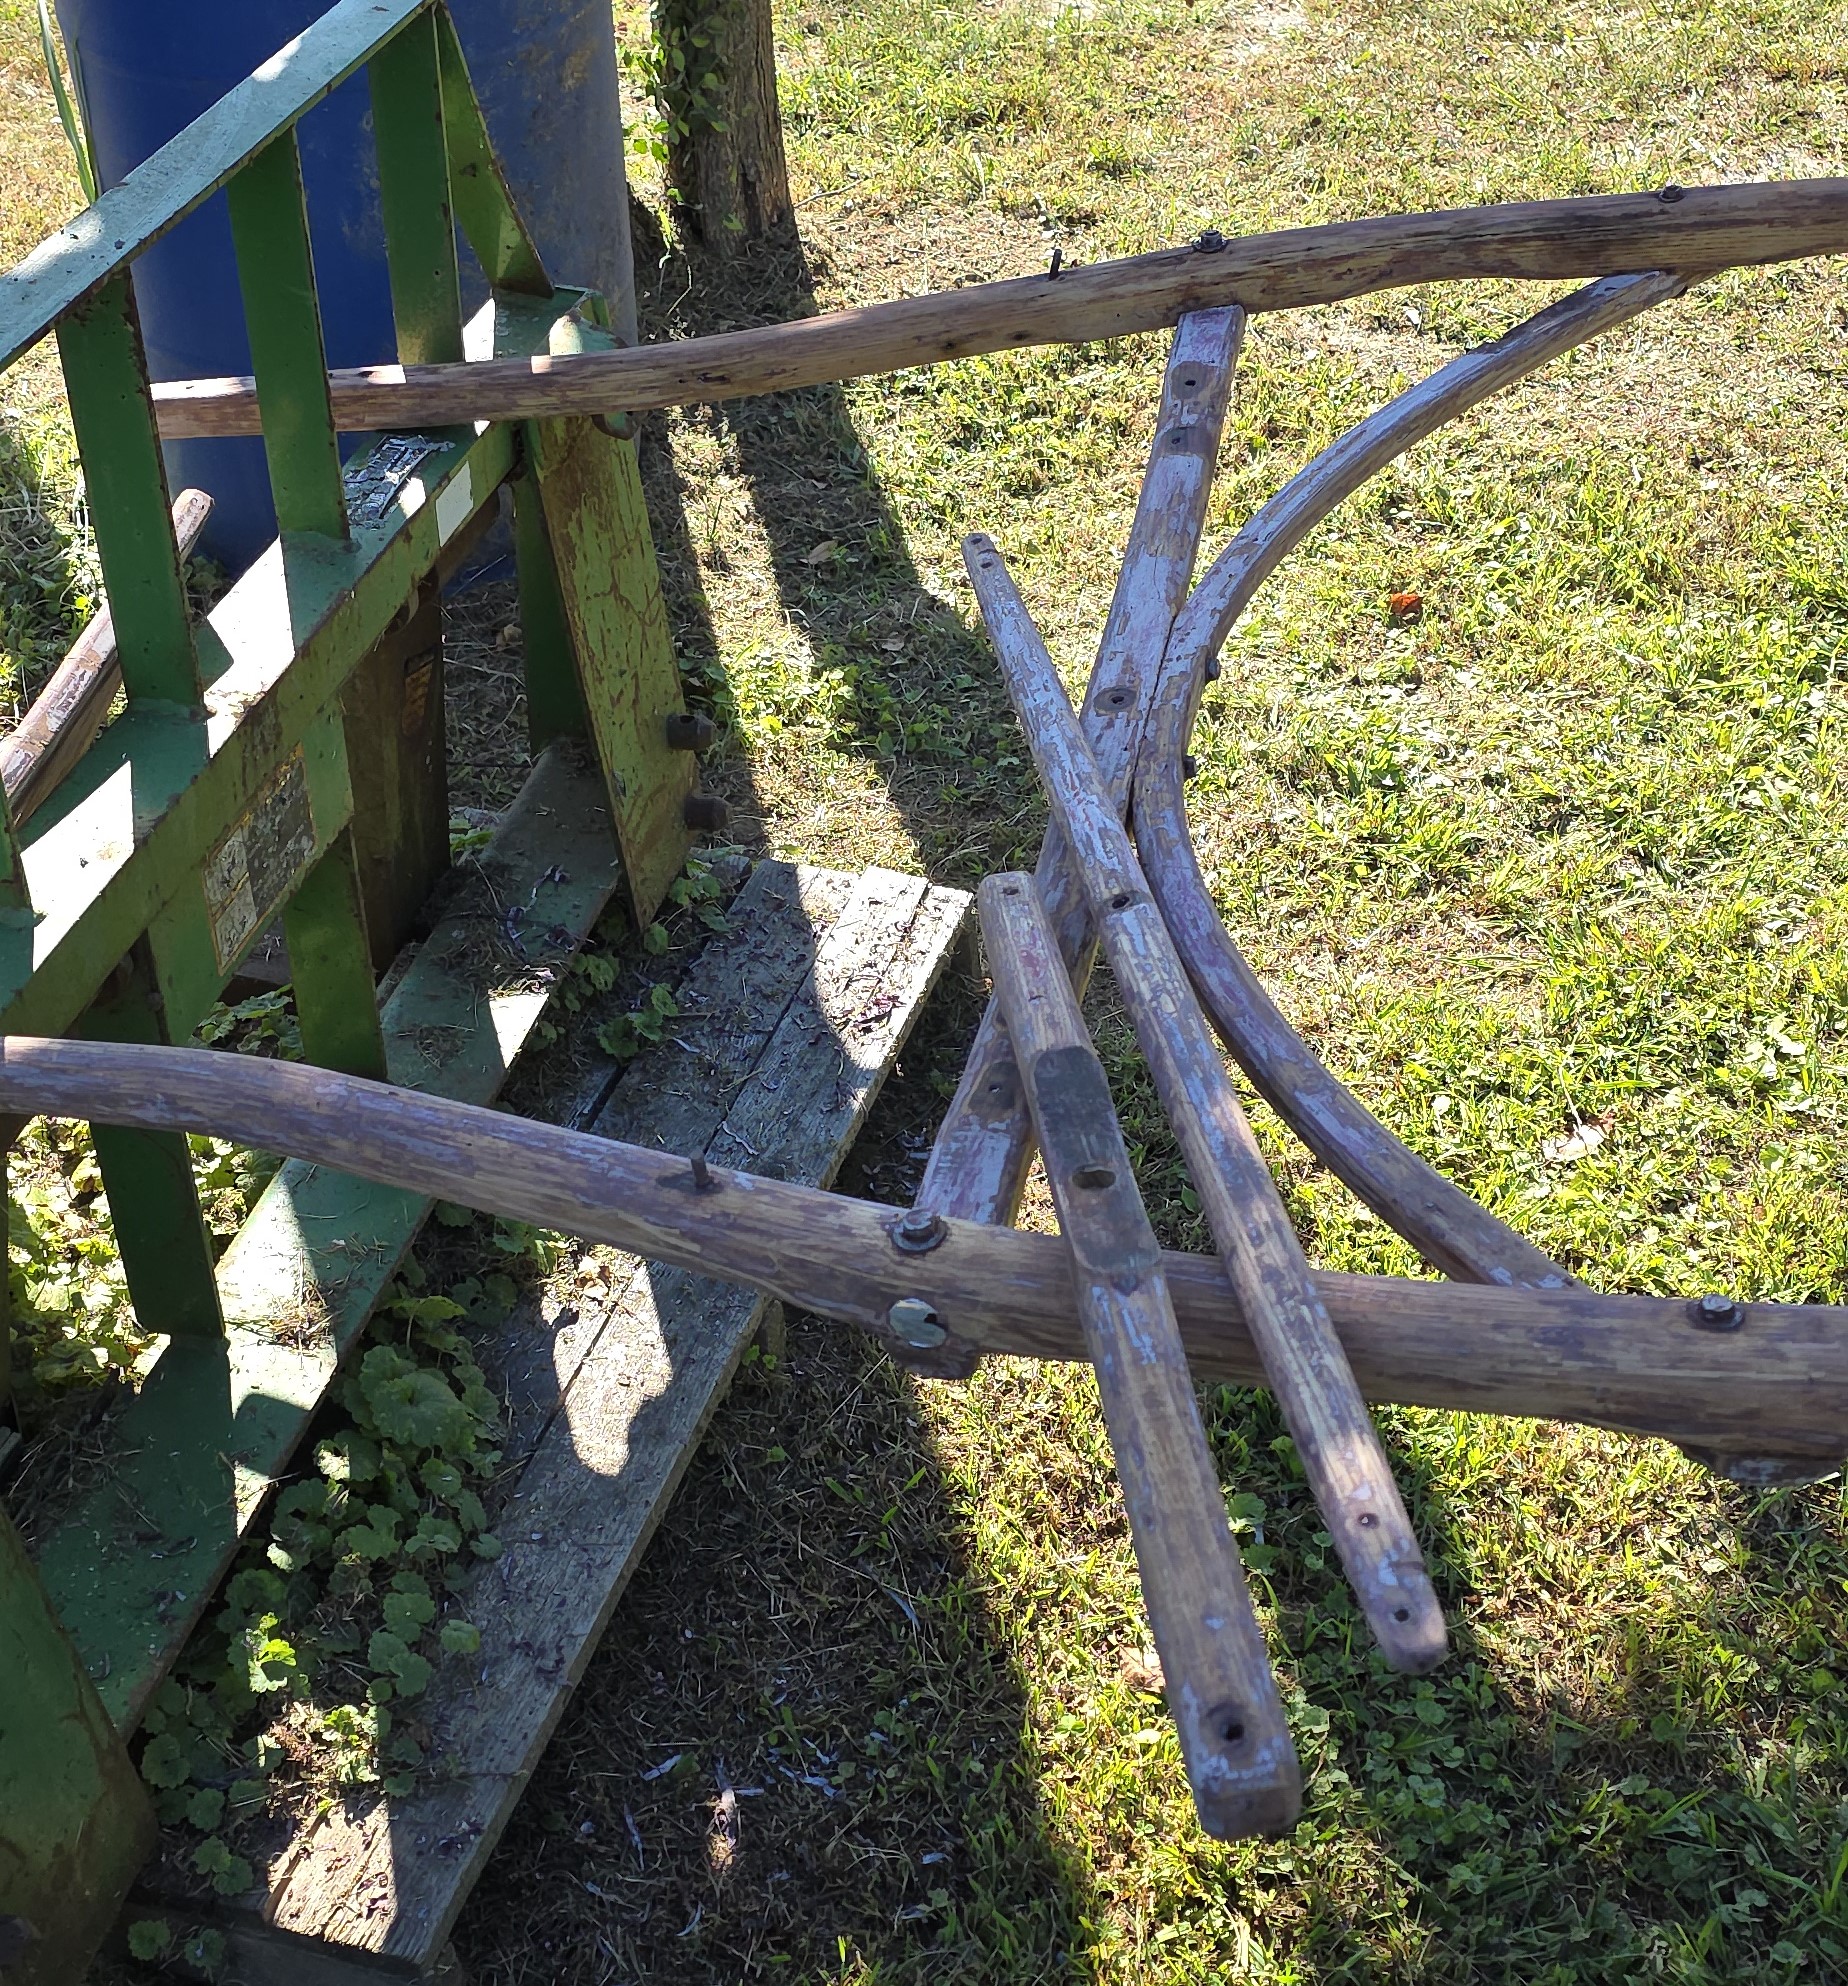
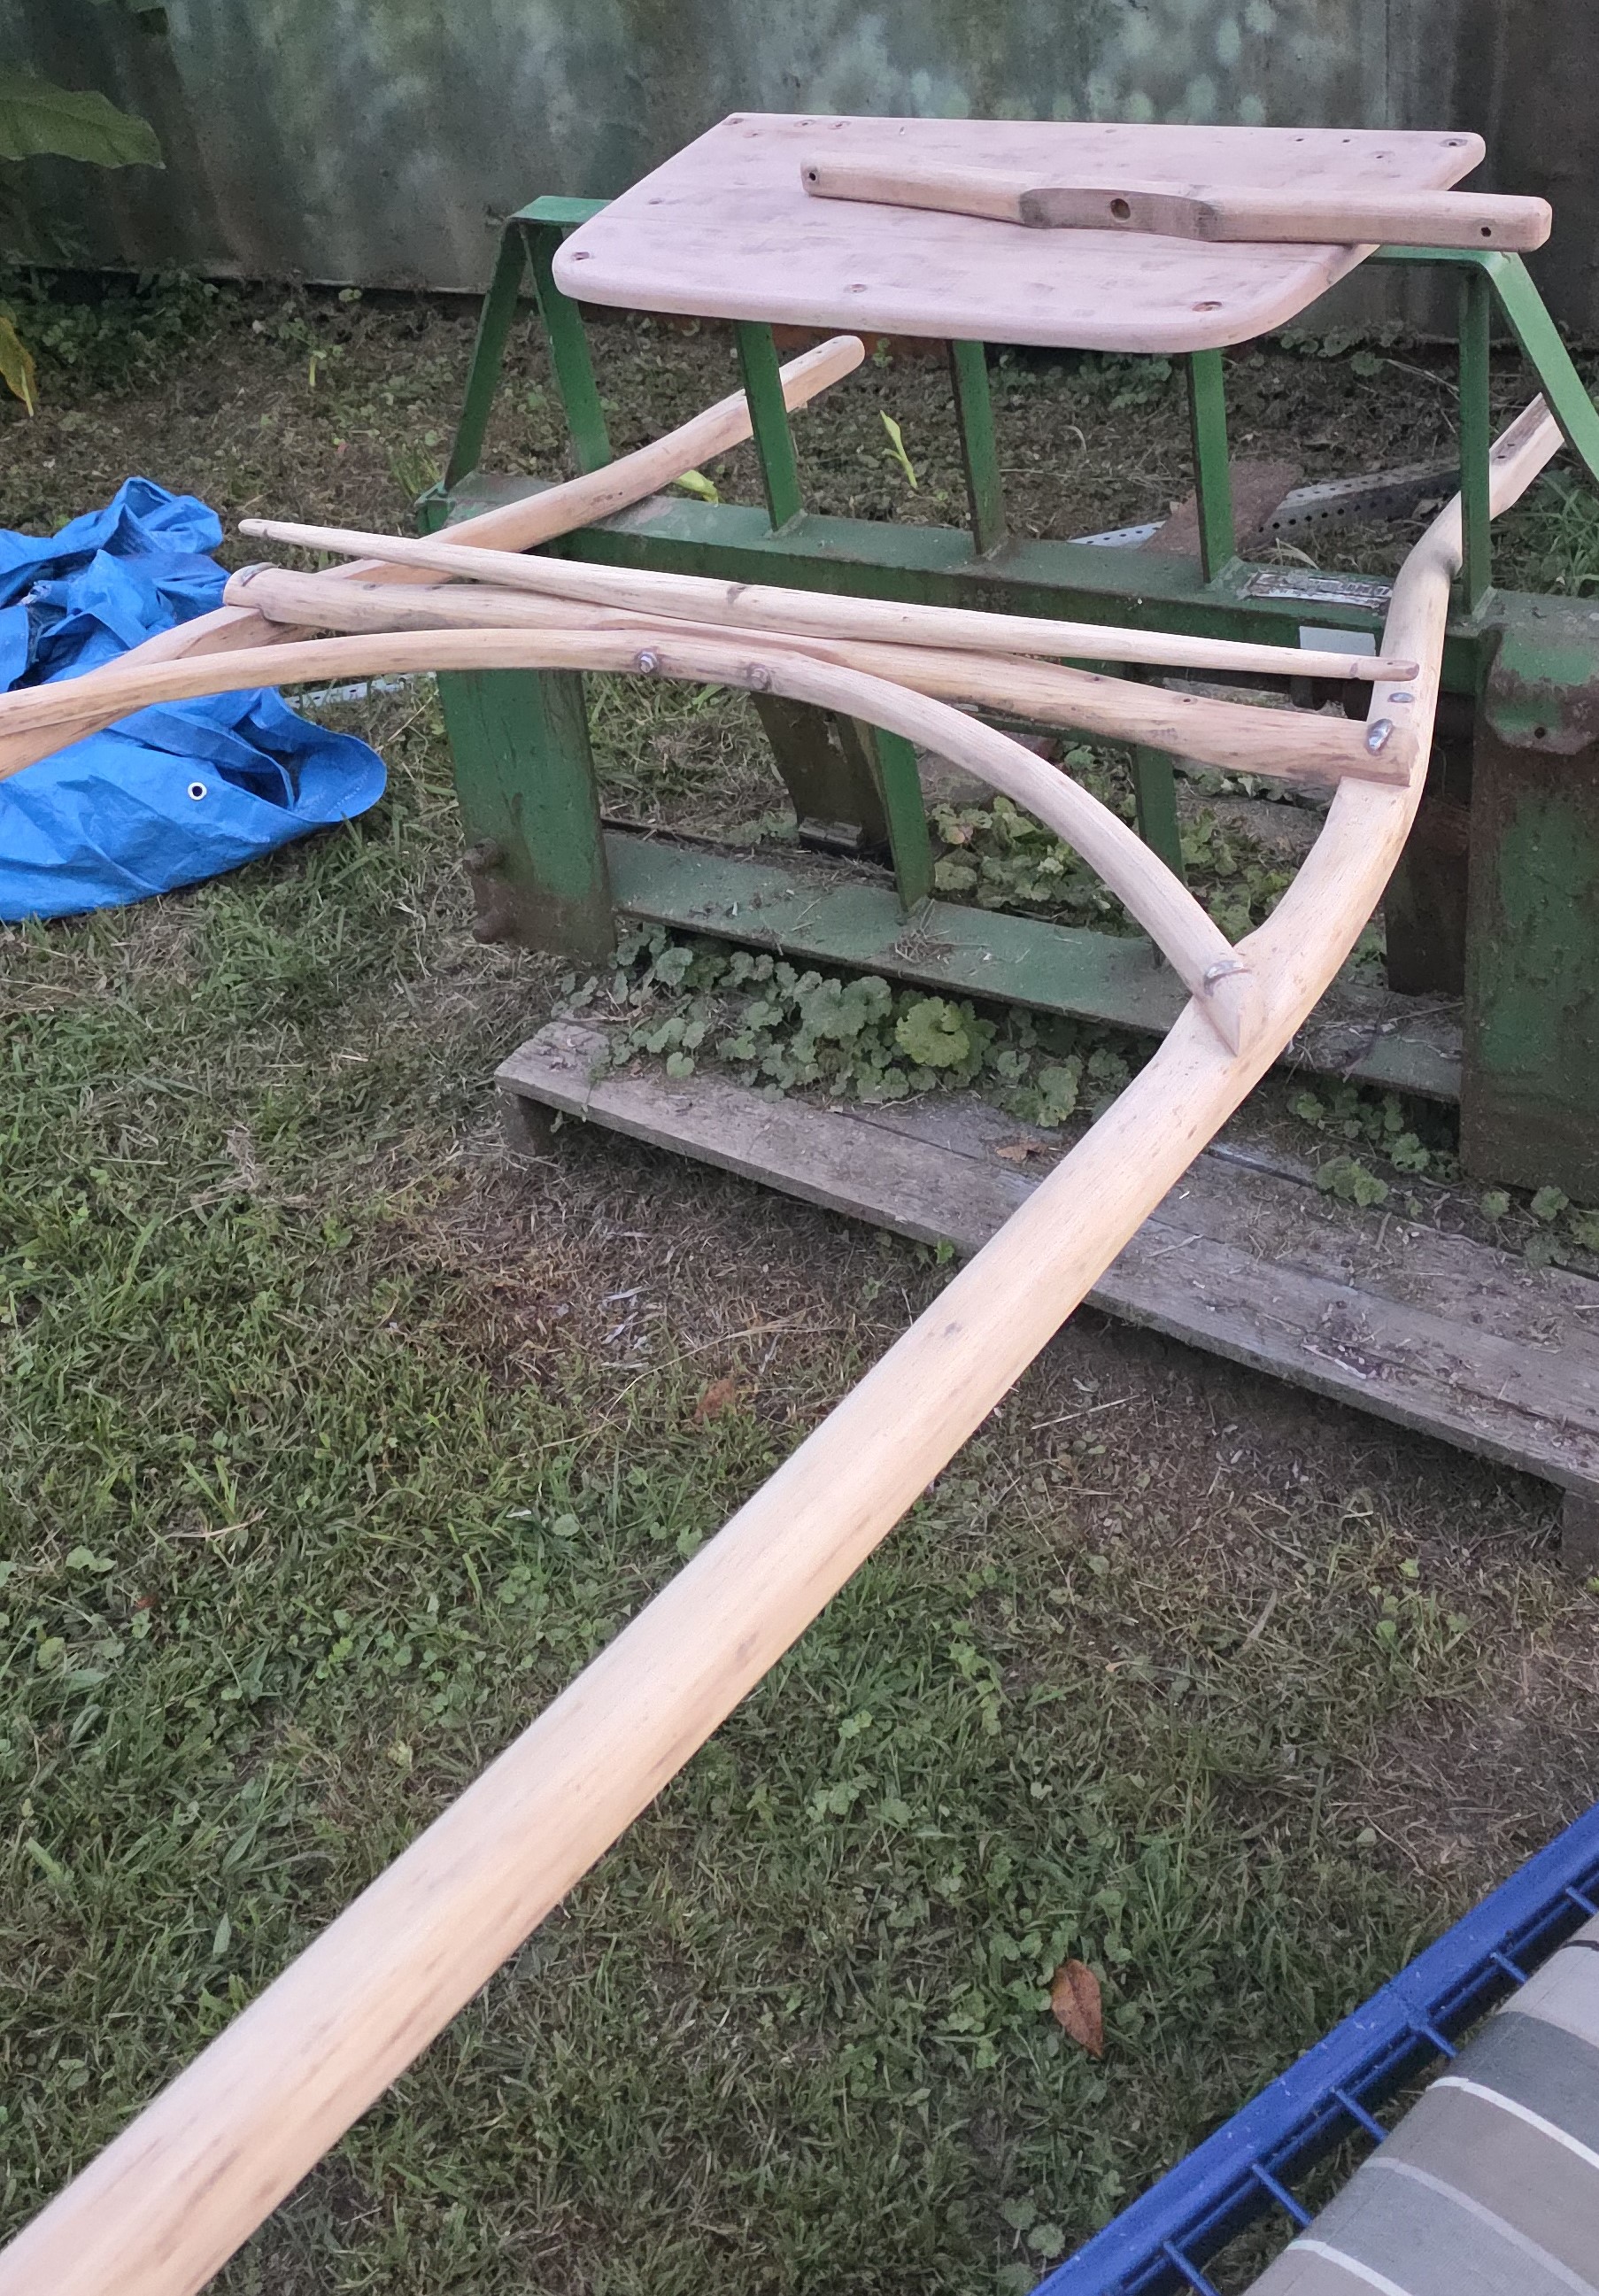
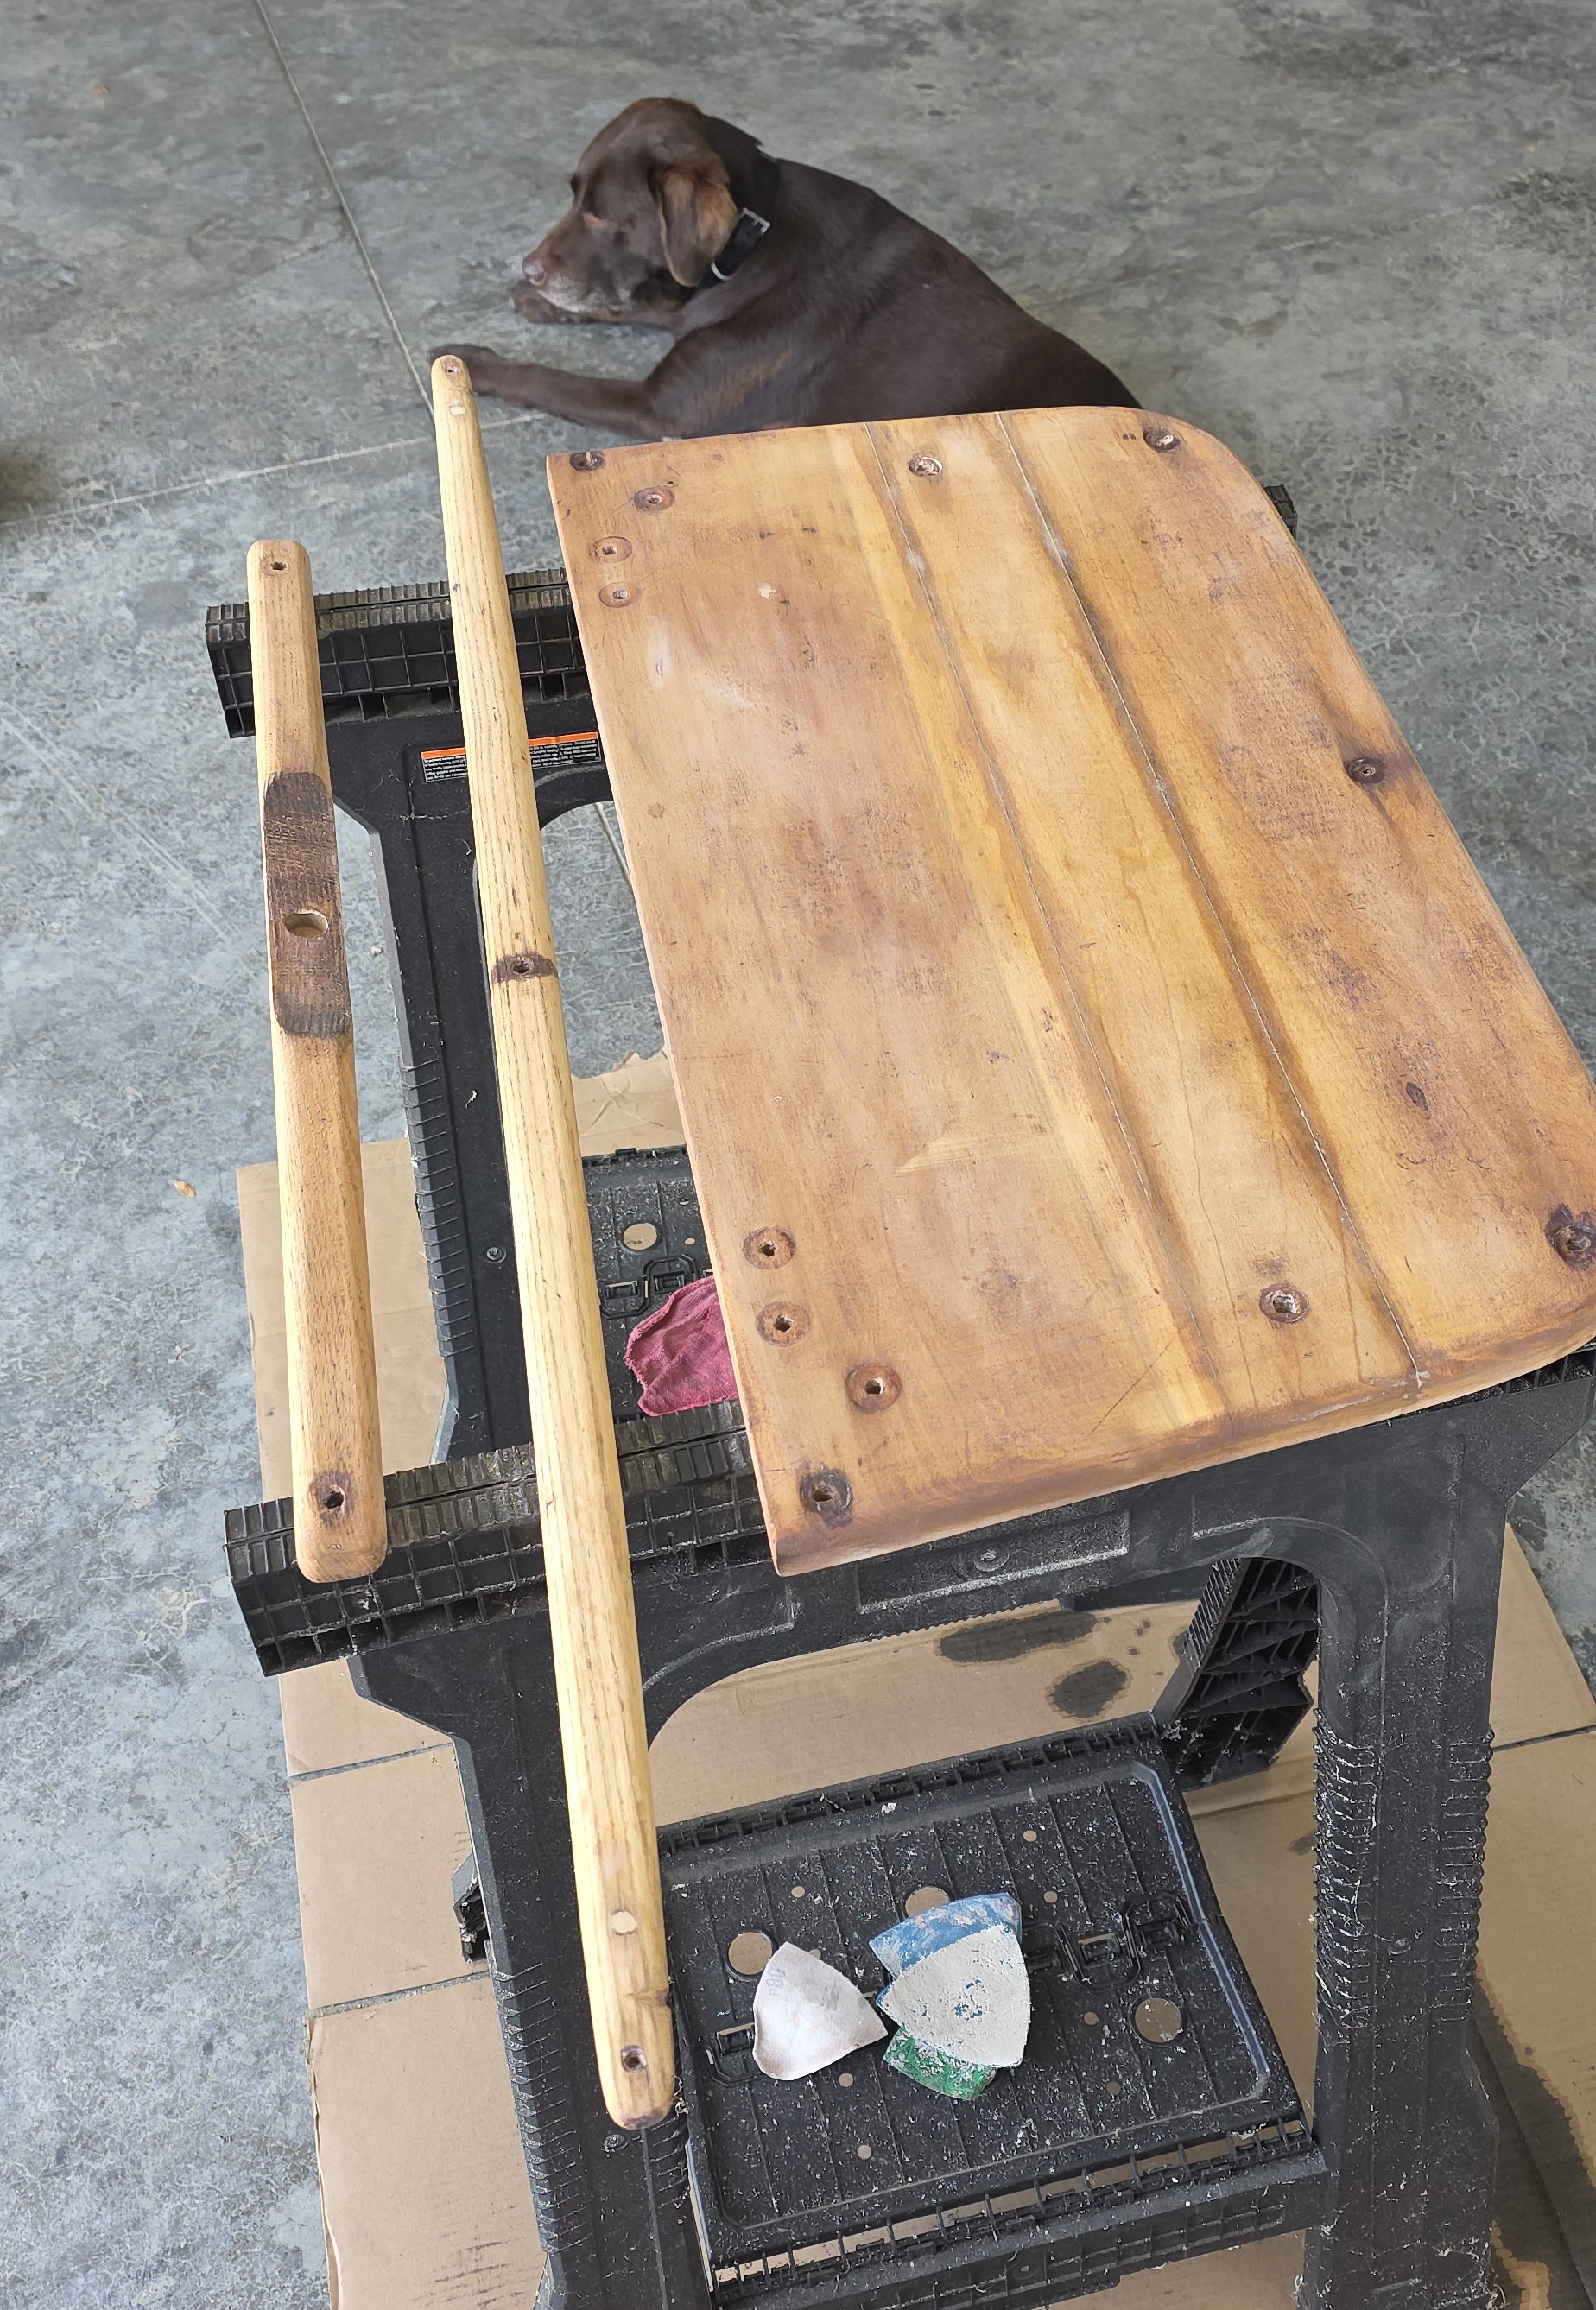
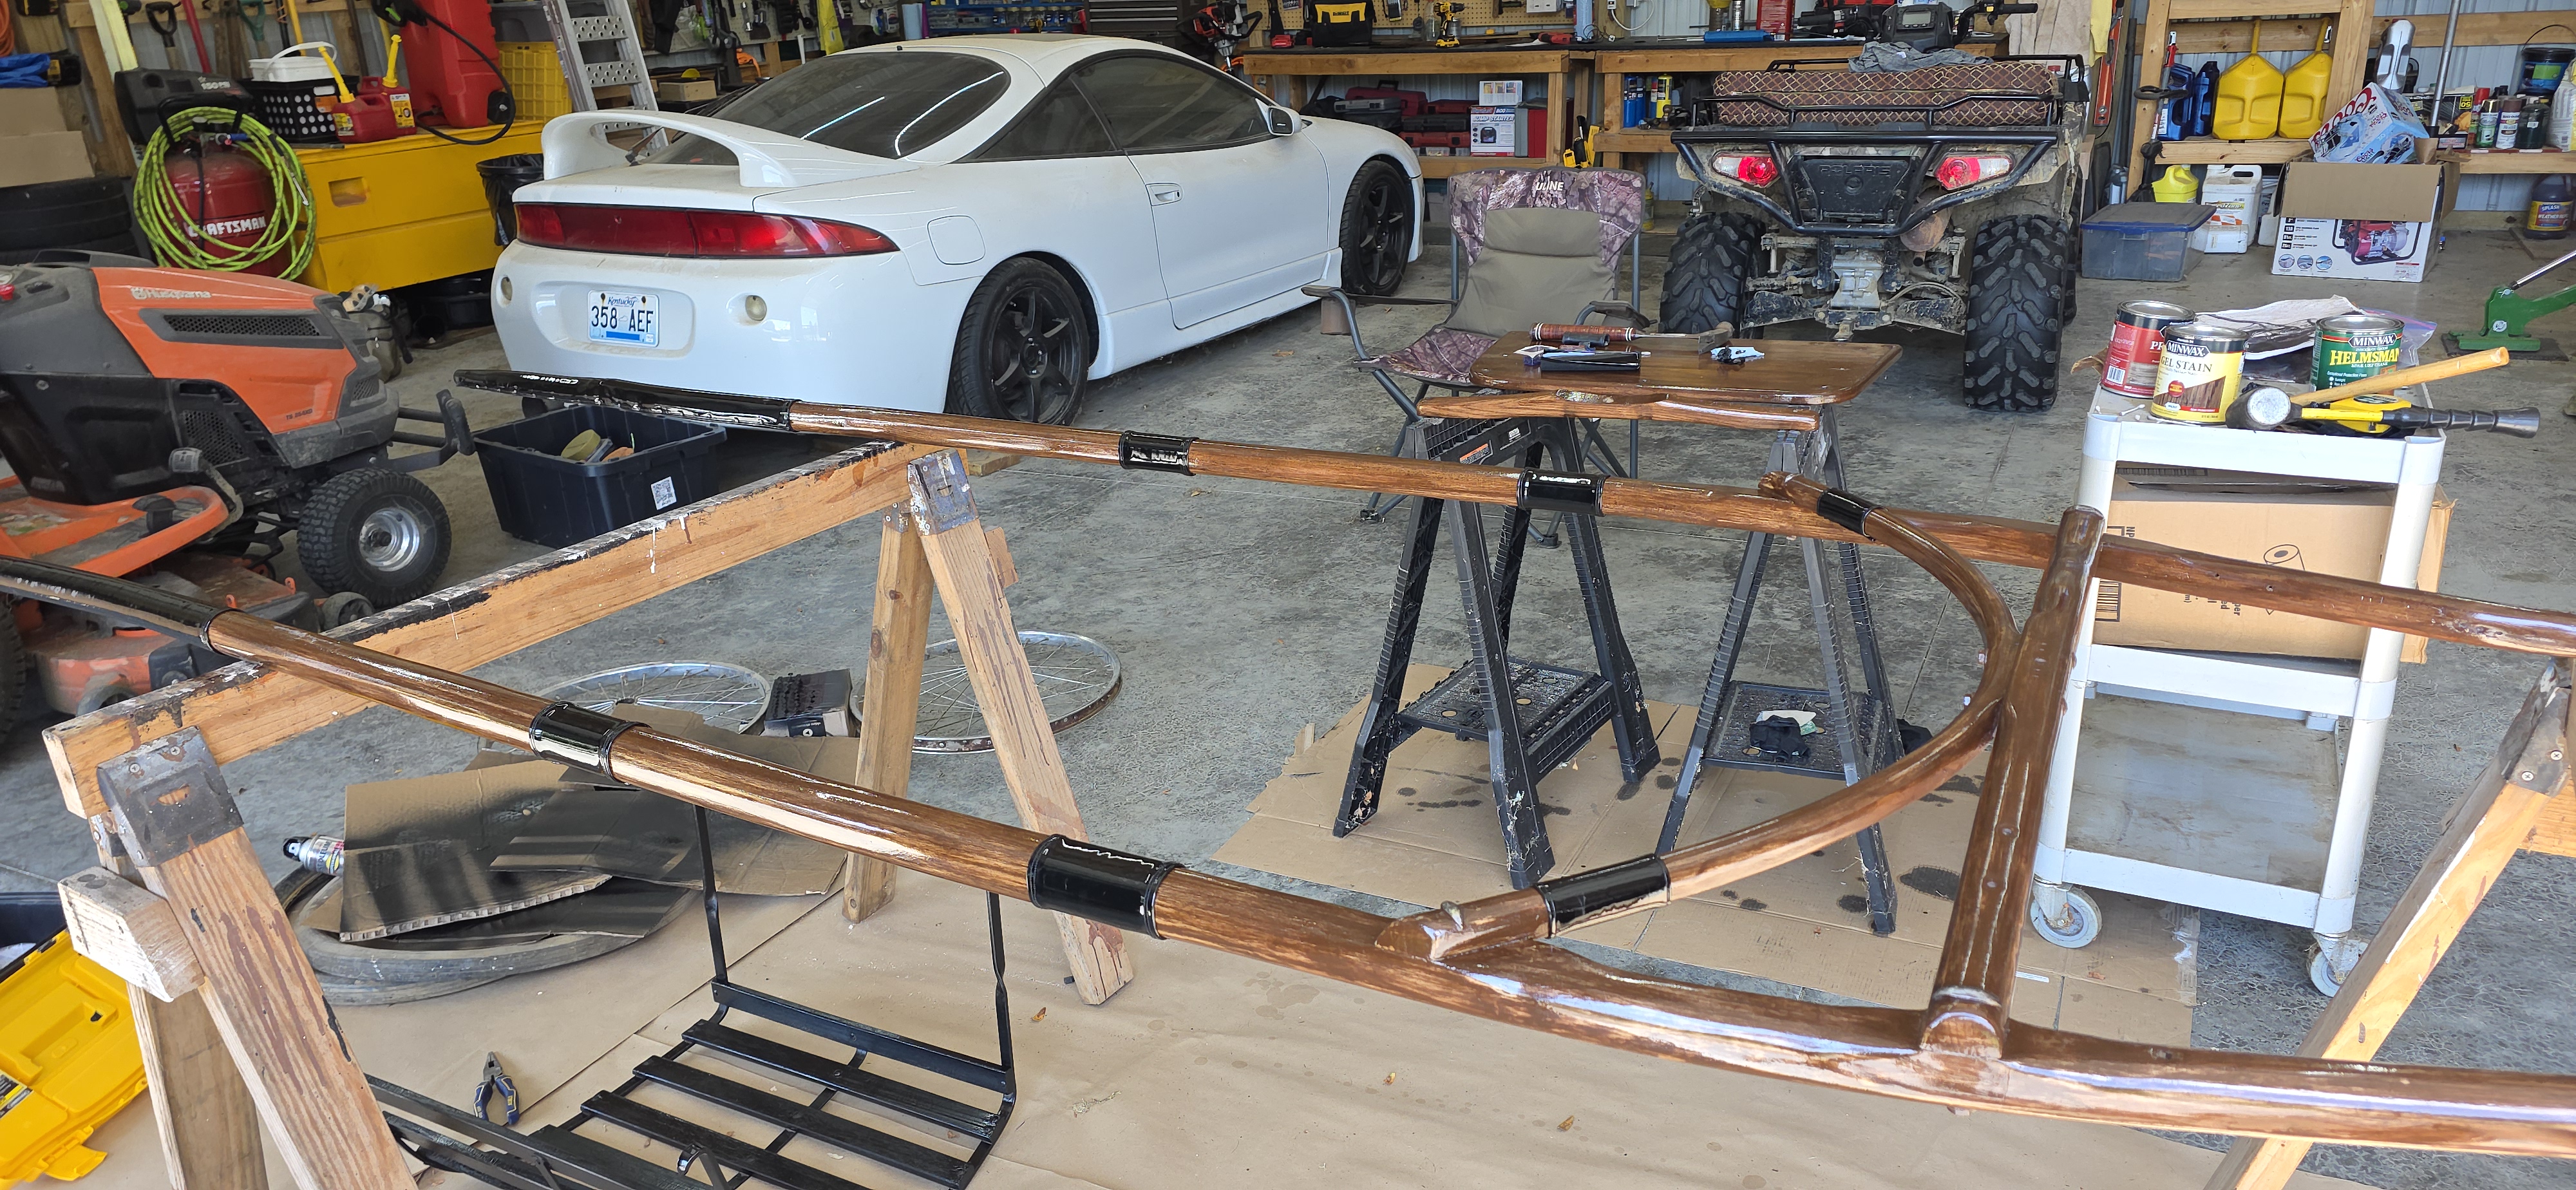
After doing some light sanding, I started doing some repairs to the wood, filling in holes where the old trim tacks were, any dents/dings/imperfections in the wood, etc. Then I sanded in detail, with a multi tool and by hand. Lots and lots of sanding until every piece was clean and smooth. Much to my surprise, after all the sanding, repairing, and cleaning up the wood is actually in really great shape.
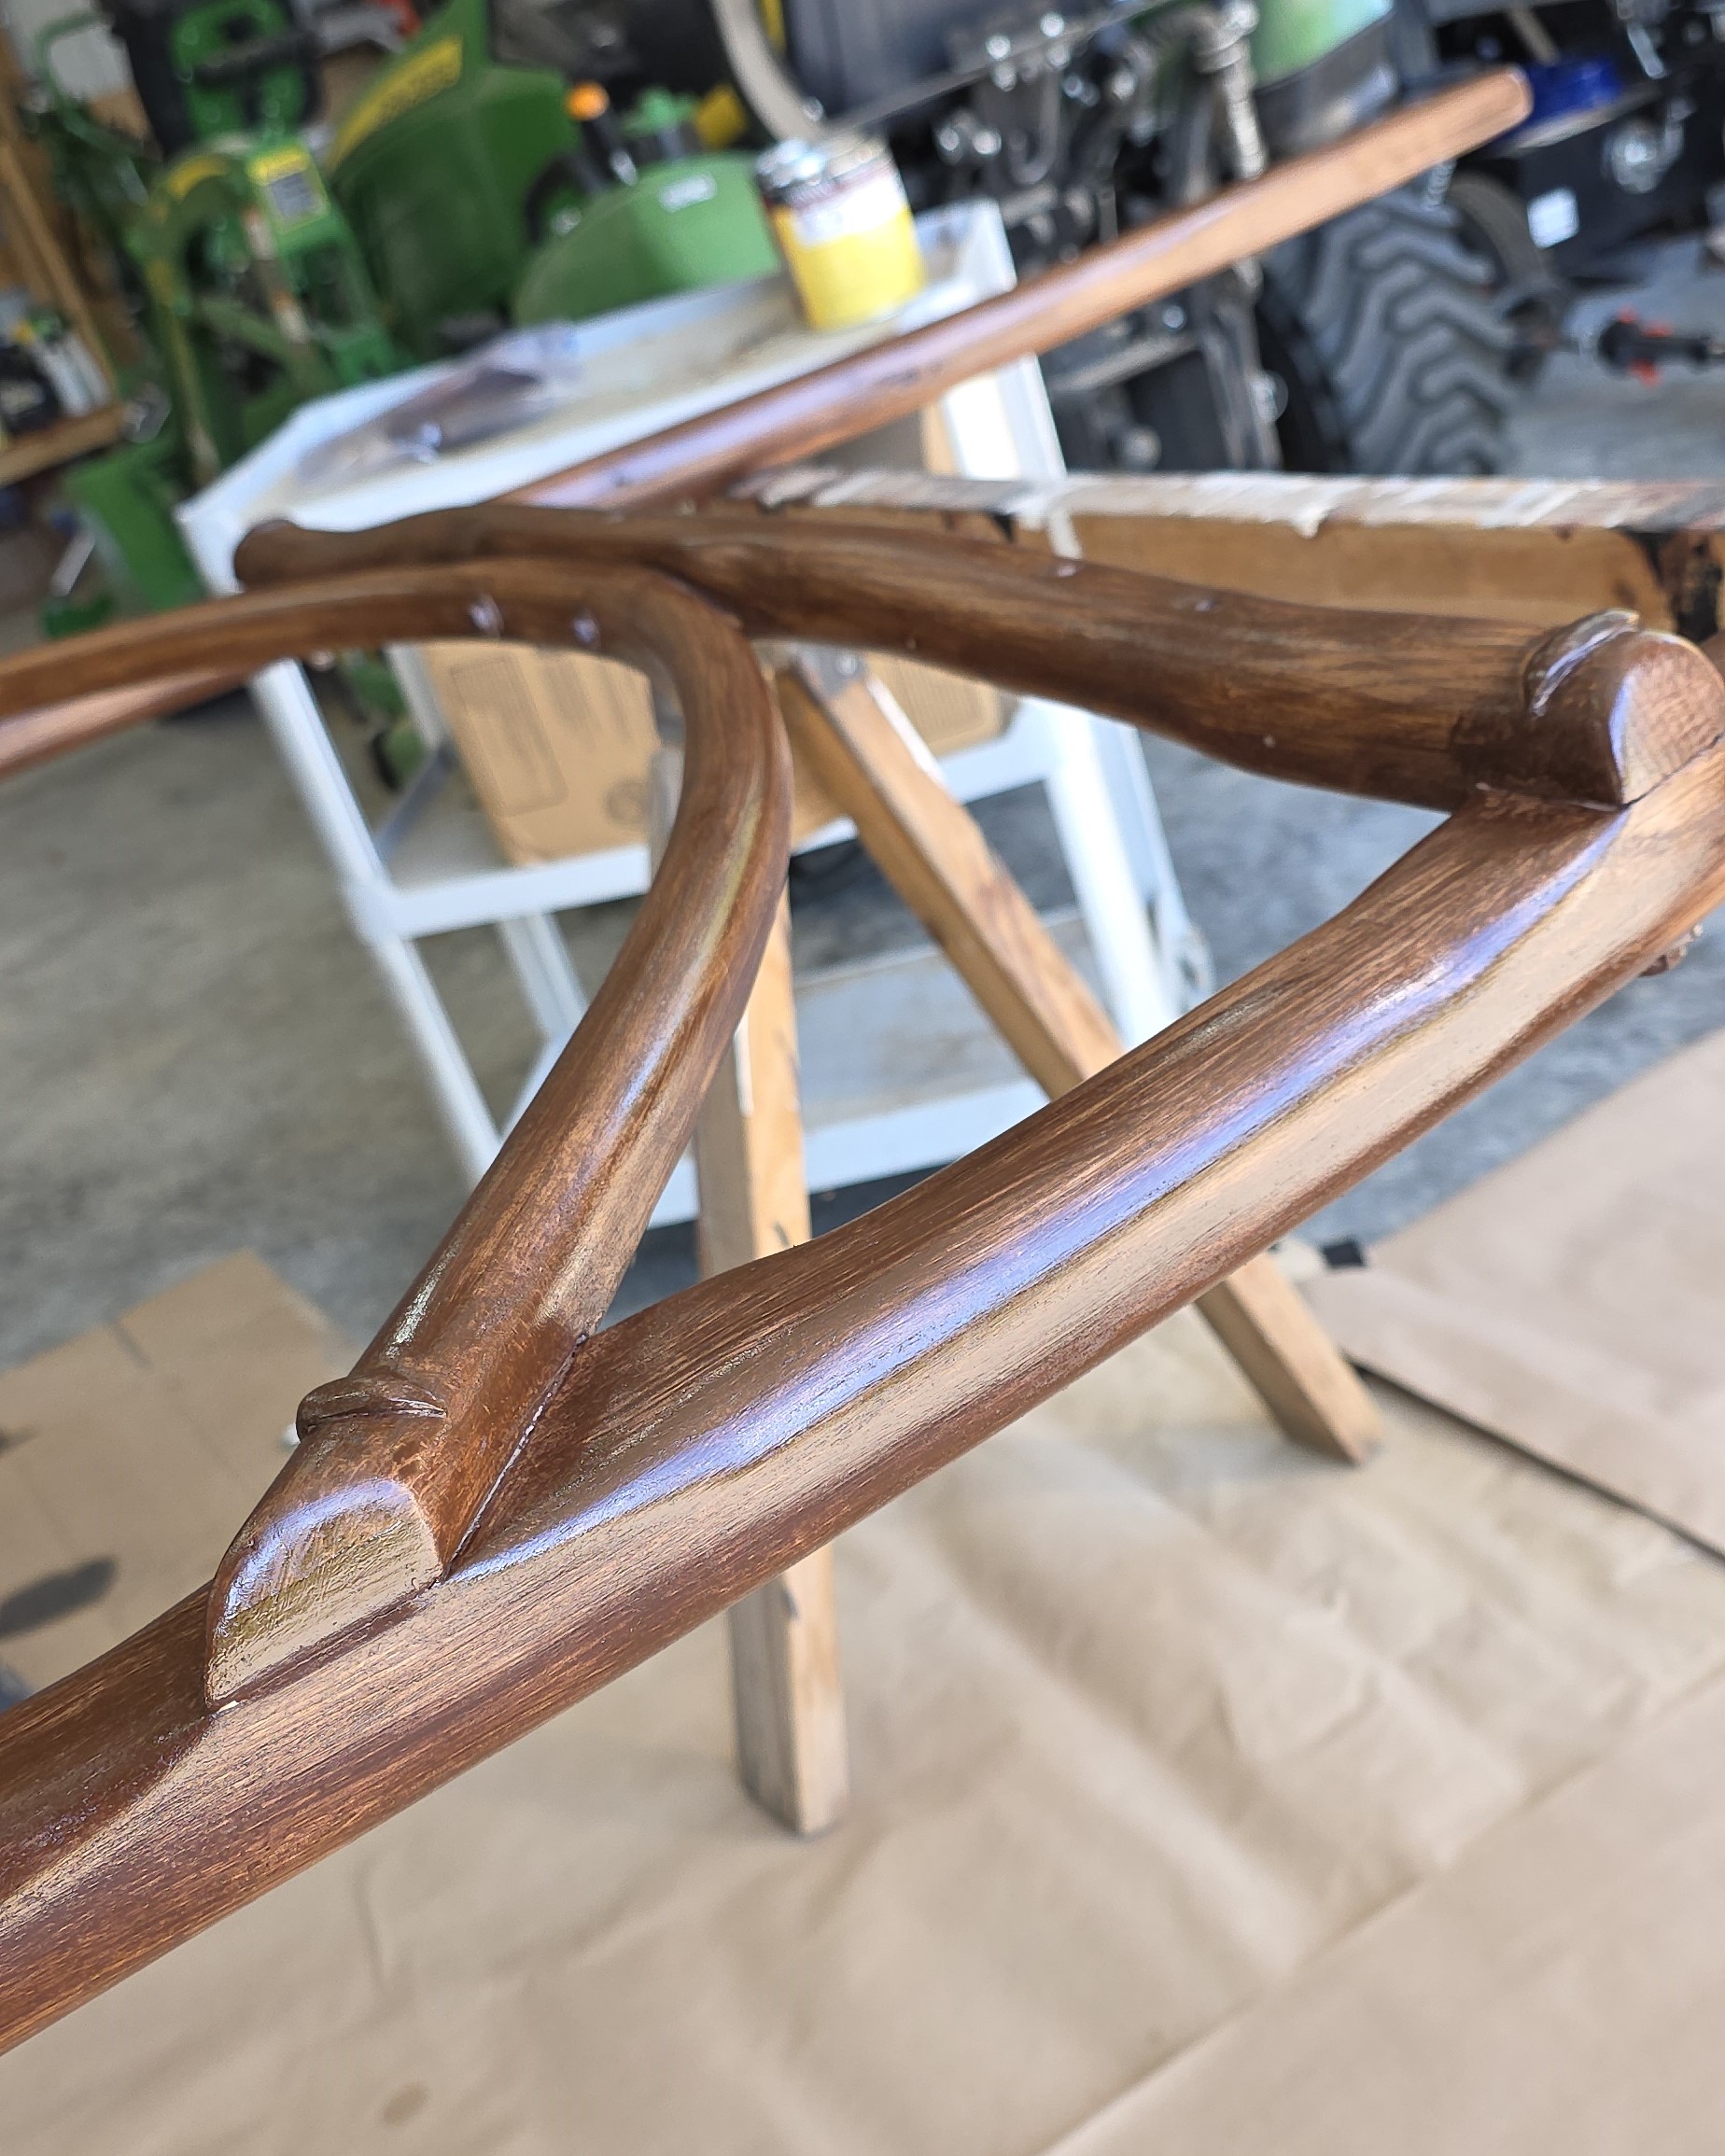
I originally intended to paint this cart black, but I was overjoyed when the wood appearance would allow me to stain it instead. I have always loved the look of a nice wood grain/stained show cart. Off to Lowes I went to get some supplies. I decided on a walnut stain and did opt for the pre-stain wood conditioner. I didn’t want to skimp on this project, although I have never used this before on anything I’ve ever stained. I got 32 oz cans of each, but in the end, I had plenty left over. I probably could have gotten by with the 8oz options, but I didn’t want to run out. I guess maybe more projects are in my future? Who knows. I got their recommended polyurethane for outdoor use. I know the cart won’t be “out in the weather” but it could get rained on at a show, be in the sun at a show, or any variety of other things so I wanted to make sure it was protected as much as possible for any kind of conditions.
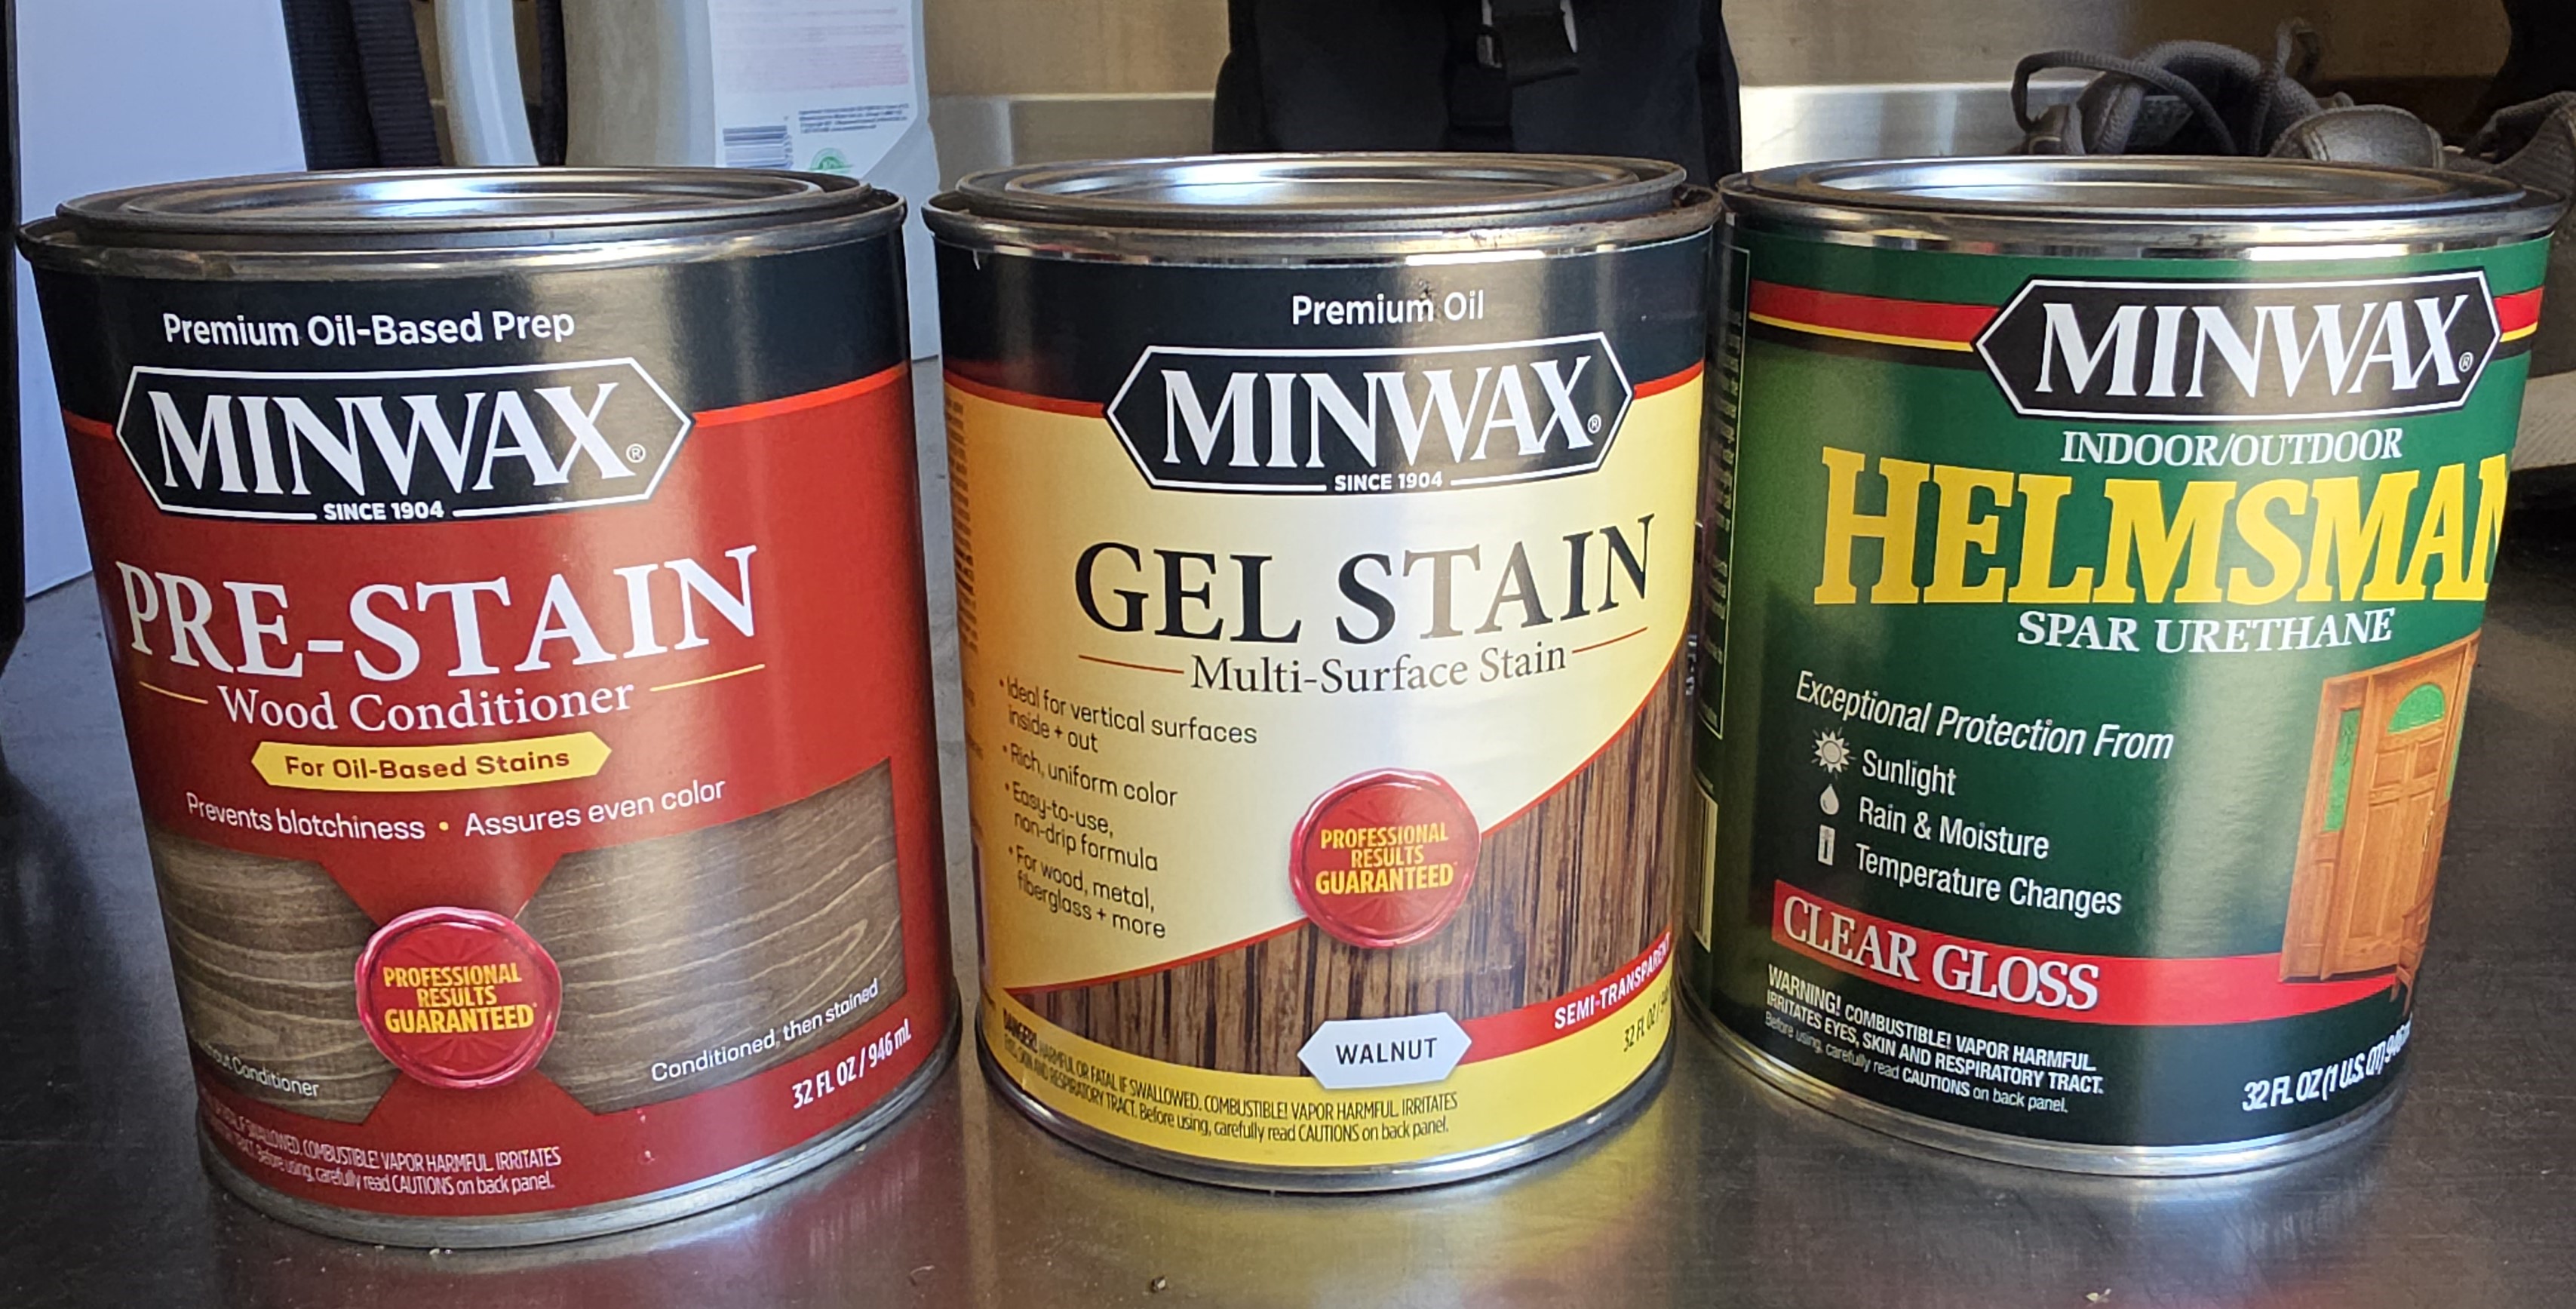


After applying the wood conditioner and waiting the time indicated on the instructions (5-30 minutes) I started staining!
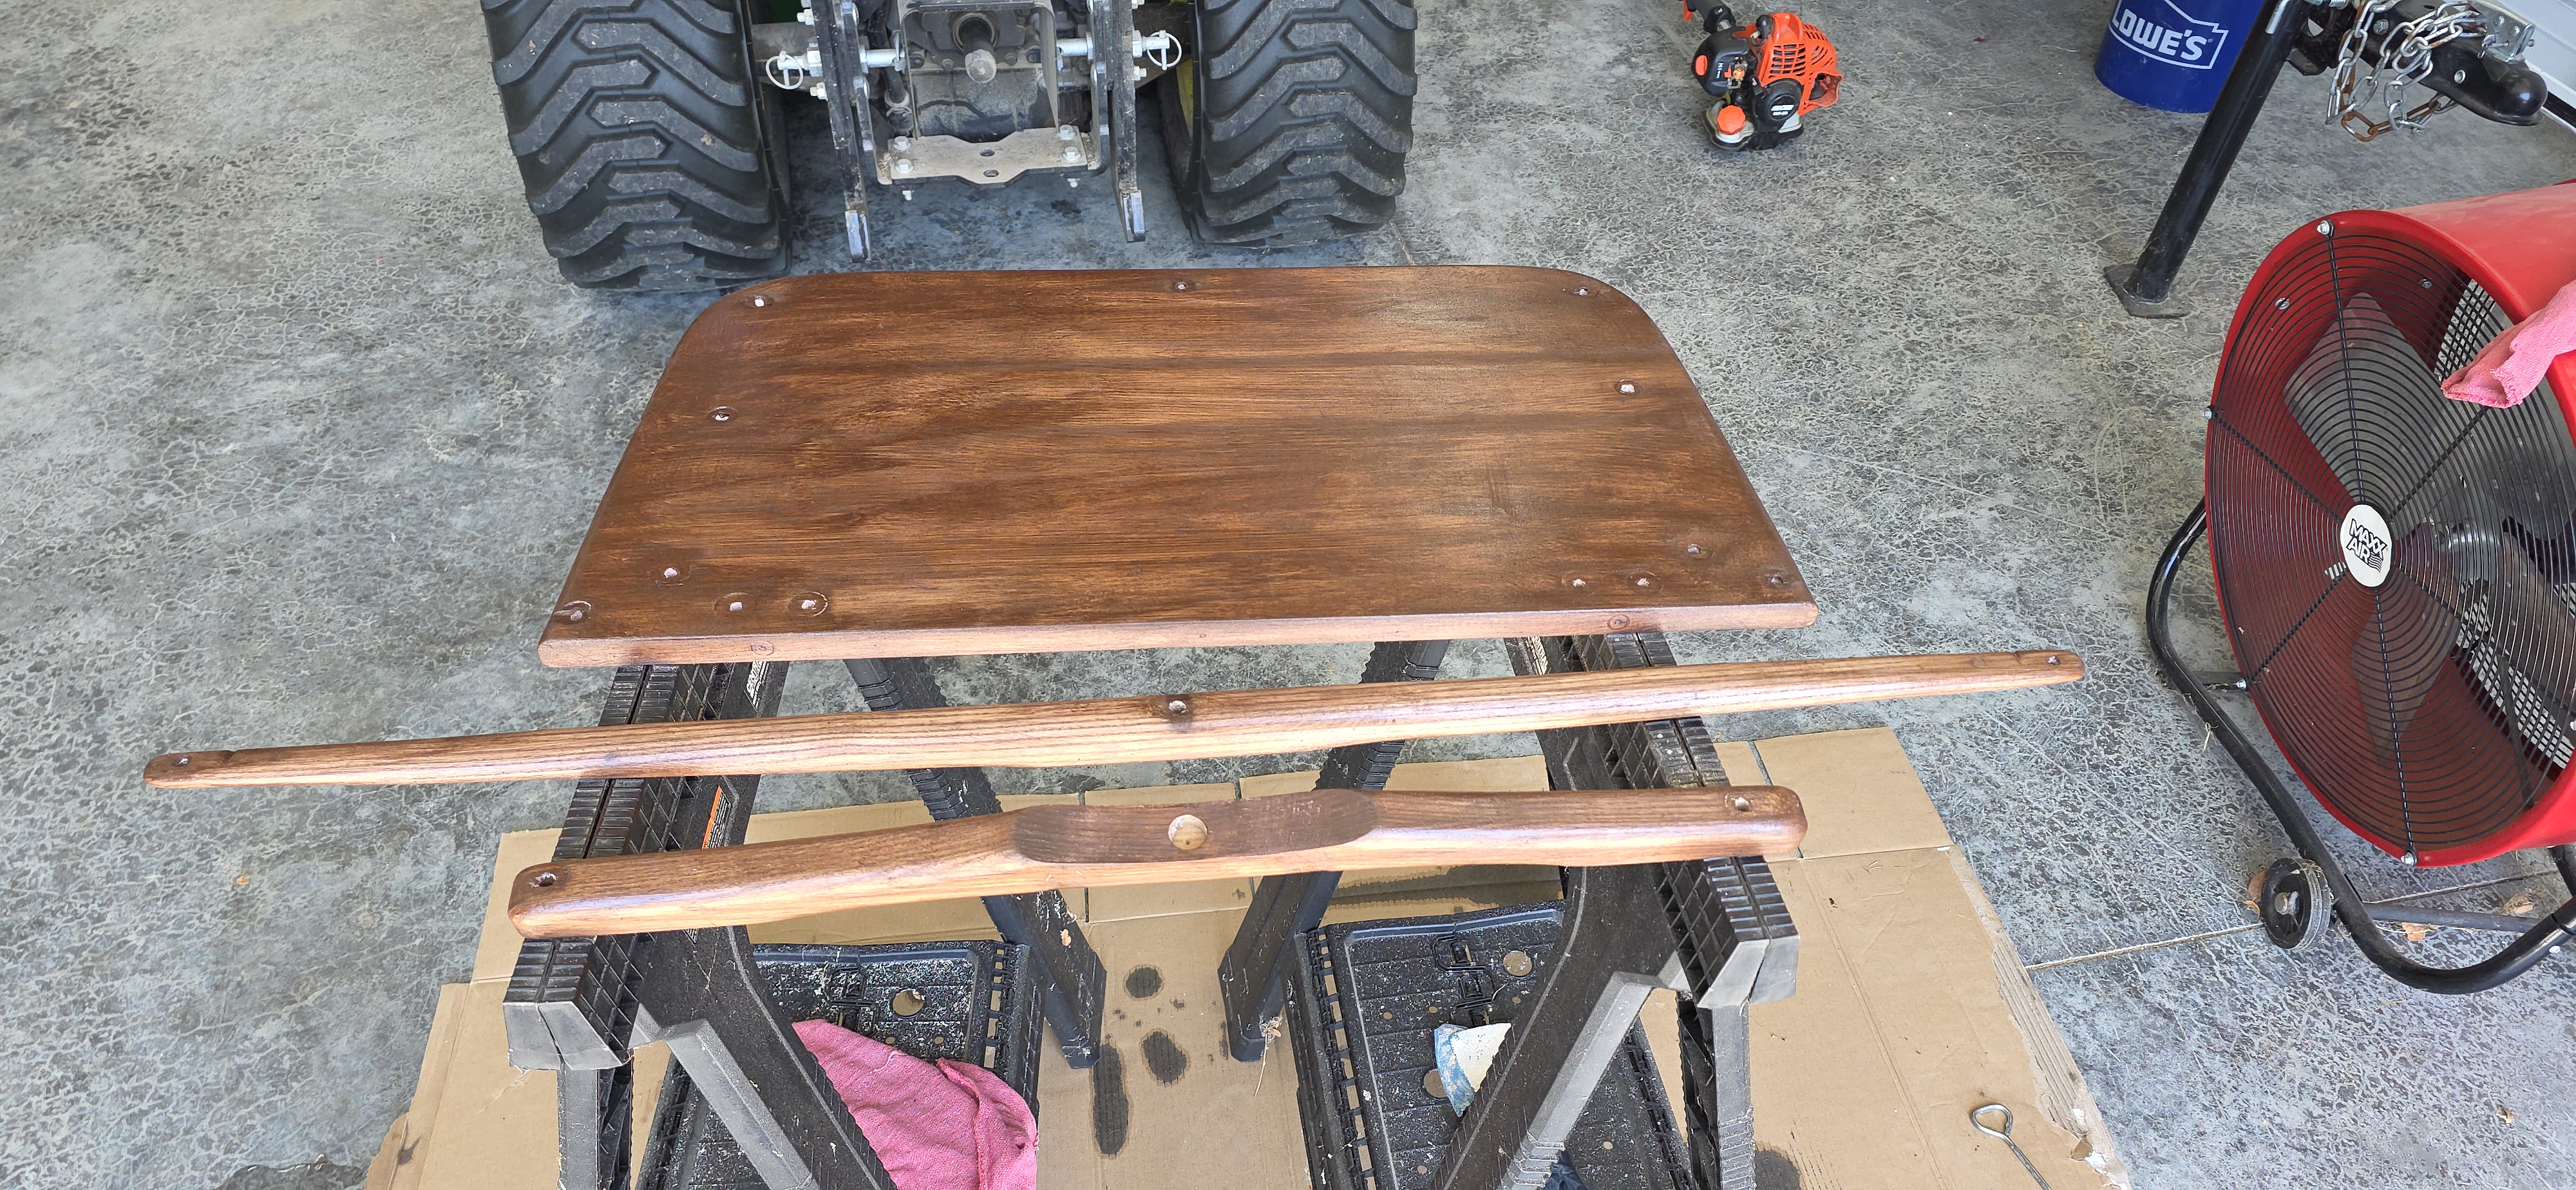
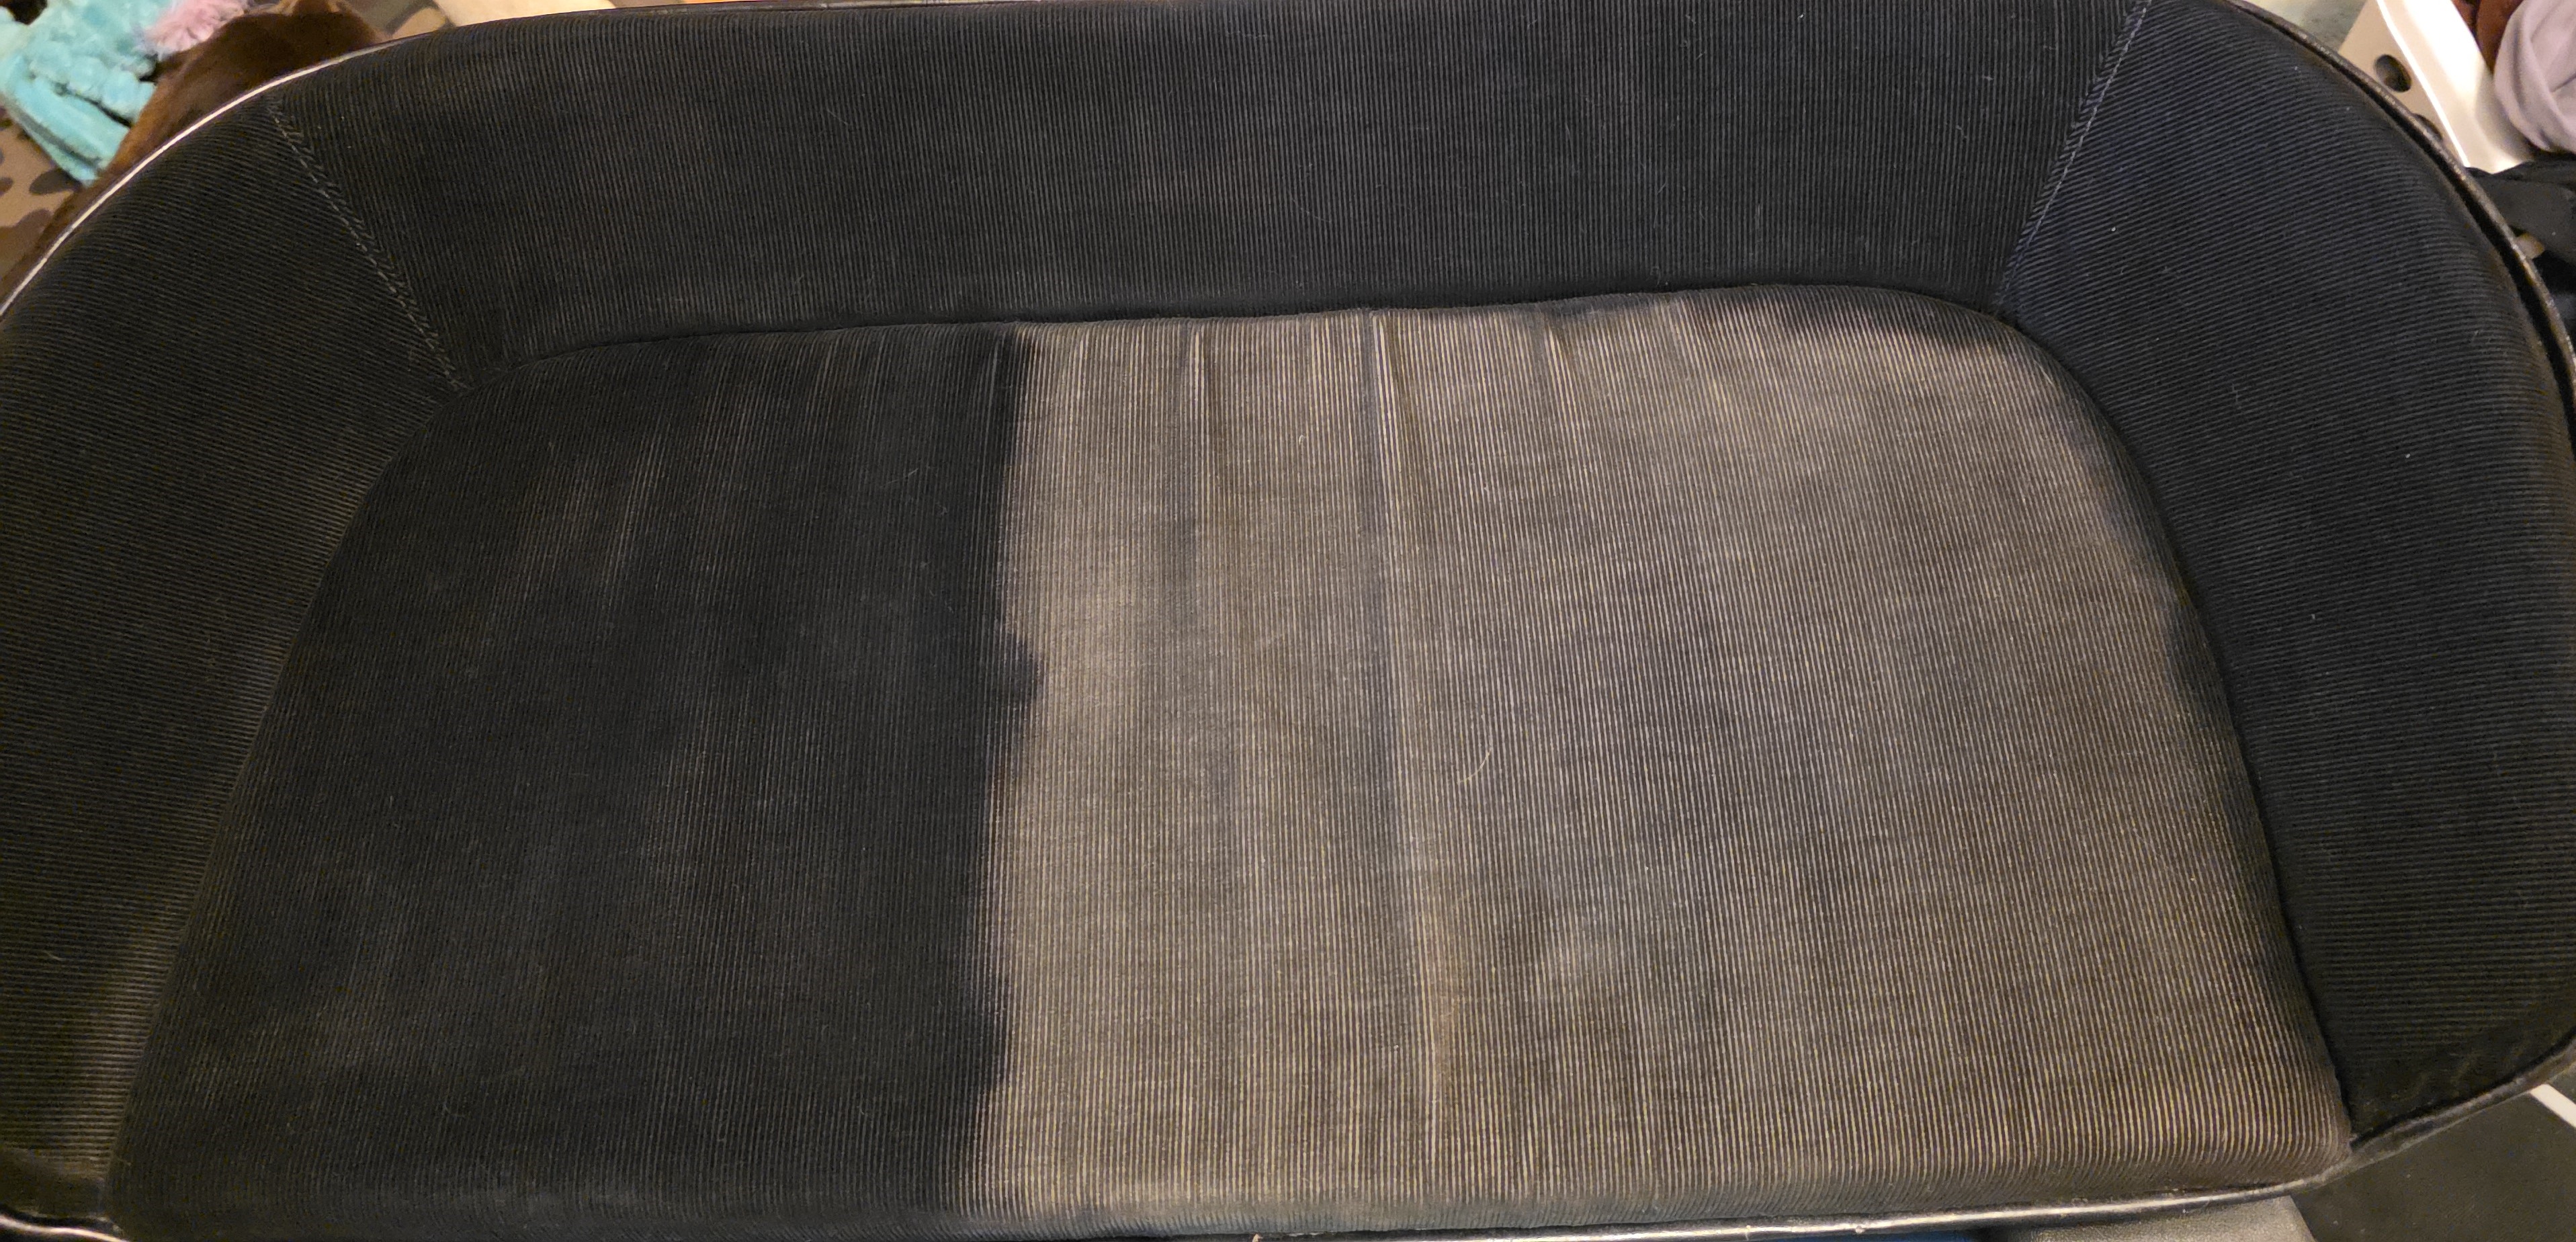
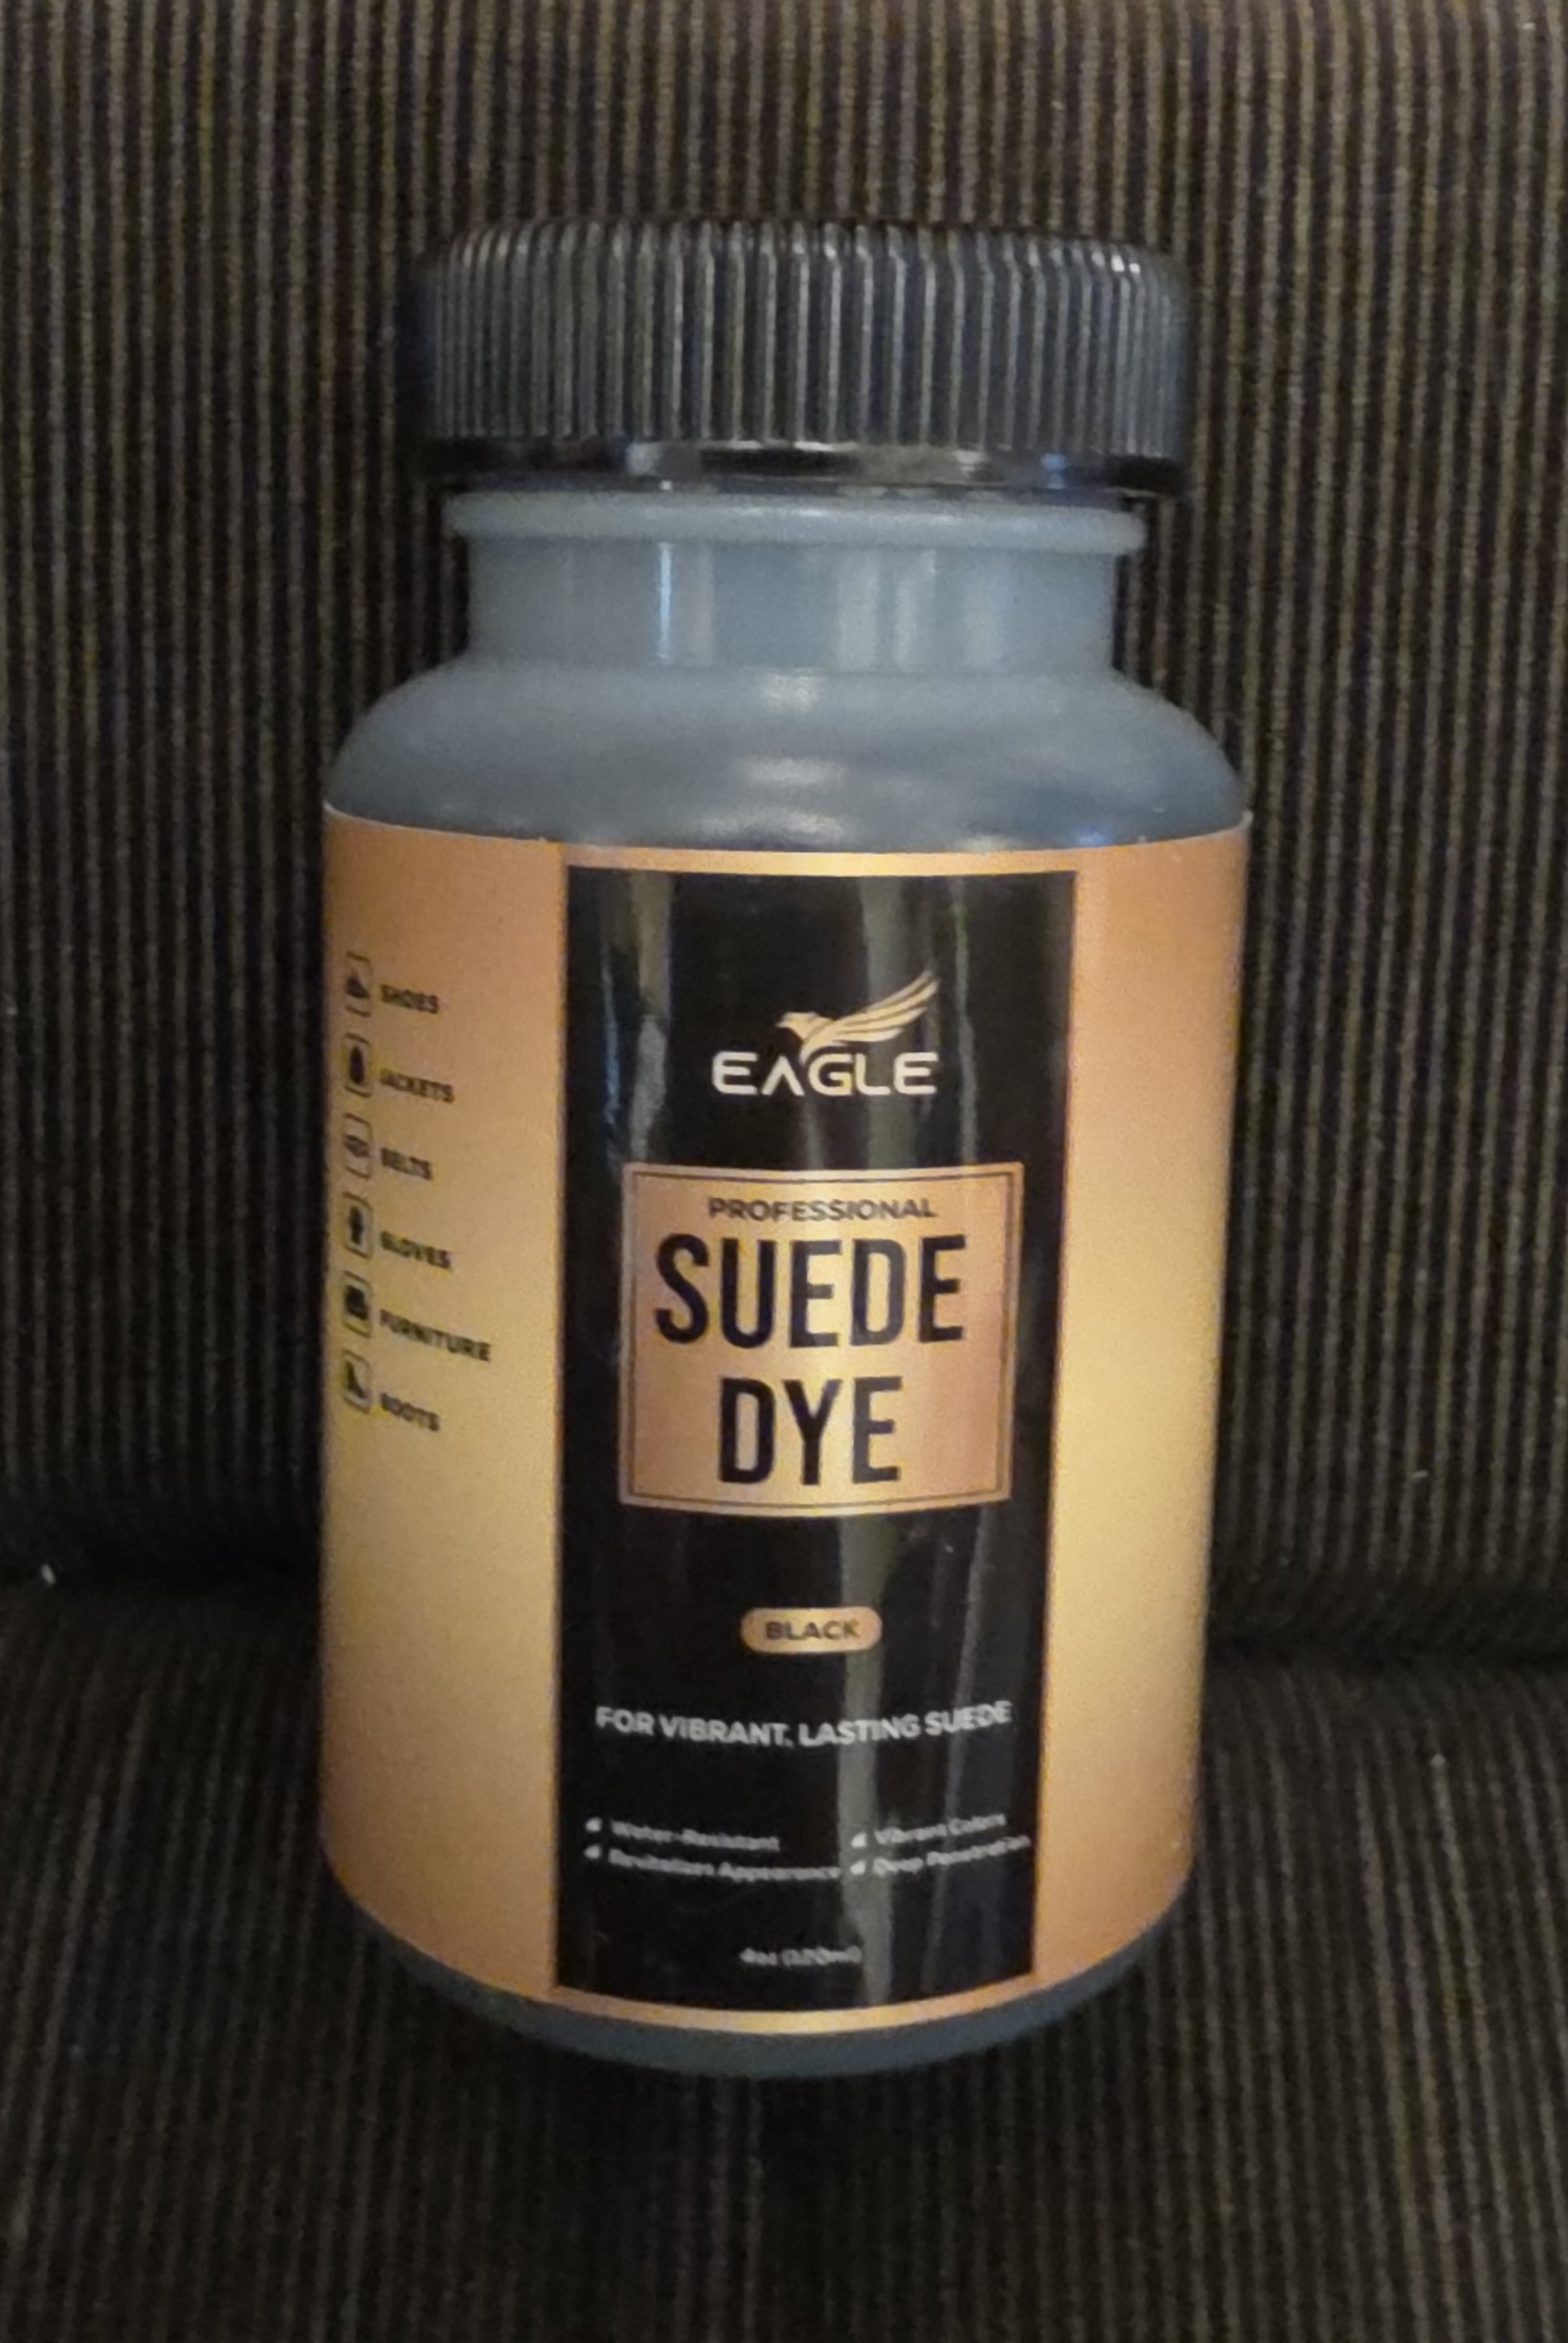
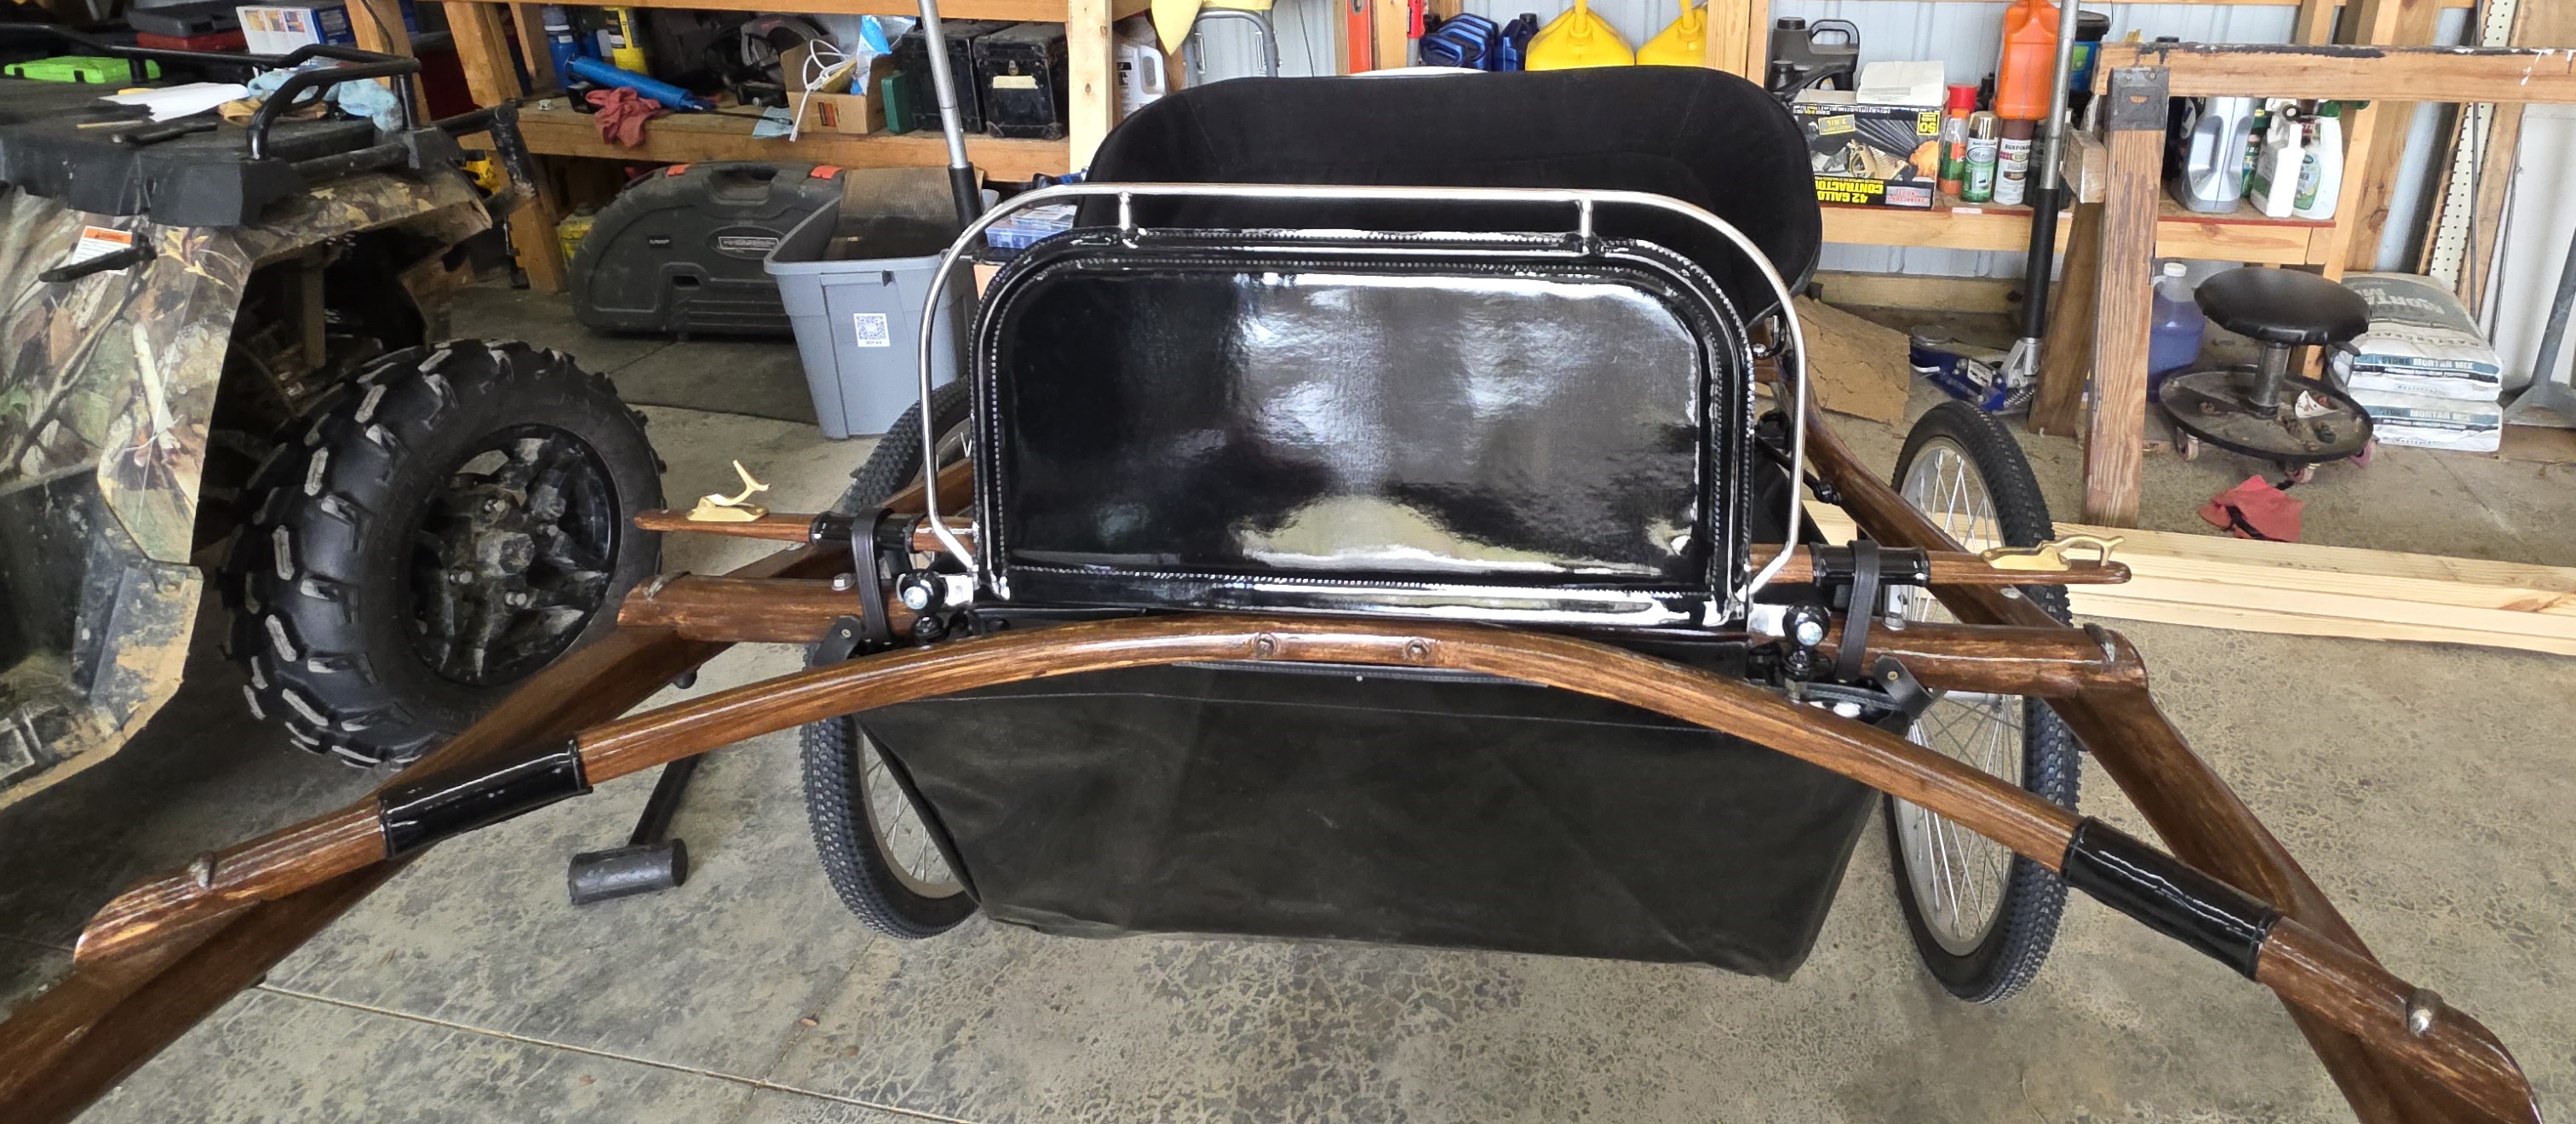
Since I have to wait 24 hours between the application of stain and any further applications of more stain or polyurethane, I decided to move on to another task. Making the seat look pretty again! It’s who knows how many years old. We got this cart used, and we’ve had it since 2013. The seat has been used at a few shows, but it otherwise has been stored indoors with us. I guess time fades all things. Anyway, I don’t know what material this is actually made of. Some form of velvety something or another, but I chose a suede shoe dye to try and revive it. One bottle did the trick! It came with a handy dobber built into the lid and I just “painted” it on. One day I might need a new seat, but today isn’t that day and anywhere I can save on cost I consider a win.


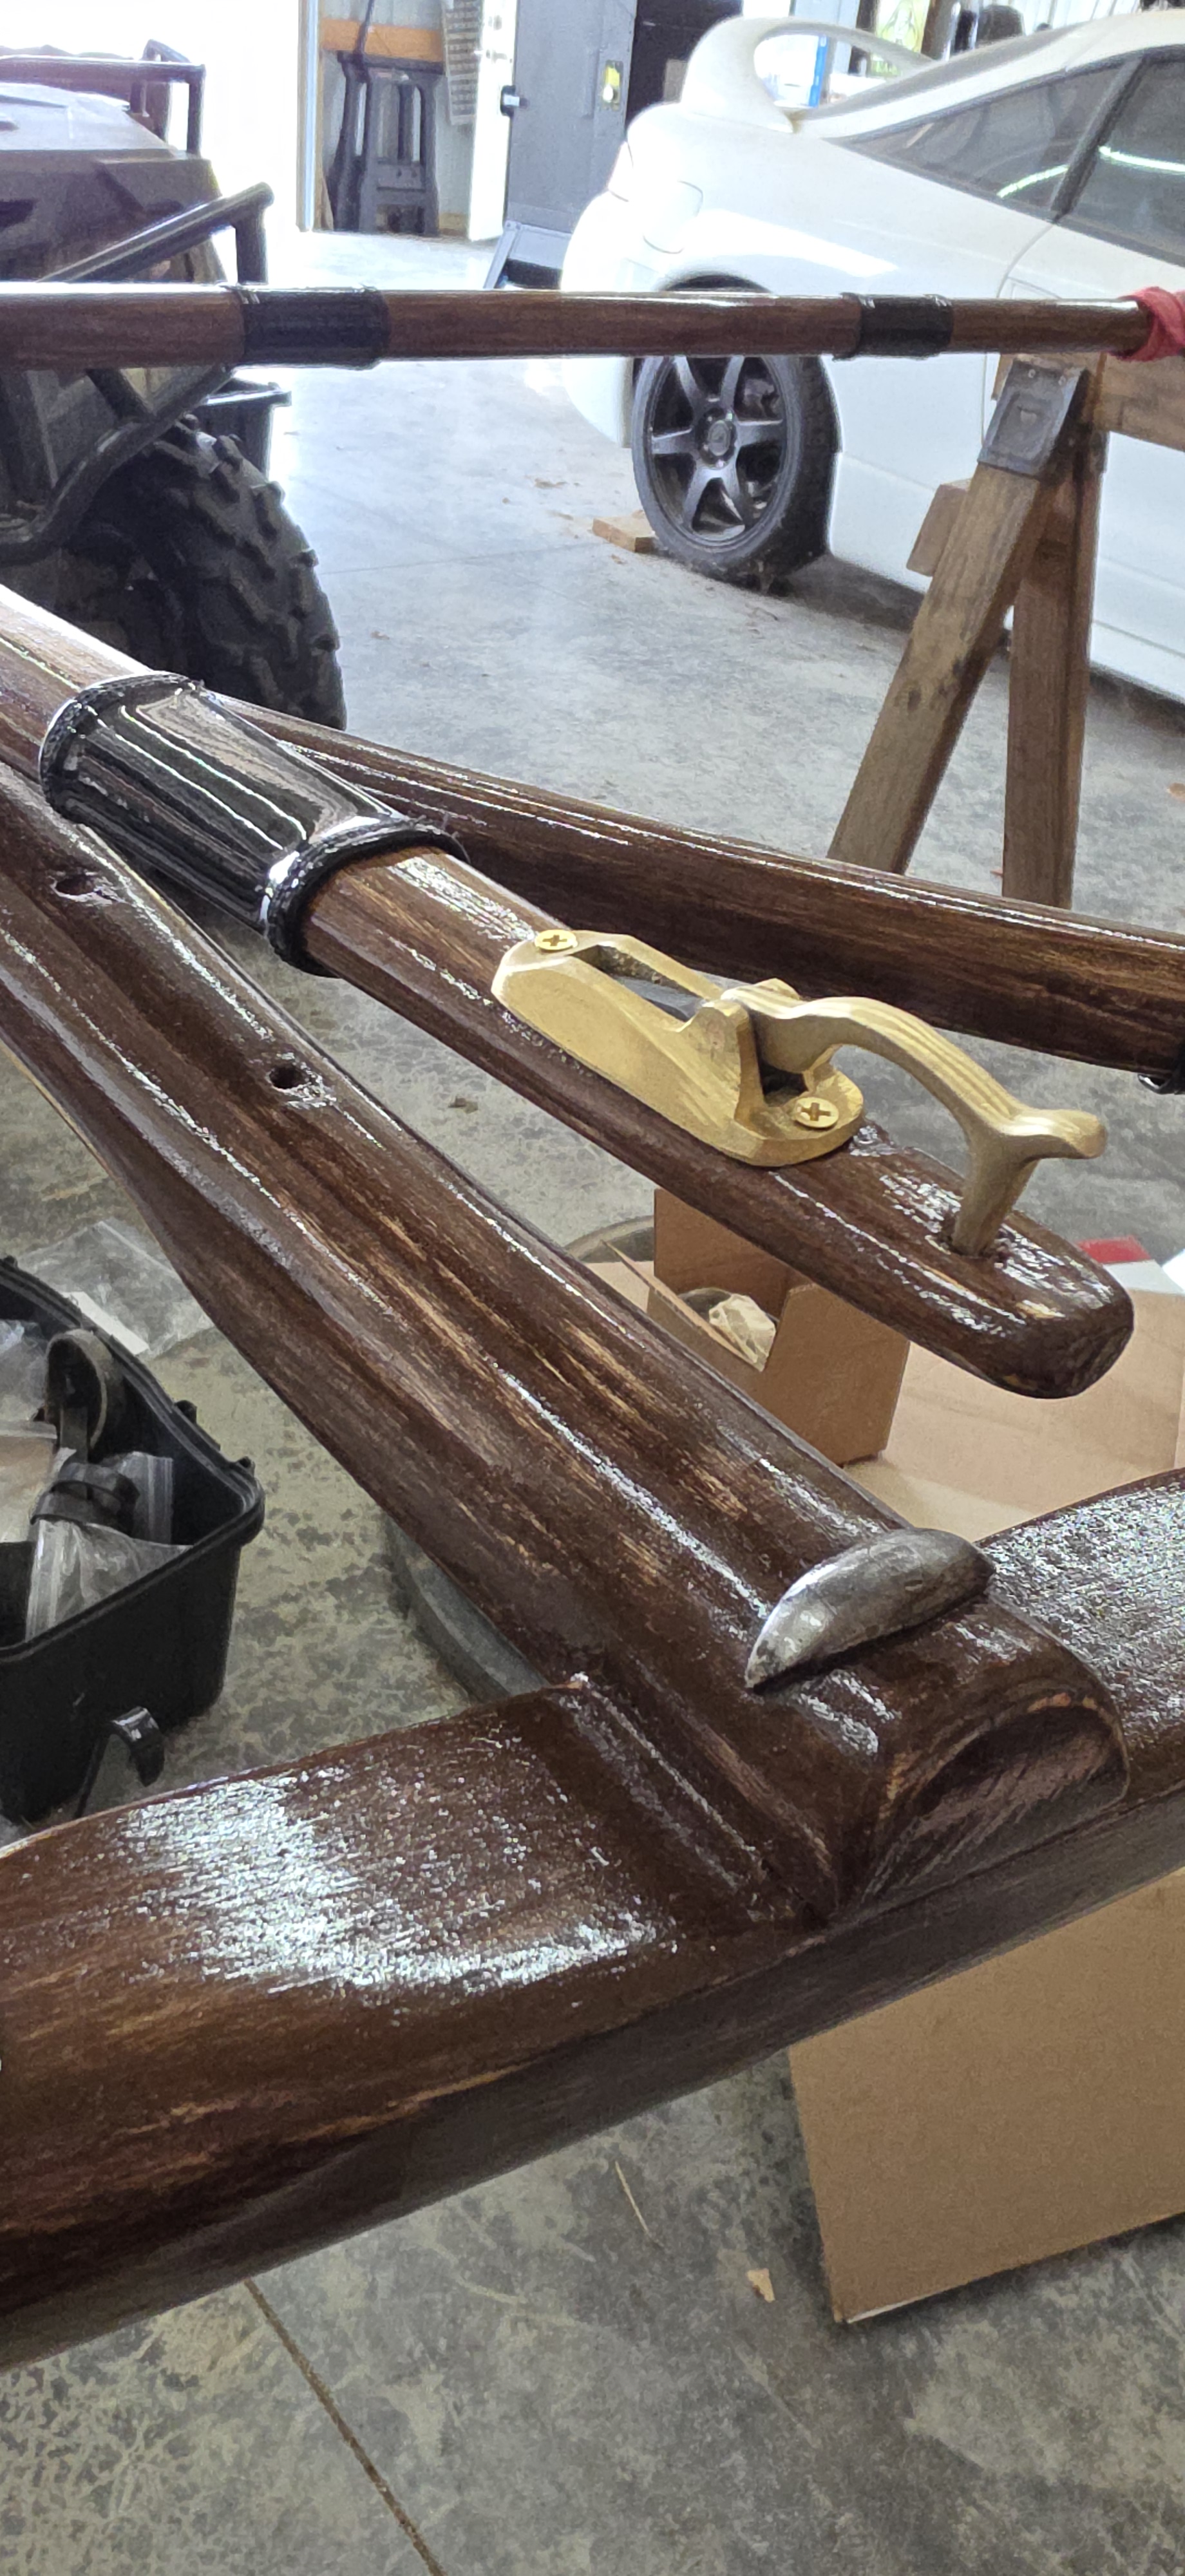
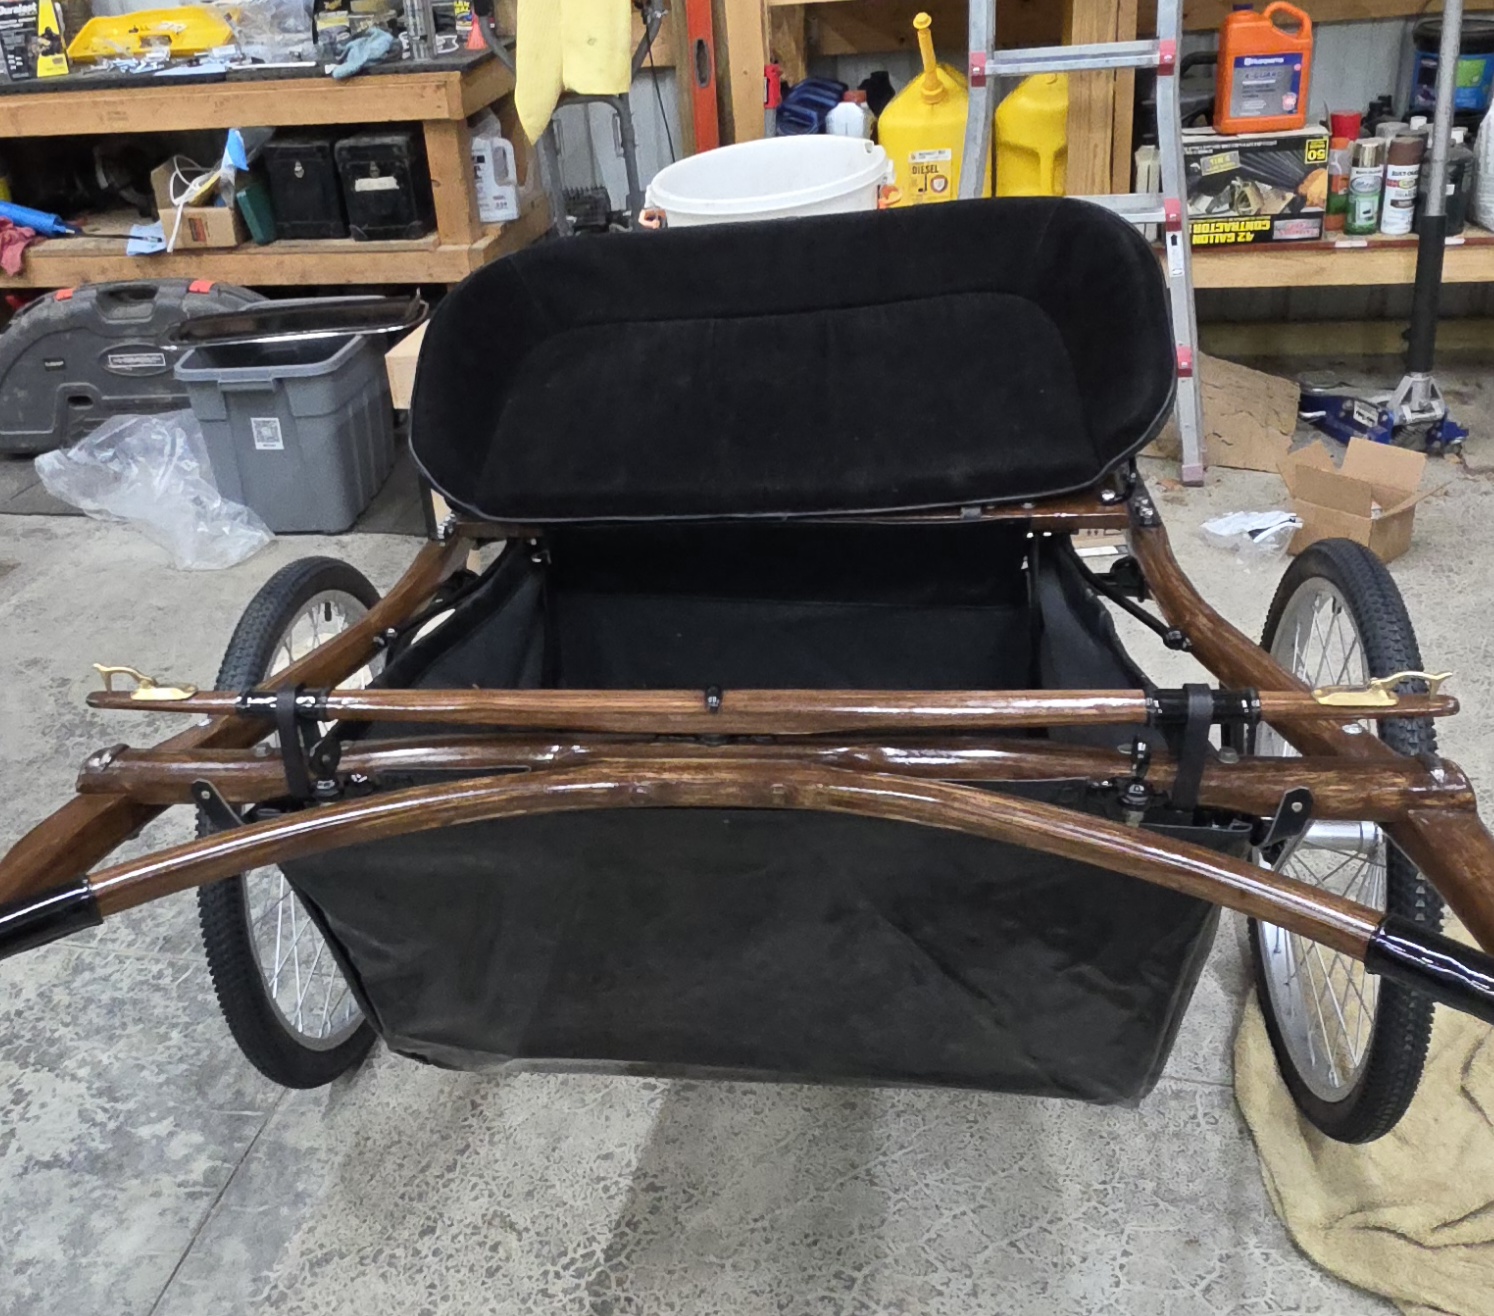
After the stain and polyurethane protectant were applied and completely dry, it was time to start putting on the trim! I was a little surprised the trim came as just cut pieces of patent leather. If I had known that, it may have been more cost effective to just buy some patent leather and cut it myself. I am perfectly capable of that. It wasn’t “finished” as it came. I’m not sure what in the world, or how they can sell it like this but whatever. I own a sewing machine and I know how to use it, so I sewed it to the best of my ability to mimic the old pieces I had kept from the cart disassembly.
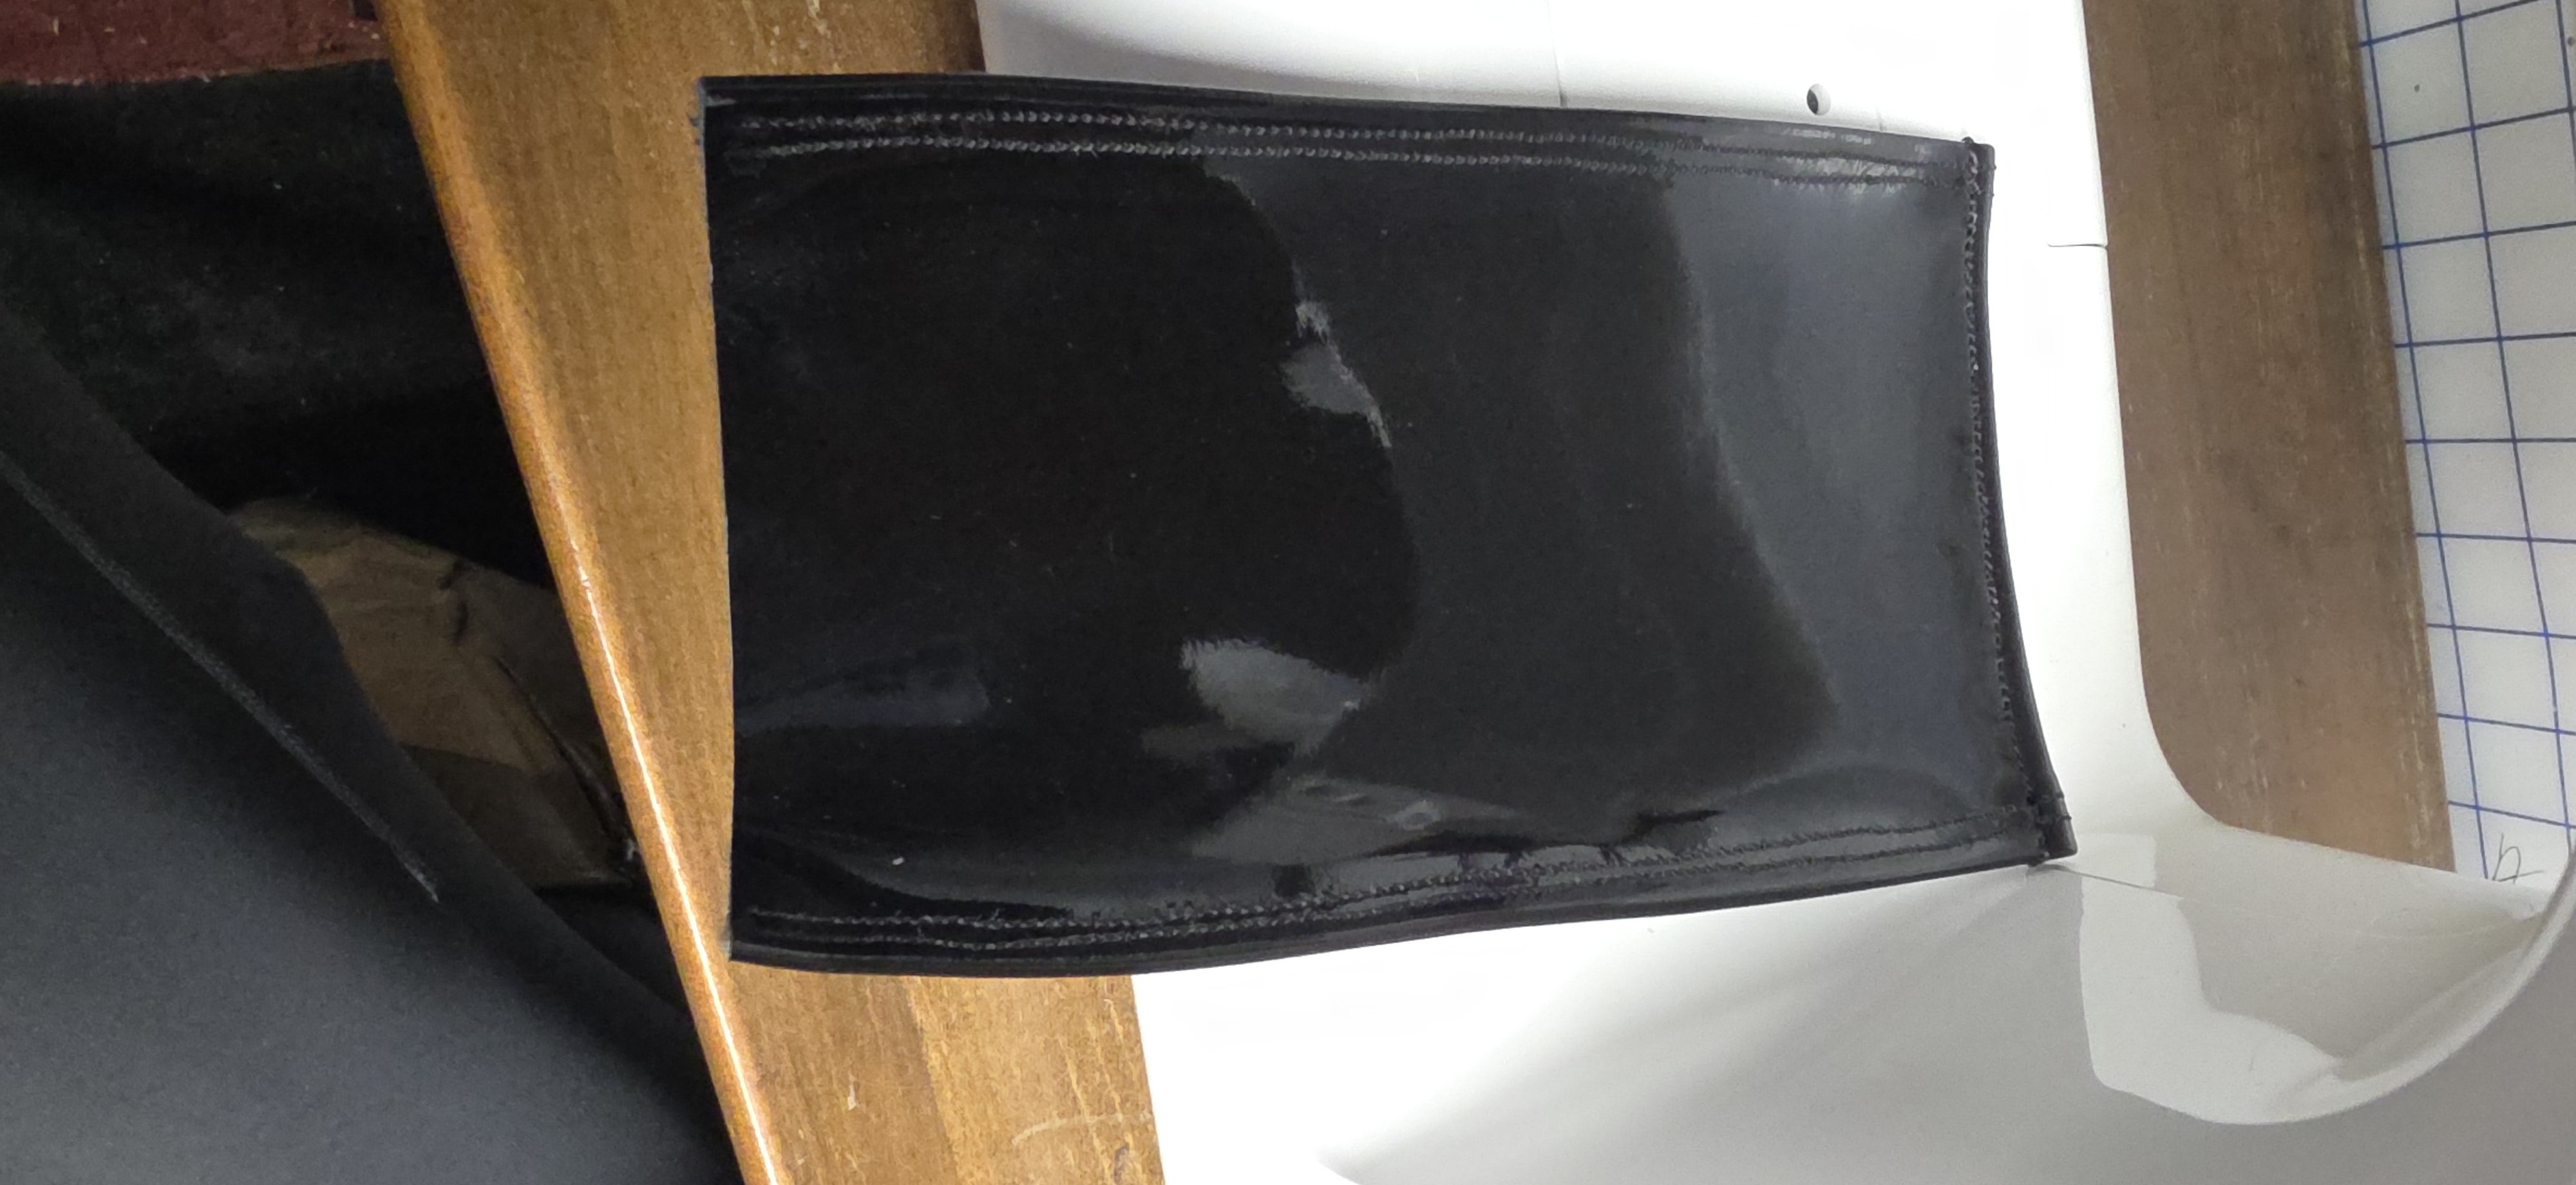
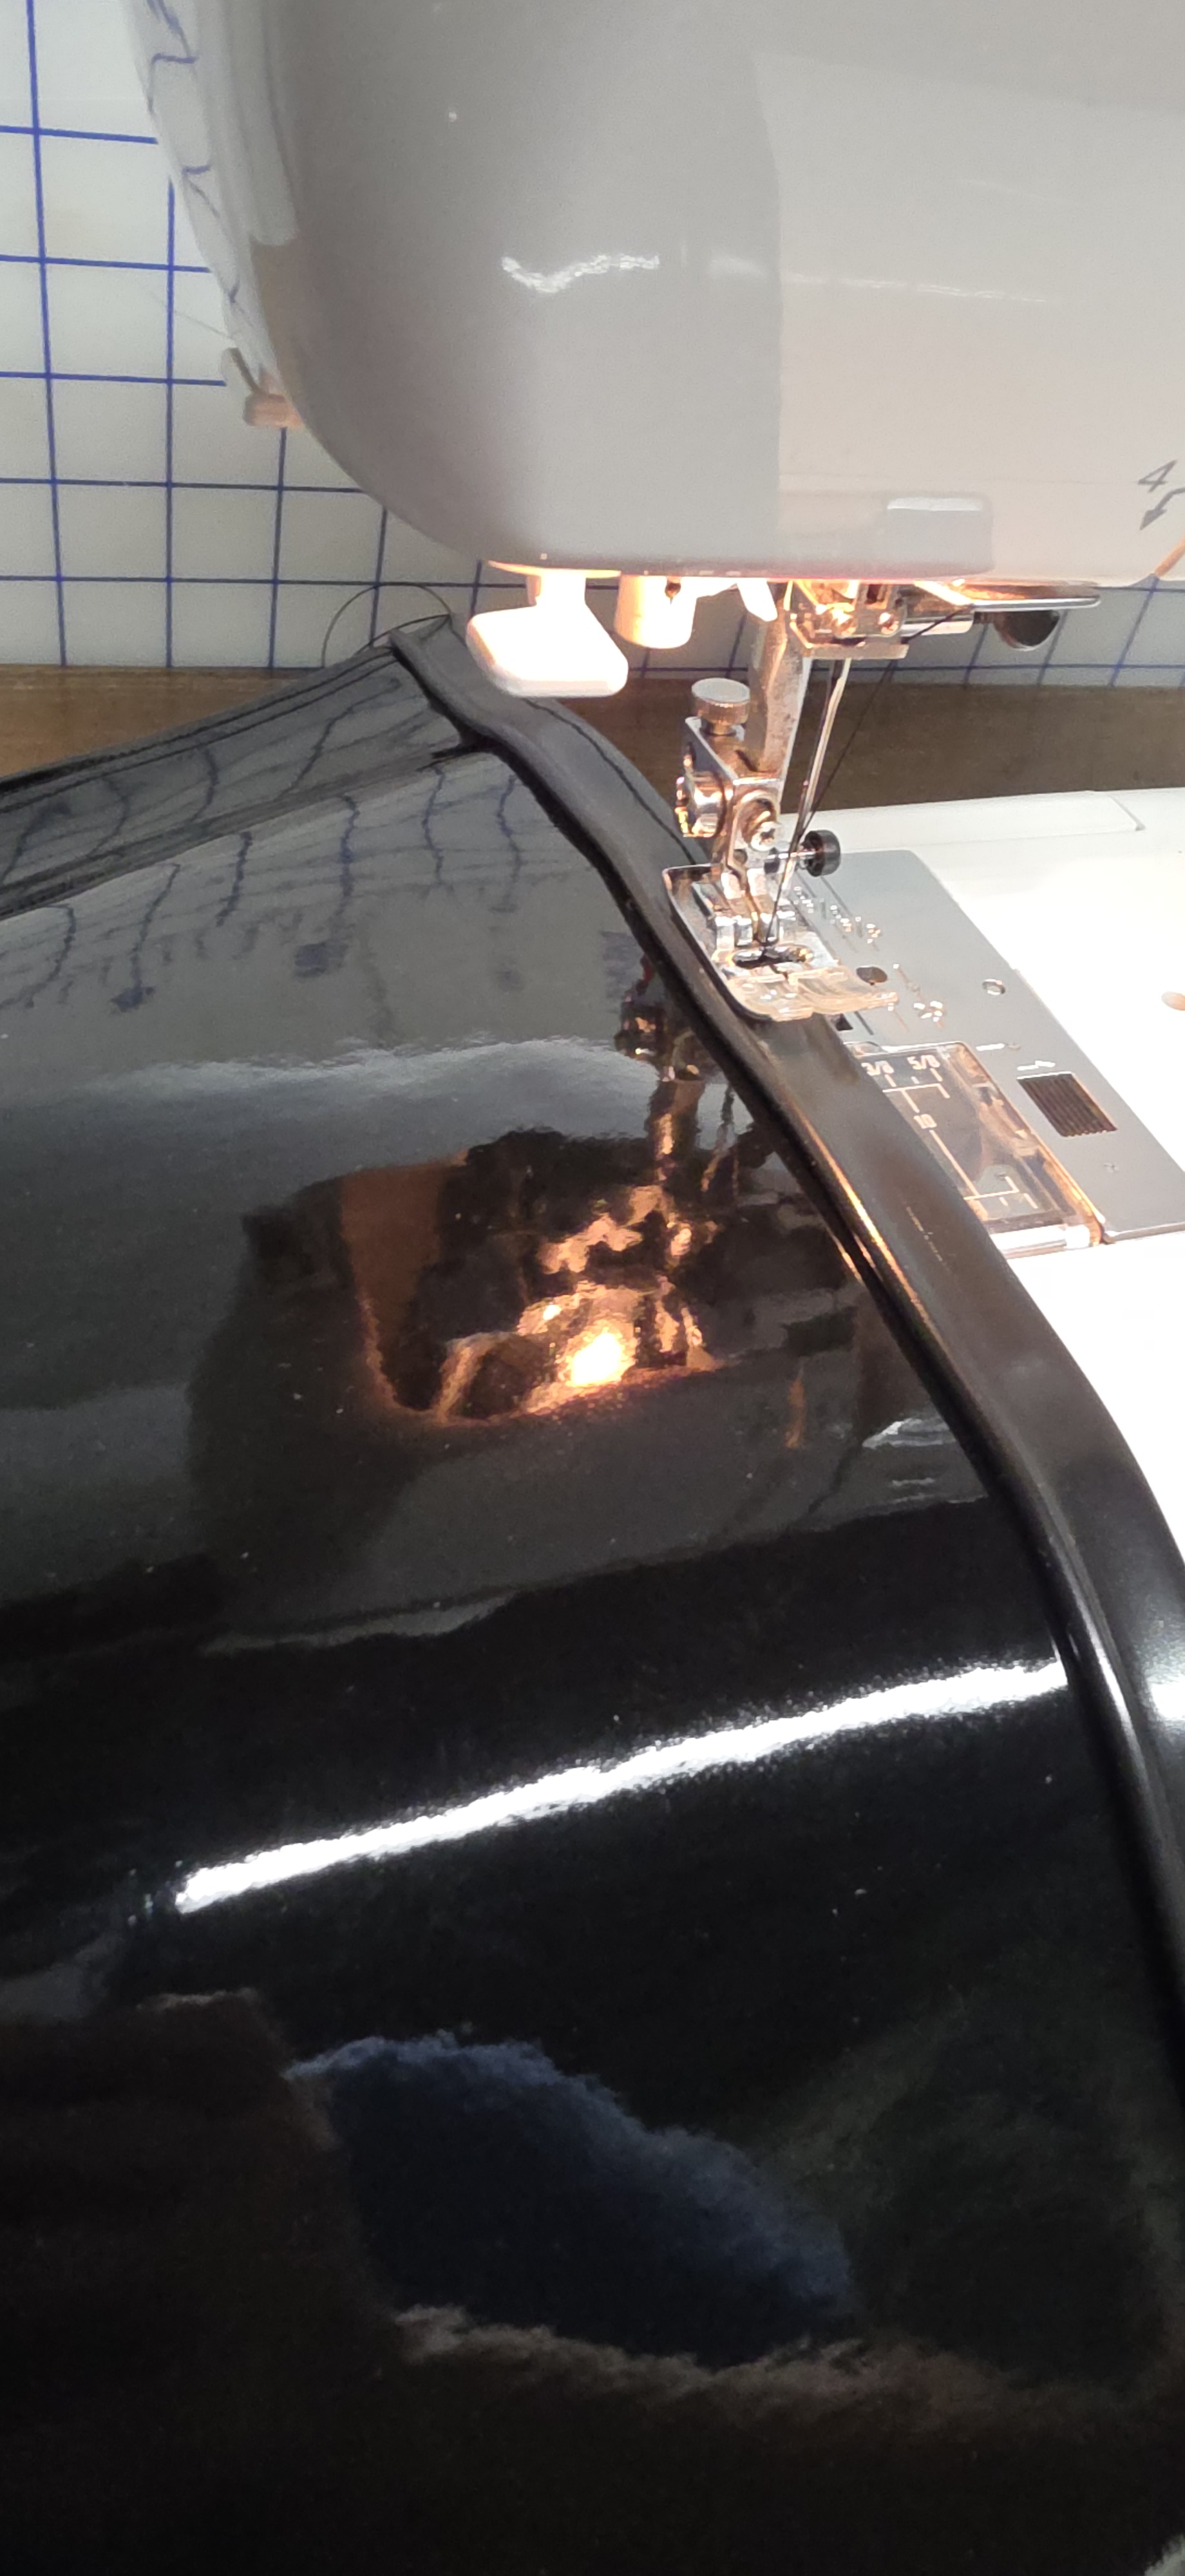
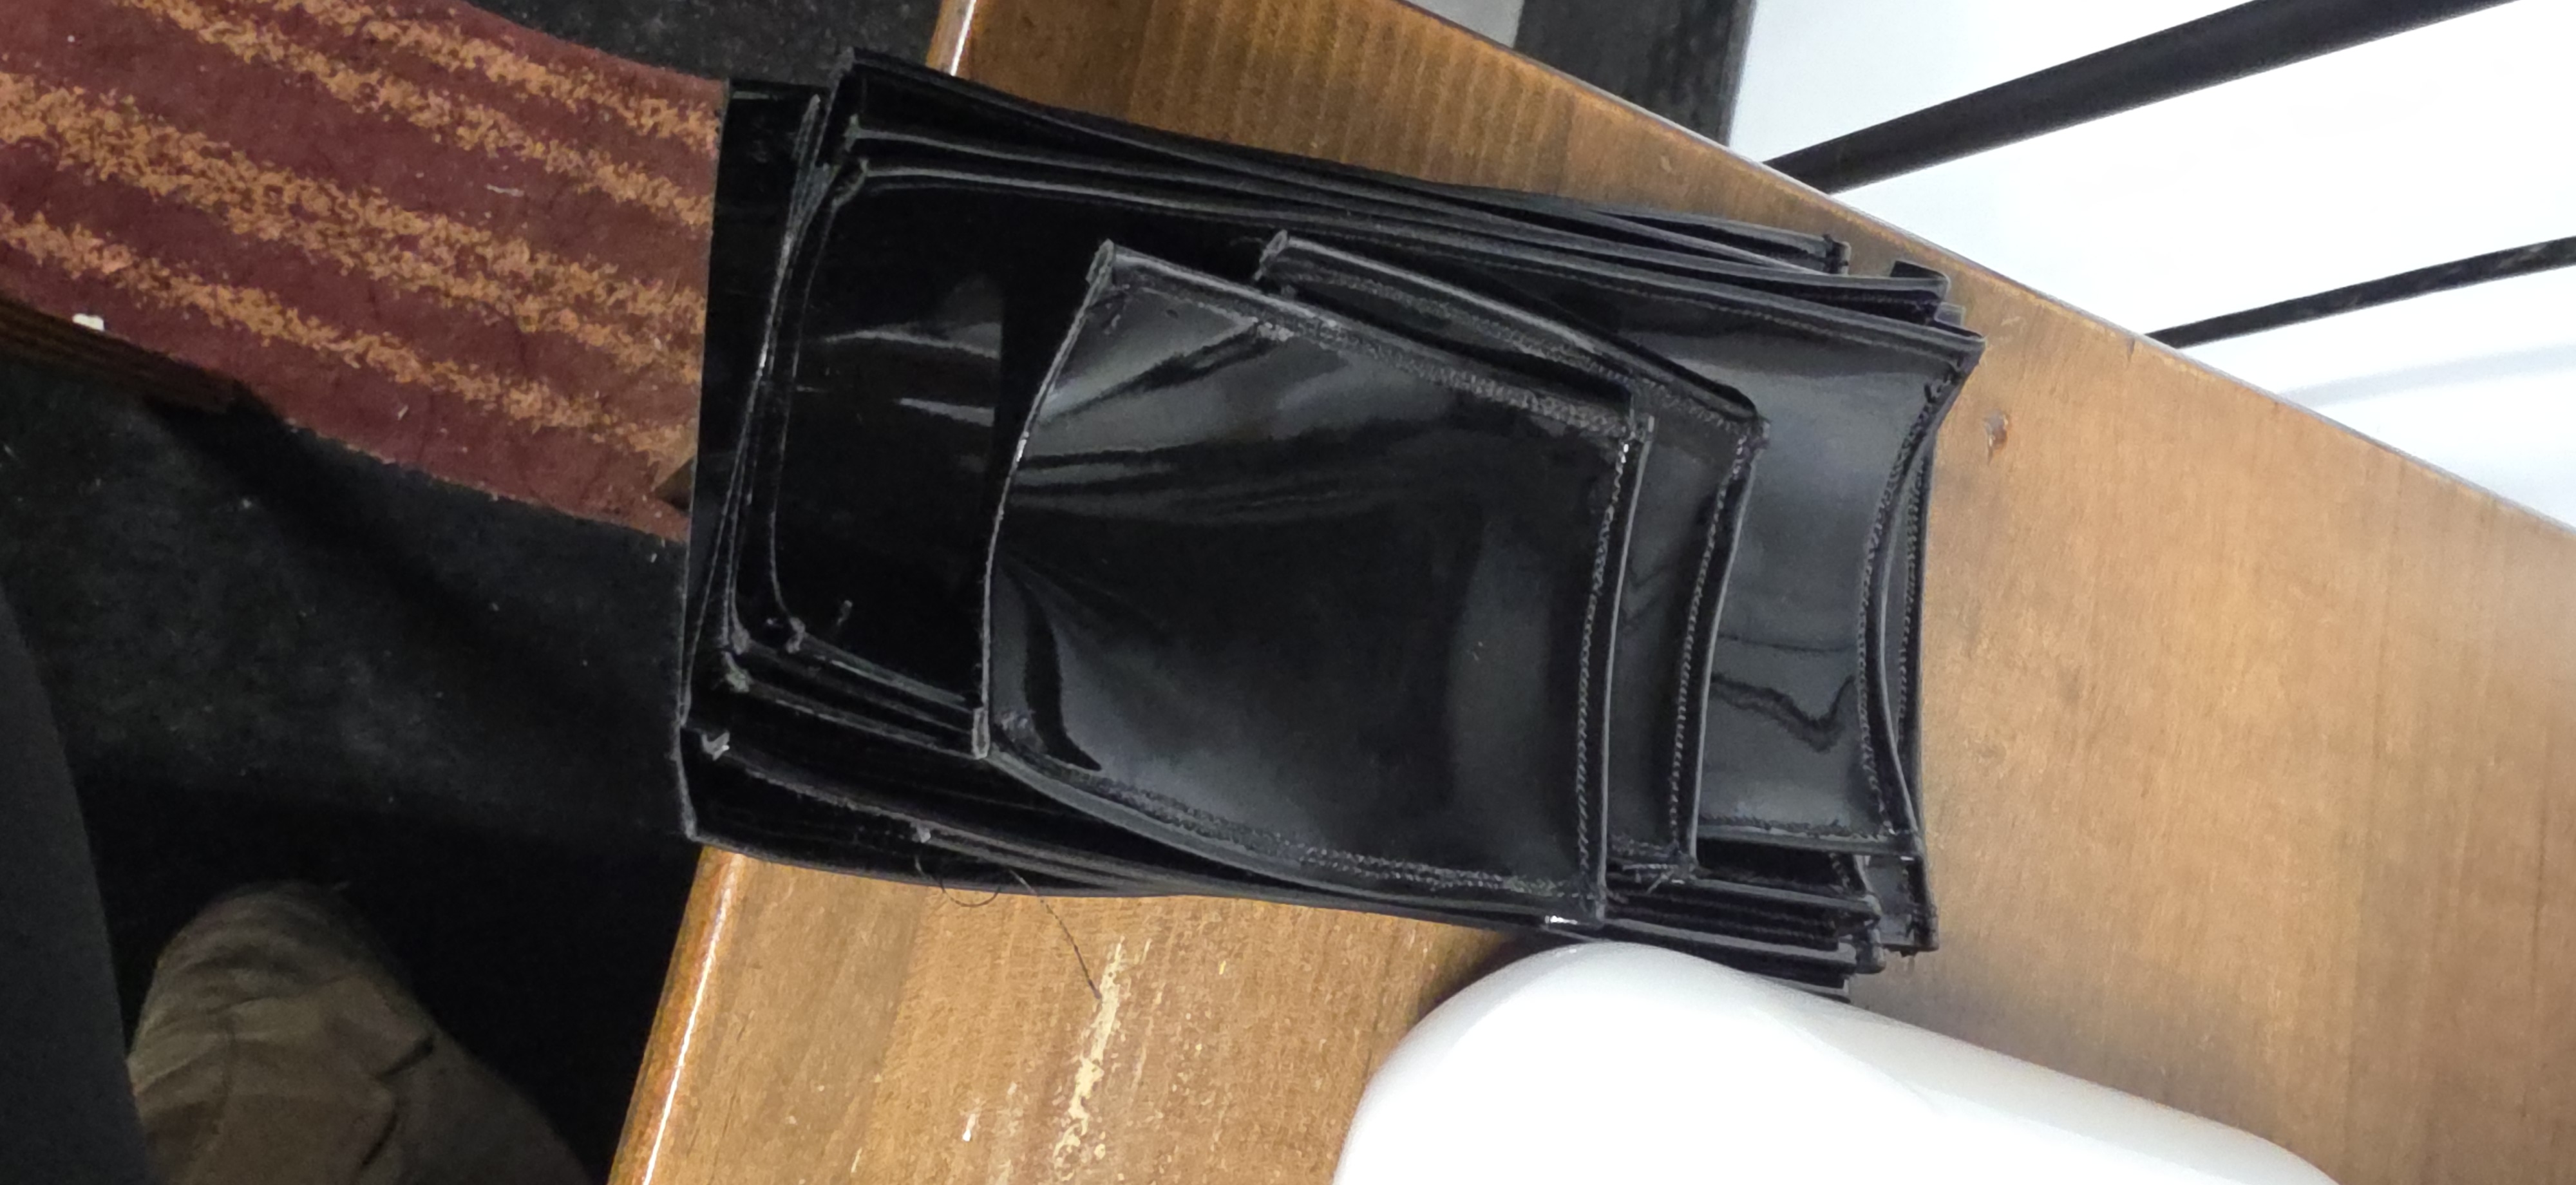
It was a bit of a pain to try and stretch these pieces and nail them on at the same time. I am not sure what is appropriate to use here, but I used small carpet strip type nails. These were tiny, and they looked most like what came off of there before. I did this by myself and it came out fine, but it would have been a lot easier to do had there been someone to help hold the material while I nailed. I put it in place and used electrical tape to tape it on there until the nails were in place.
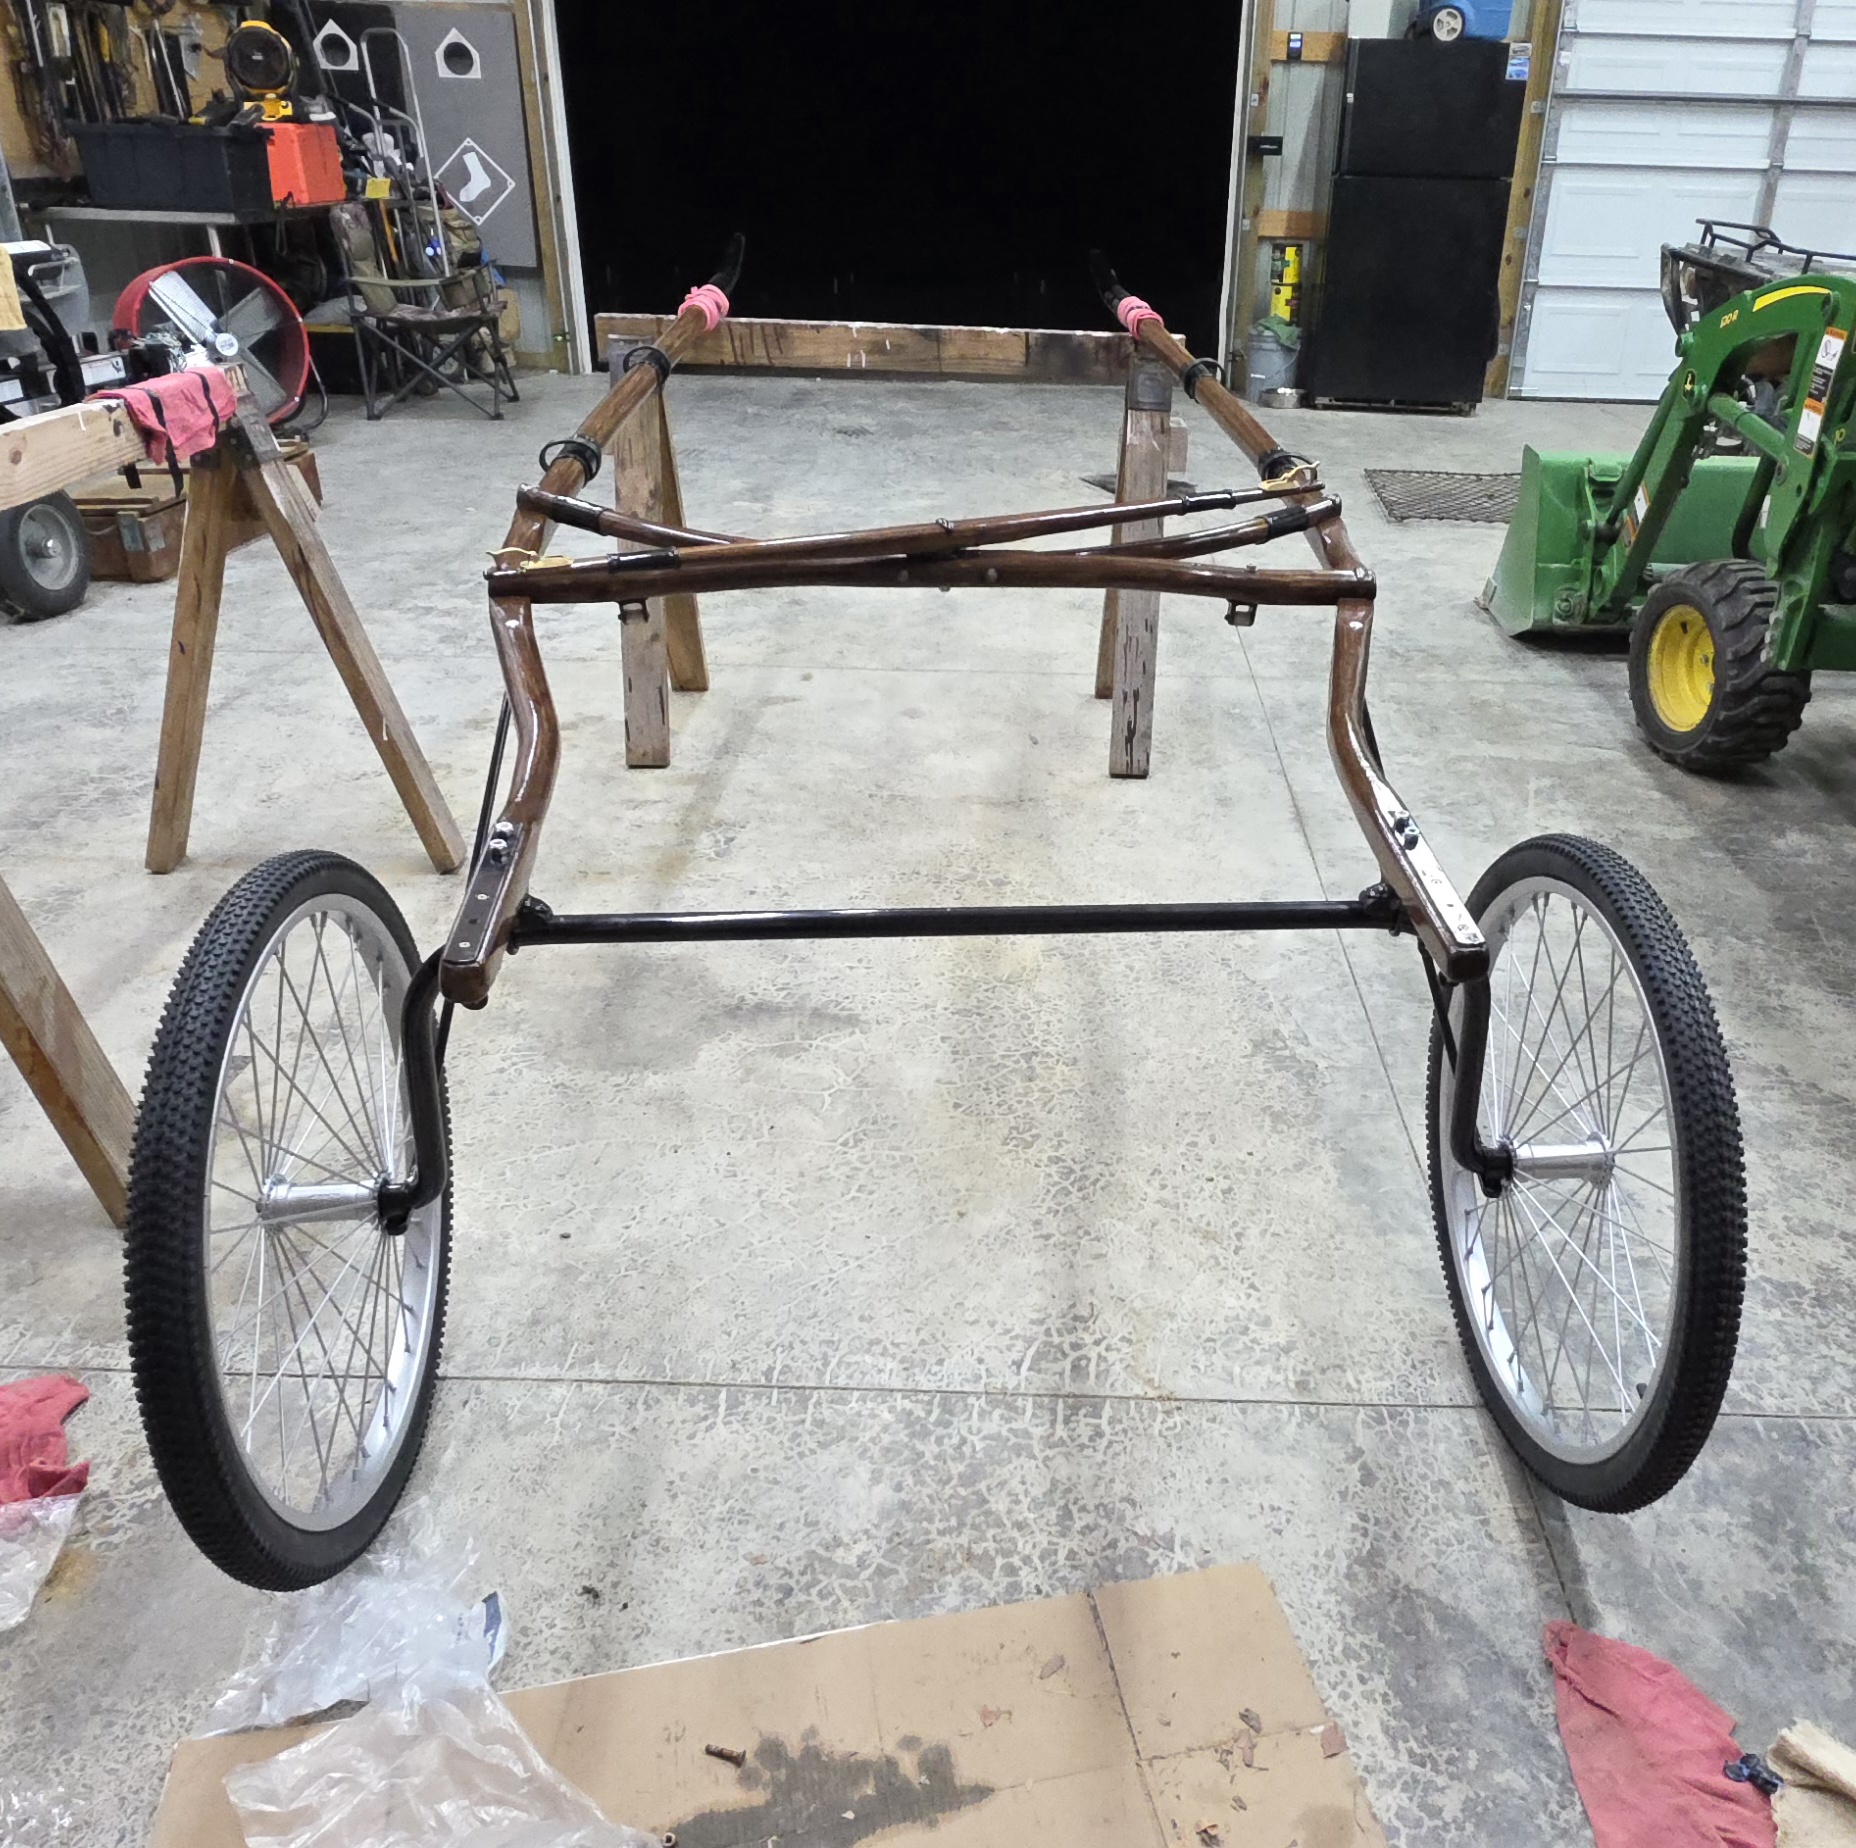
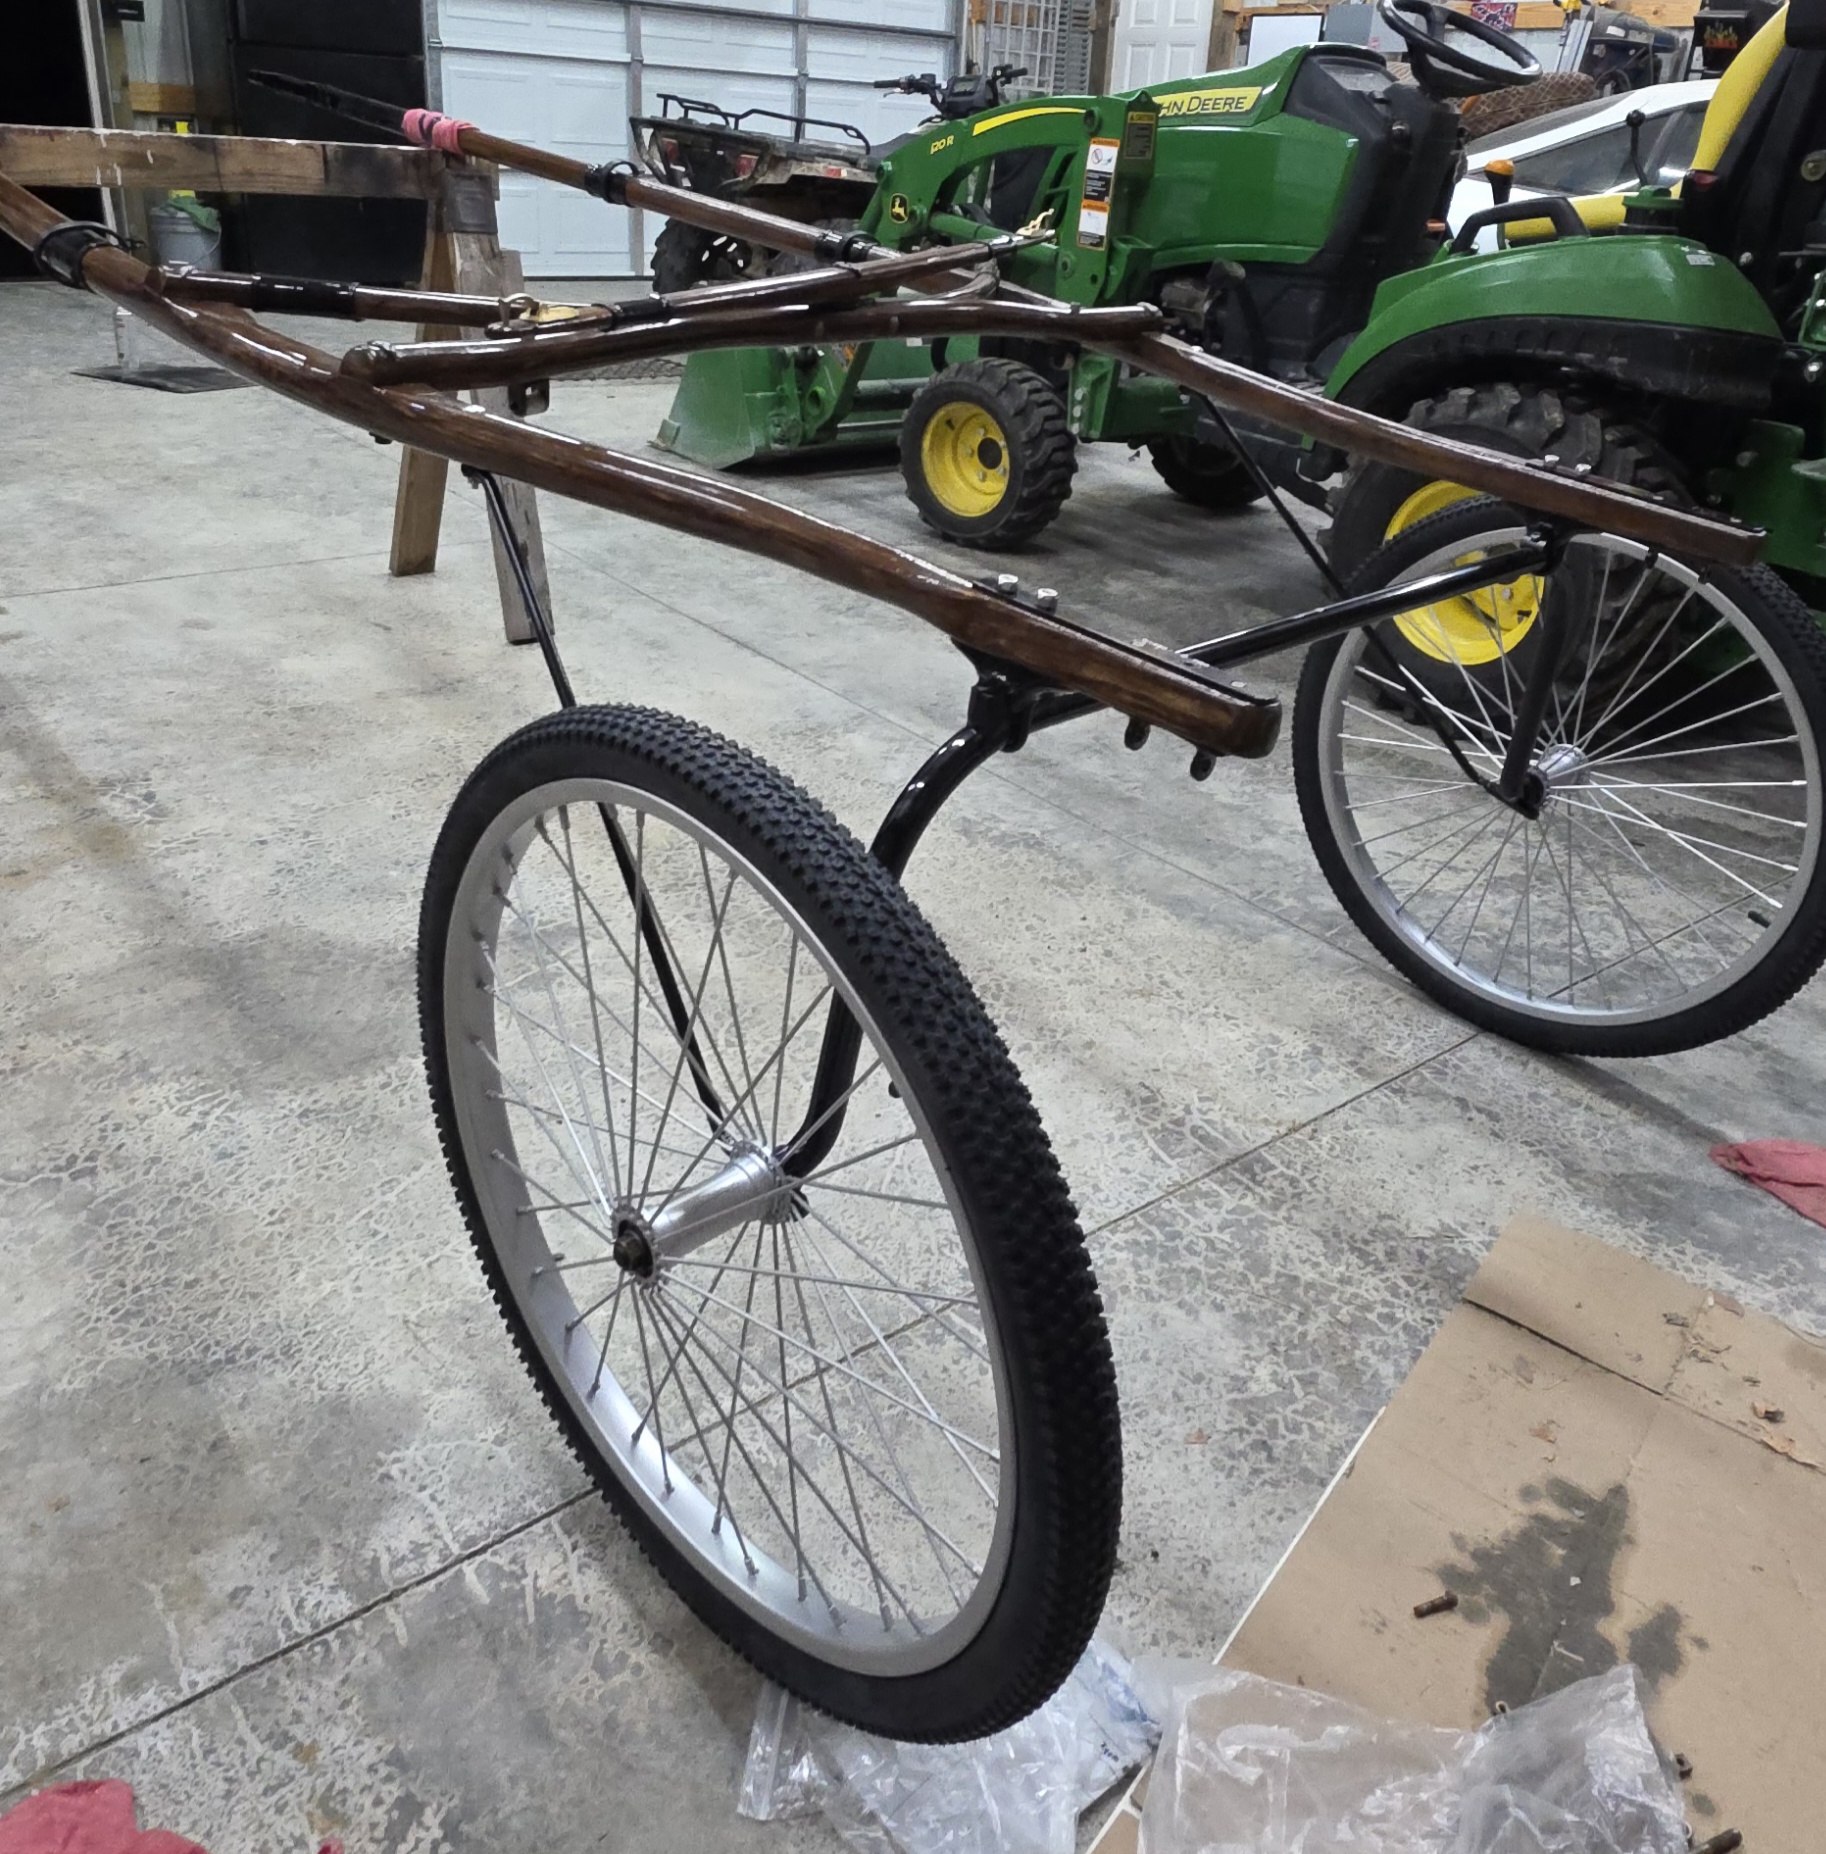
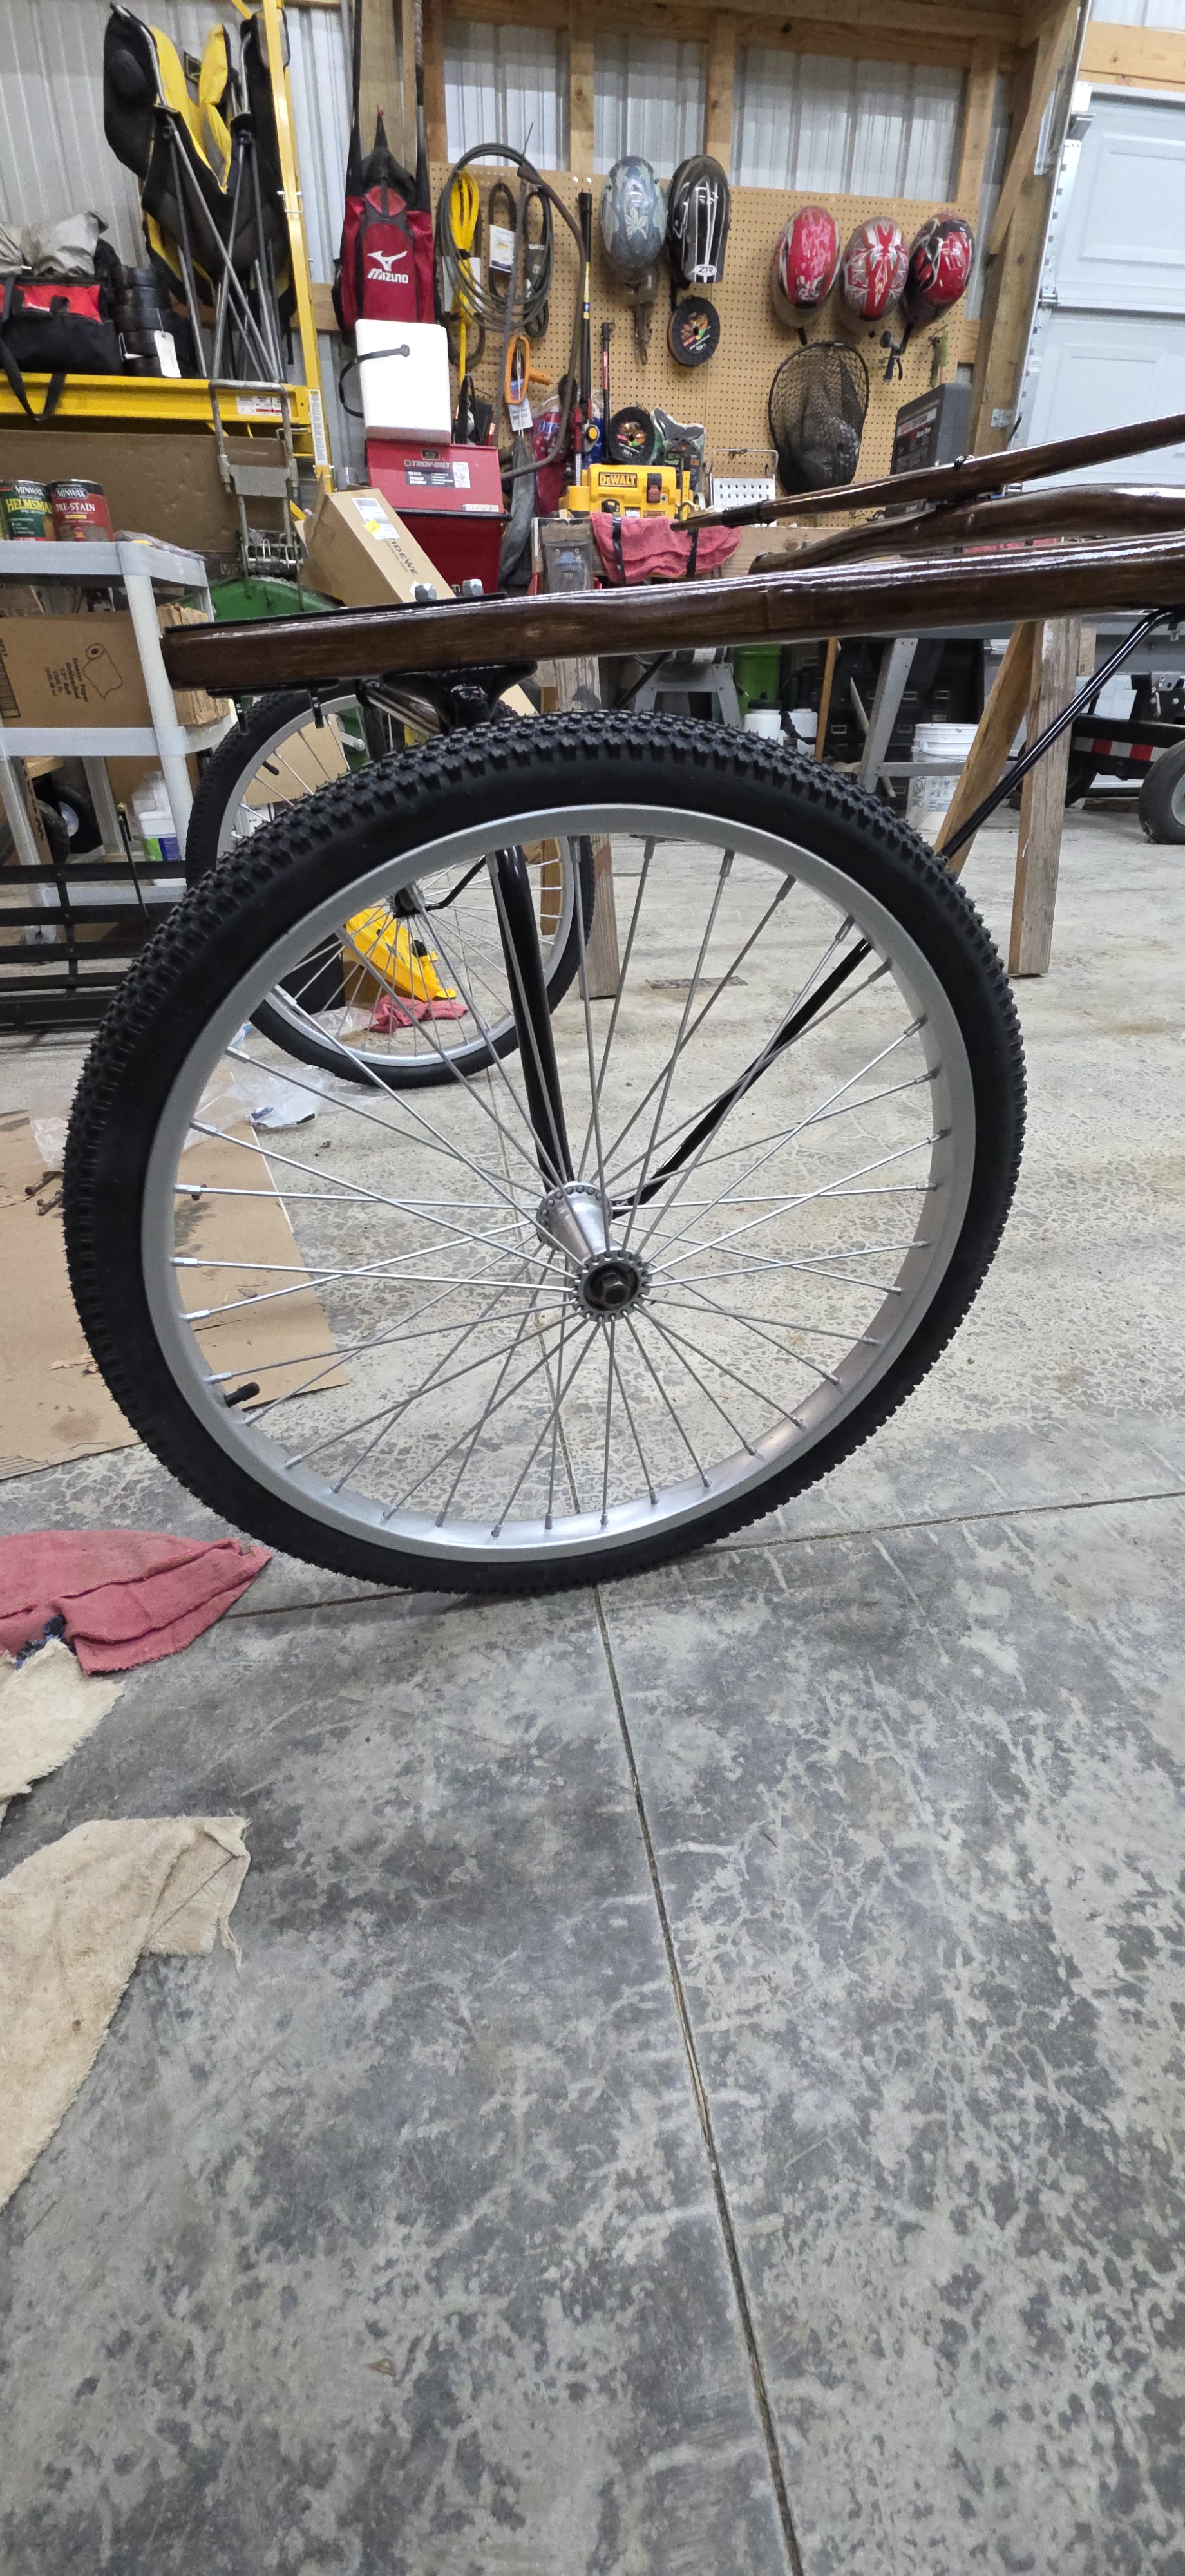
When the parts came back from powdercoating, reassembly commenced! It went back together quick and I was surprised at how easy it was to assemble. The hardest part was finding the right size bolts, and remembering which parts went where. There may or may not have been multiple runs to the hardware store looking for a different size of something. I am a little embarrassed by how many trips I made, if I’m being real, but that’s life!

A list of the items and cost. There may be a few other odds and ends, but either I already had the things or they were so insignificant I can’t remember buying them.
| Item | Cost |
| Citristrip | 28 |
| Wood Conditioner | 19 |
| Stain | 24 |
| Polyurethane | 26 |
| Shaft Trim Kit | 50 |
| Shaft Tips | 48 |
| Trace Holders | 23 |
| Shaft Stops | 50 |
| 2 new Axle Clips | 16 |
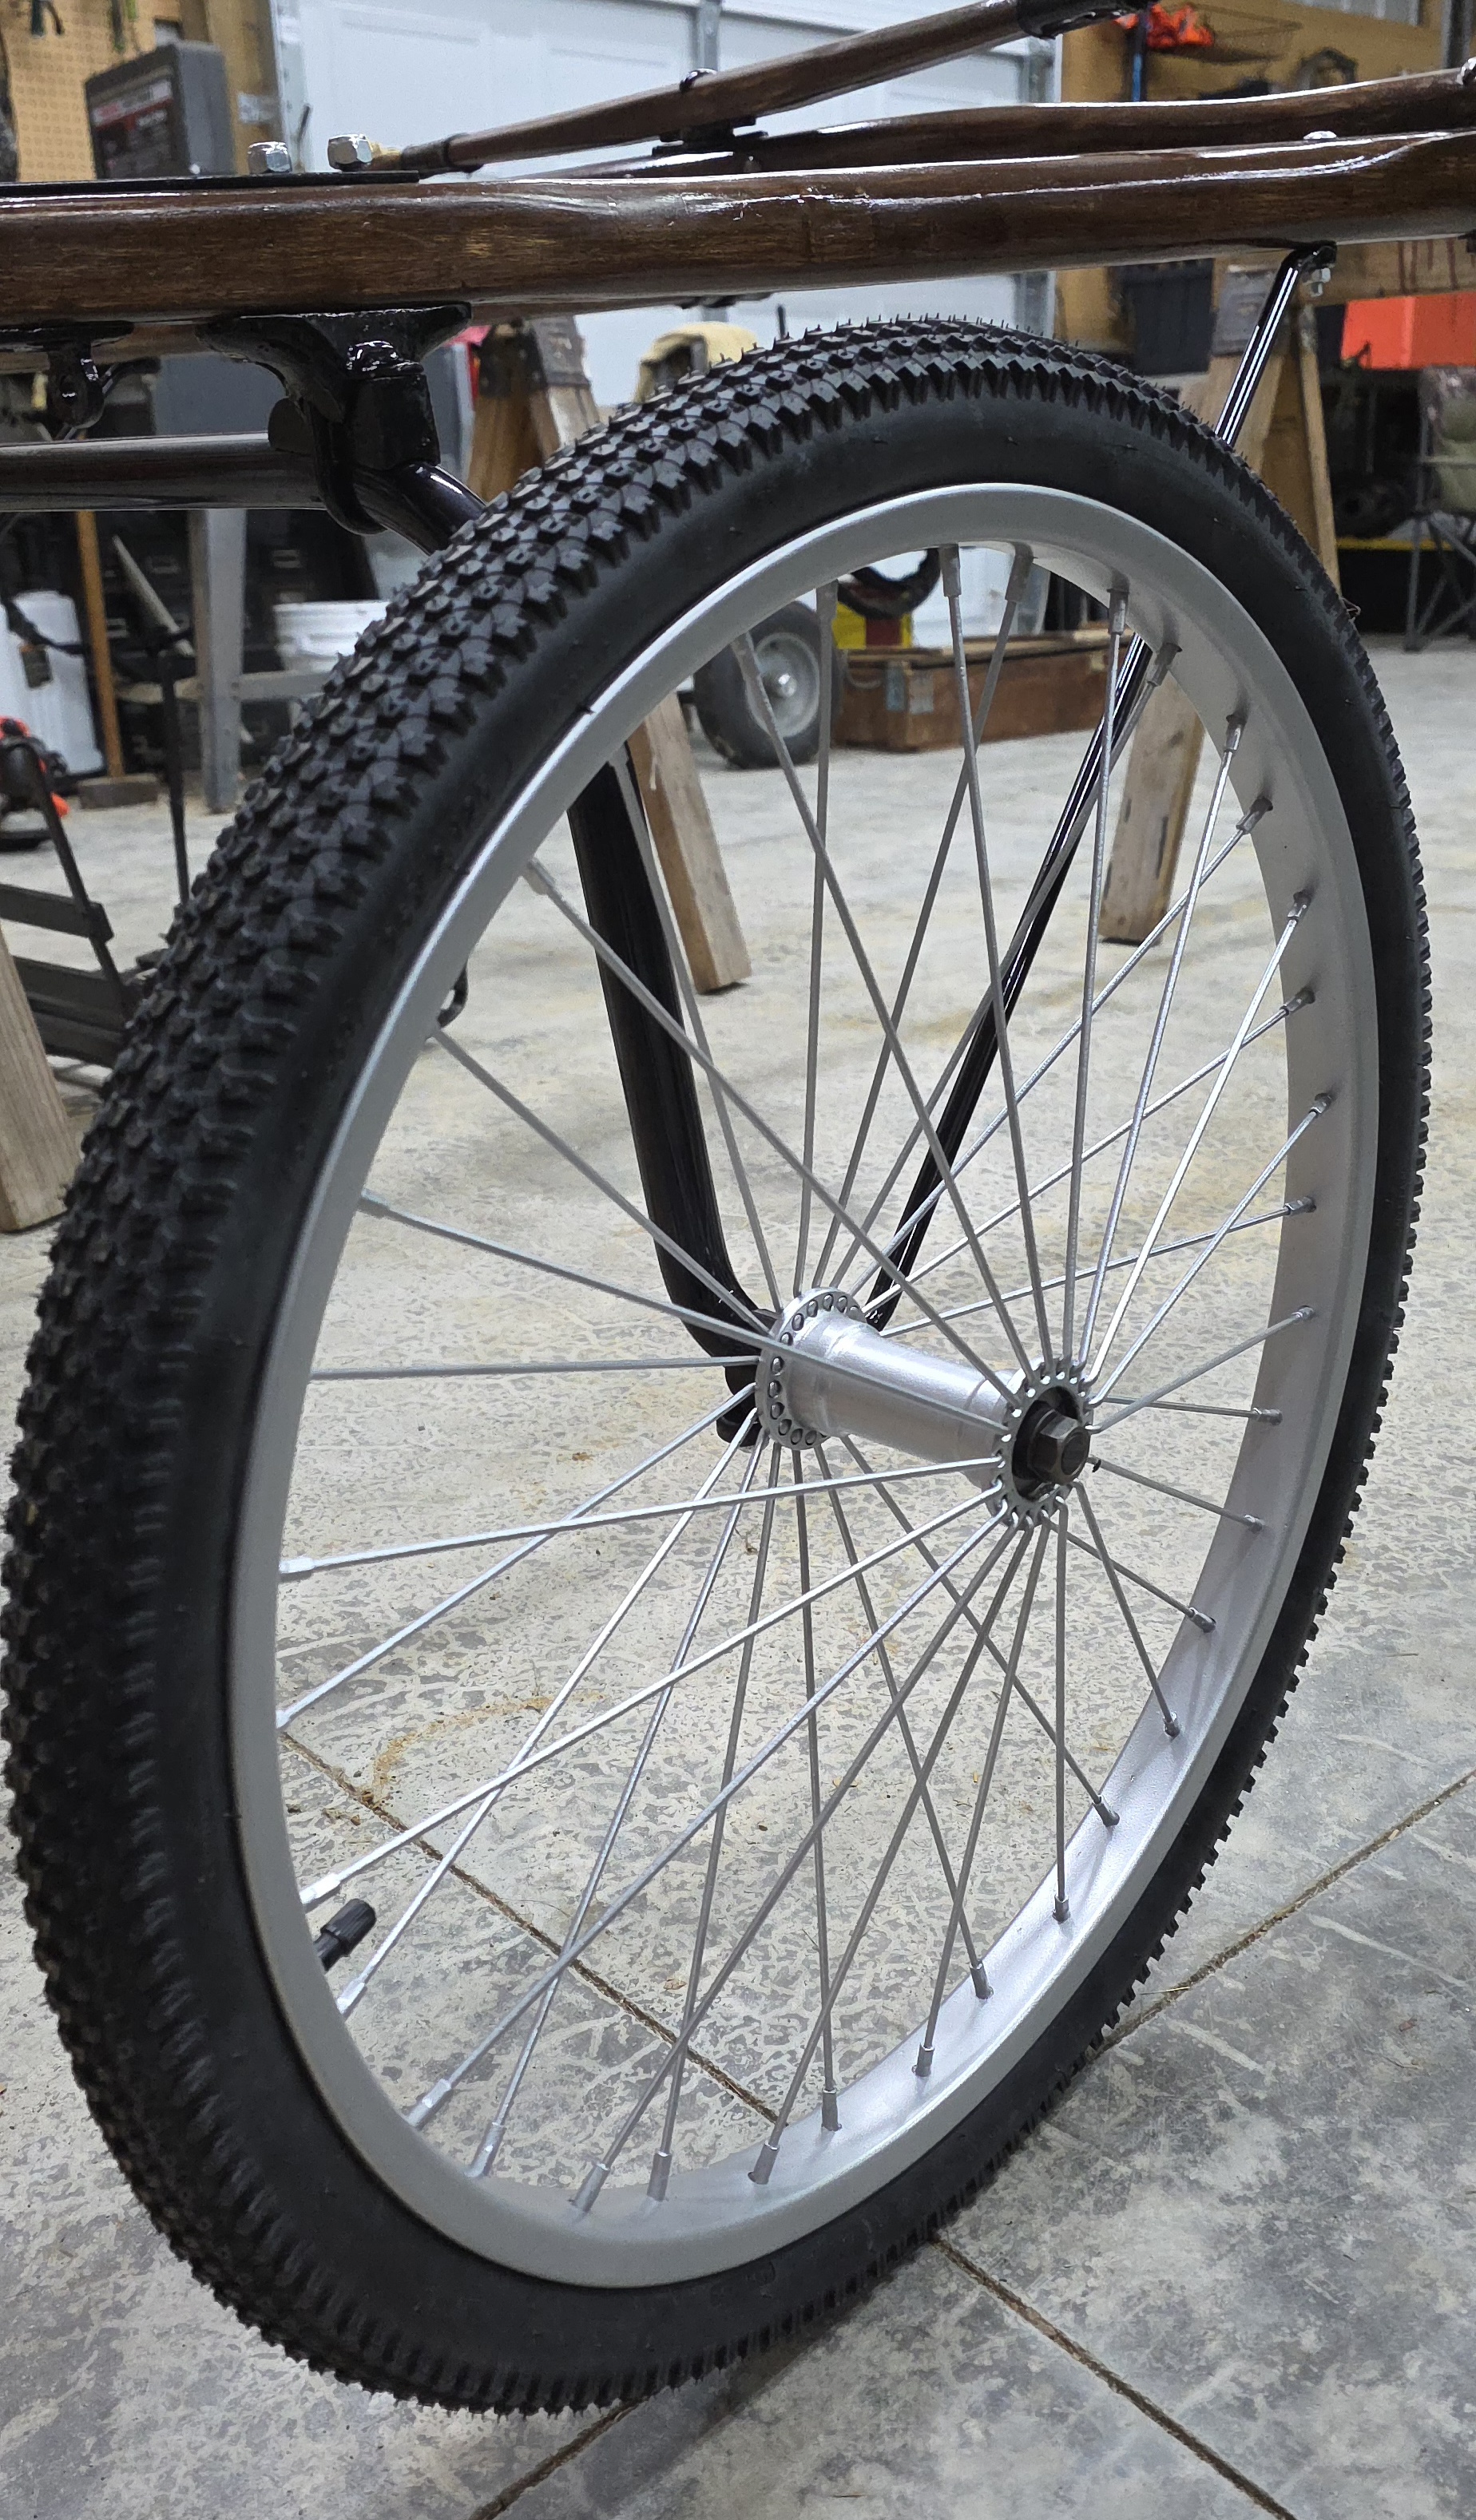
| Wheel Bearings, Cones, Lock Nuts, Snap Rings | 210 |
| Hub Caps | 190 |
| Patent Boot | 245 |
| Patent Dash | 275 |
| Leather Tug Straps | 28 |
| Tires, Tubes, Spoke Wrap | 50 |
| Various Nuts, Bolts, Screws, Washers | 63 |
| Powdercoating | 200 |
| Suede Dye | 10 |
| Whip Holder | 40 |
| Tug Stops | 50 |
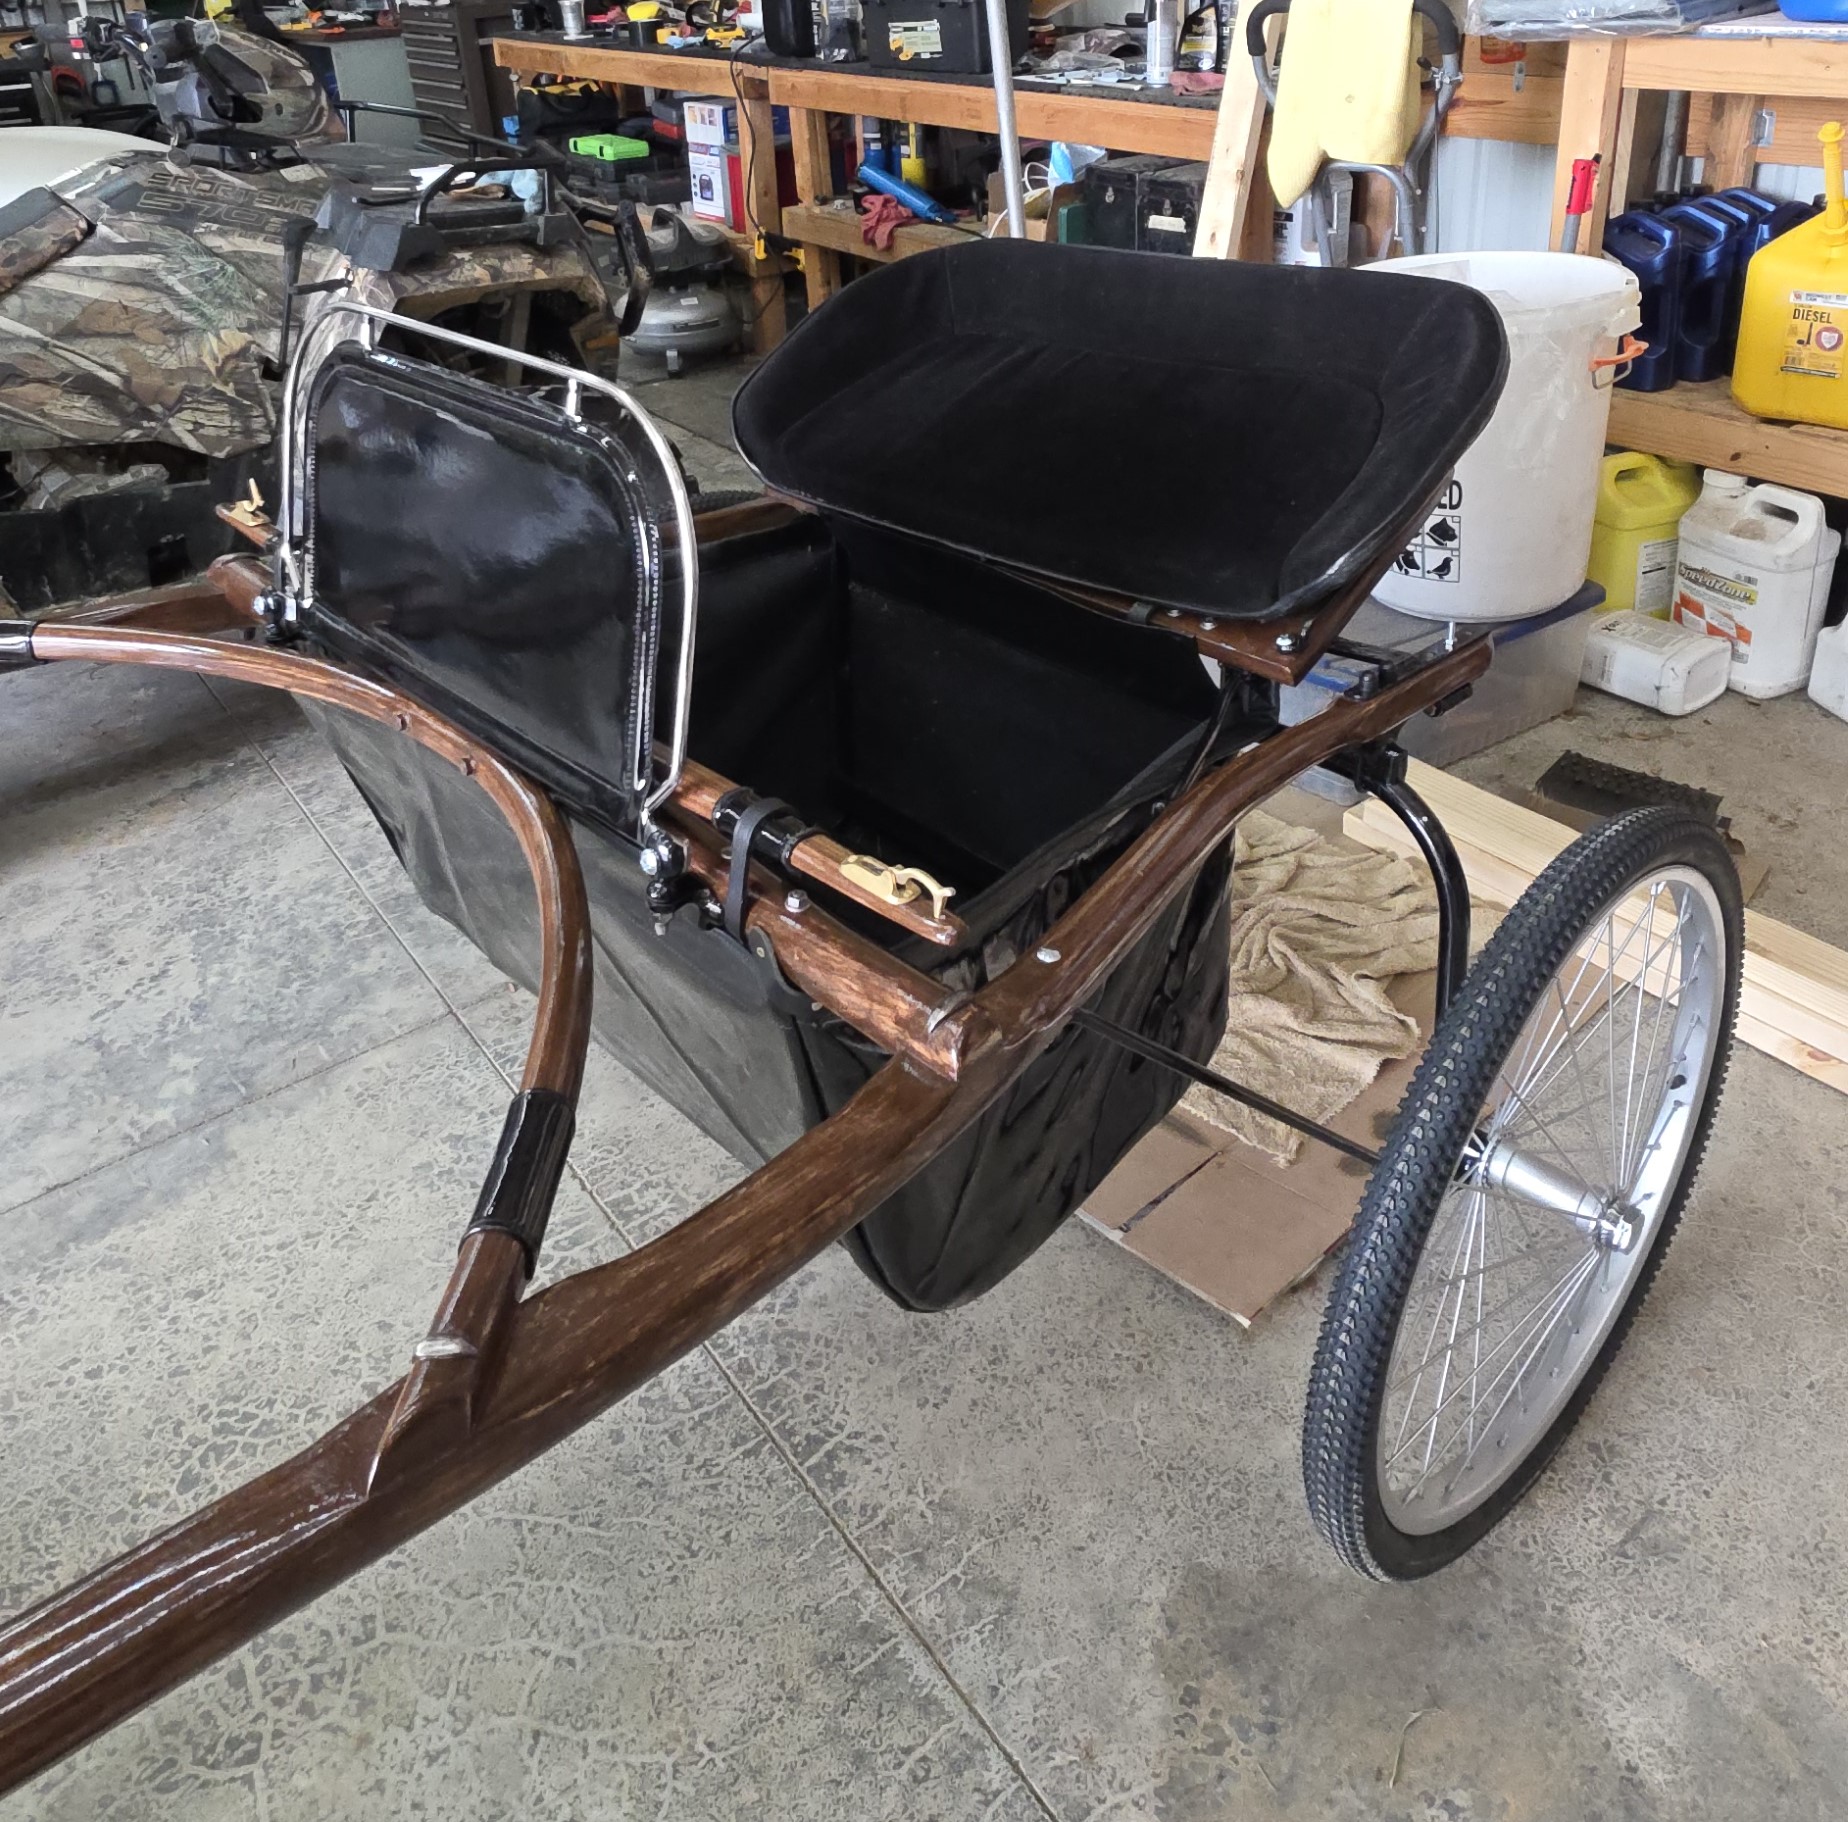
With the dash (the last item I had to buy!) installed.
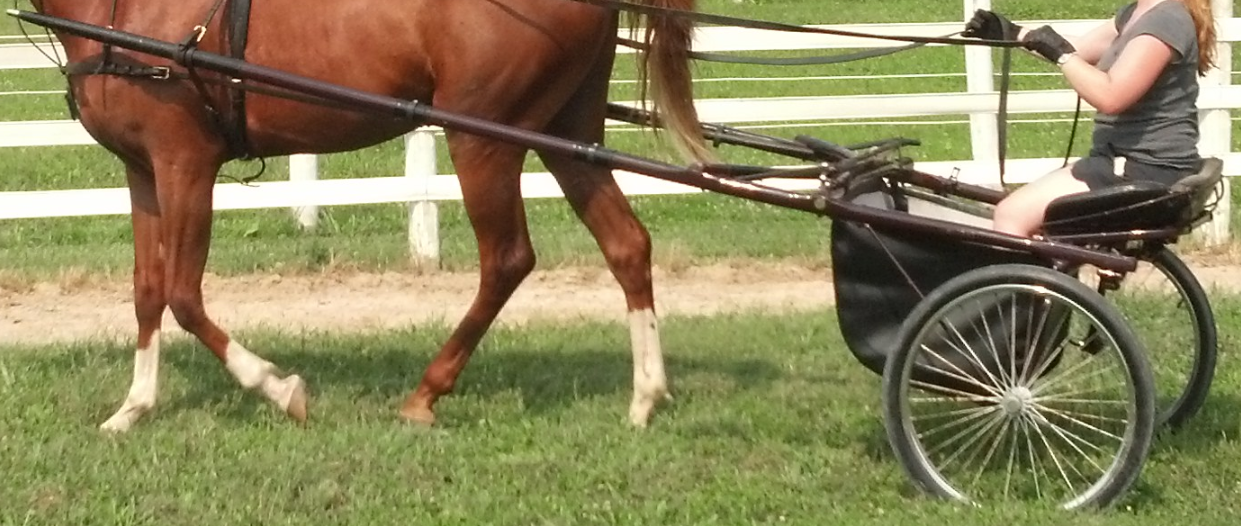
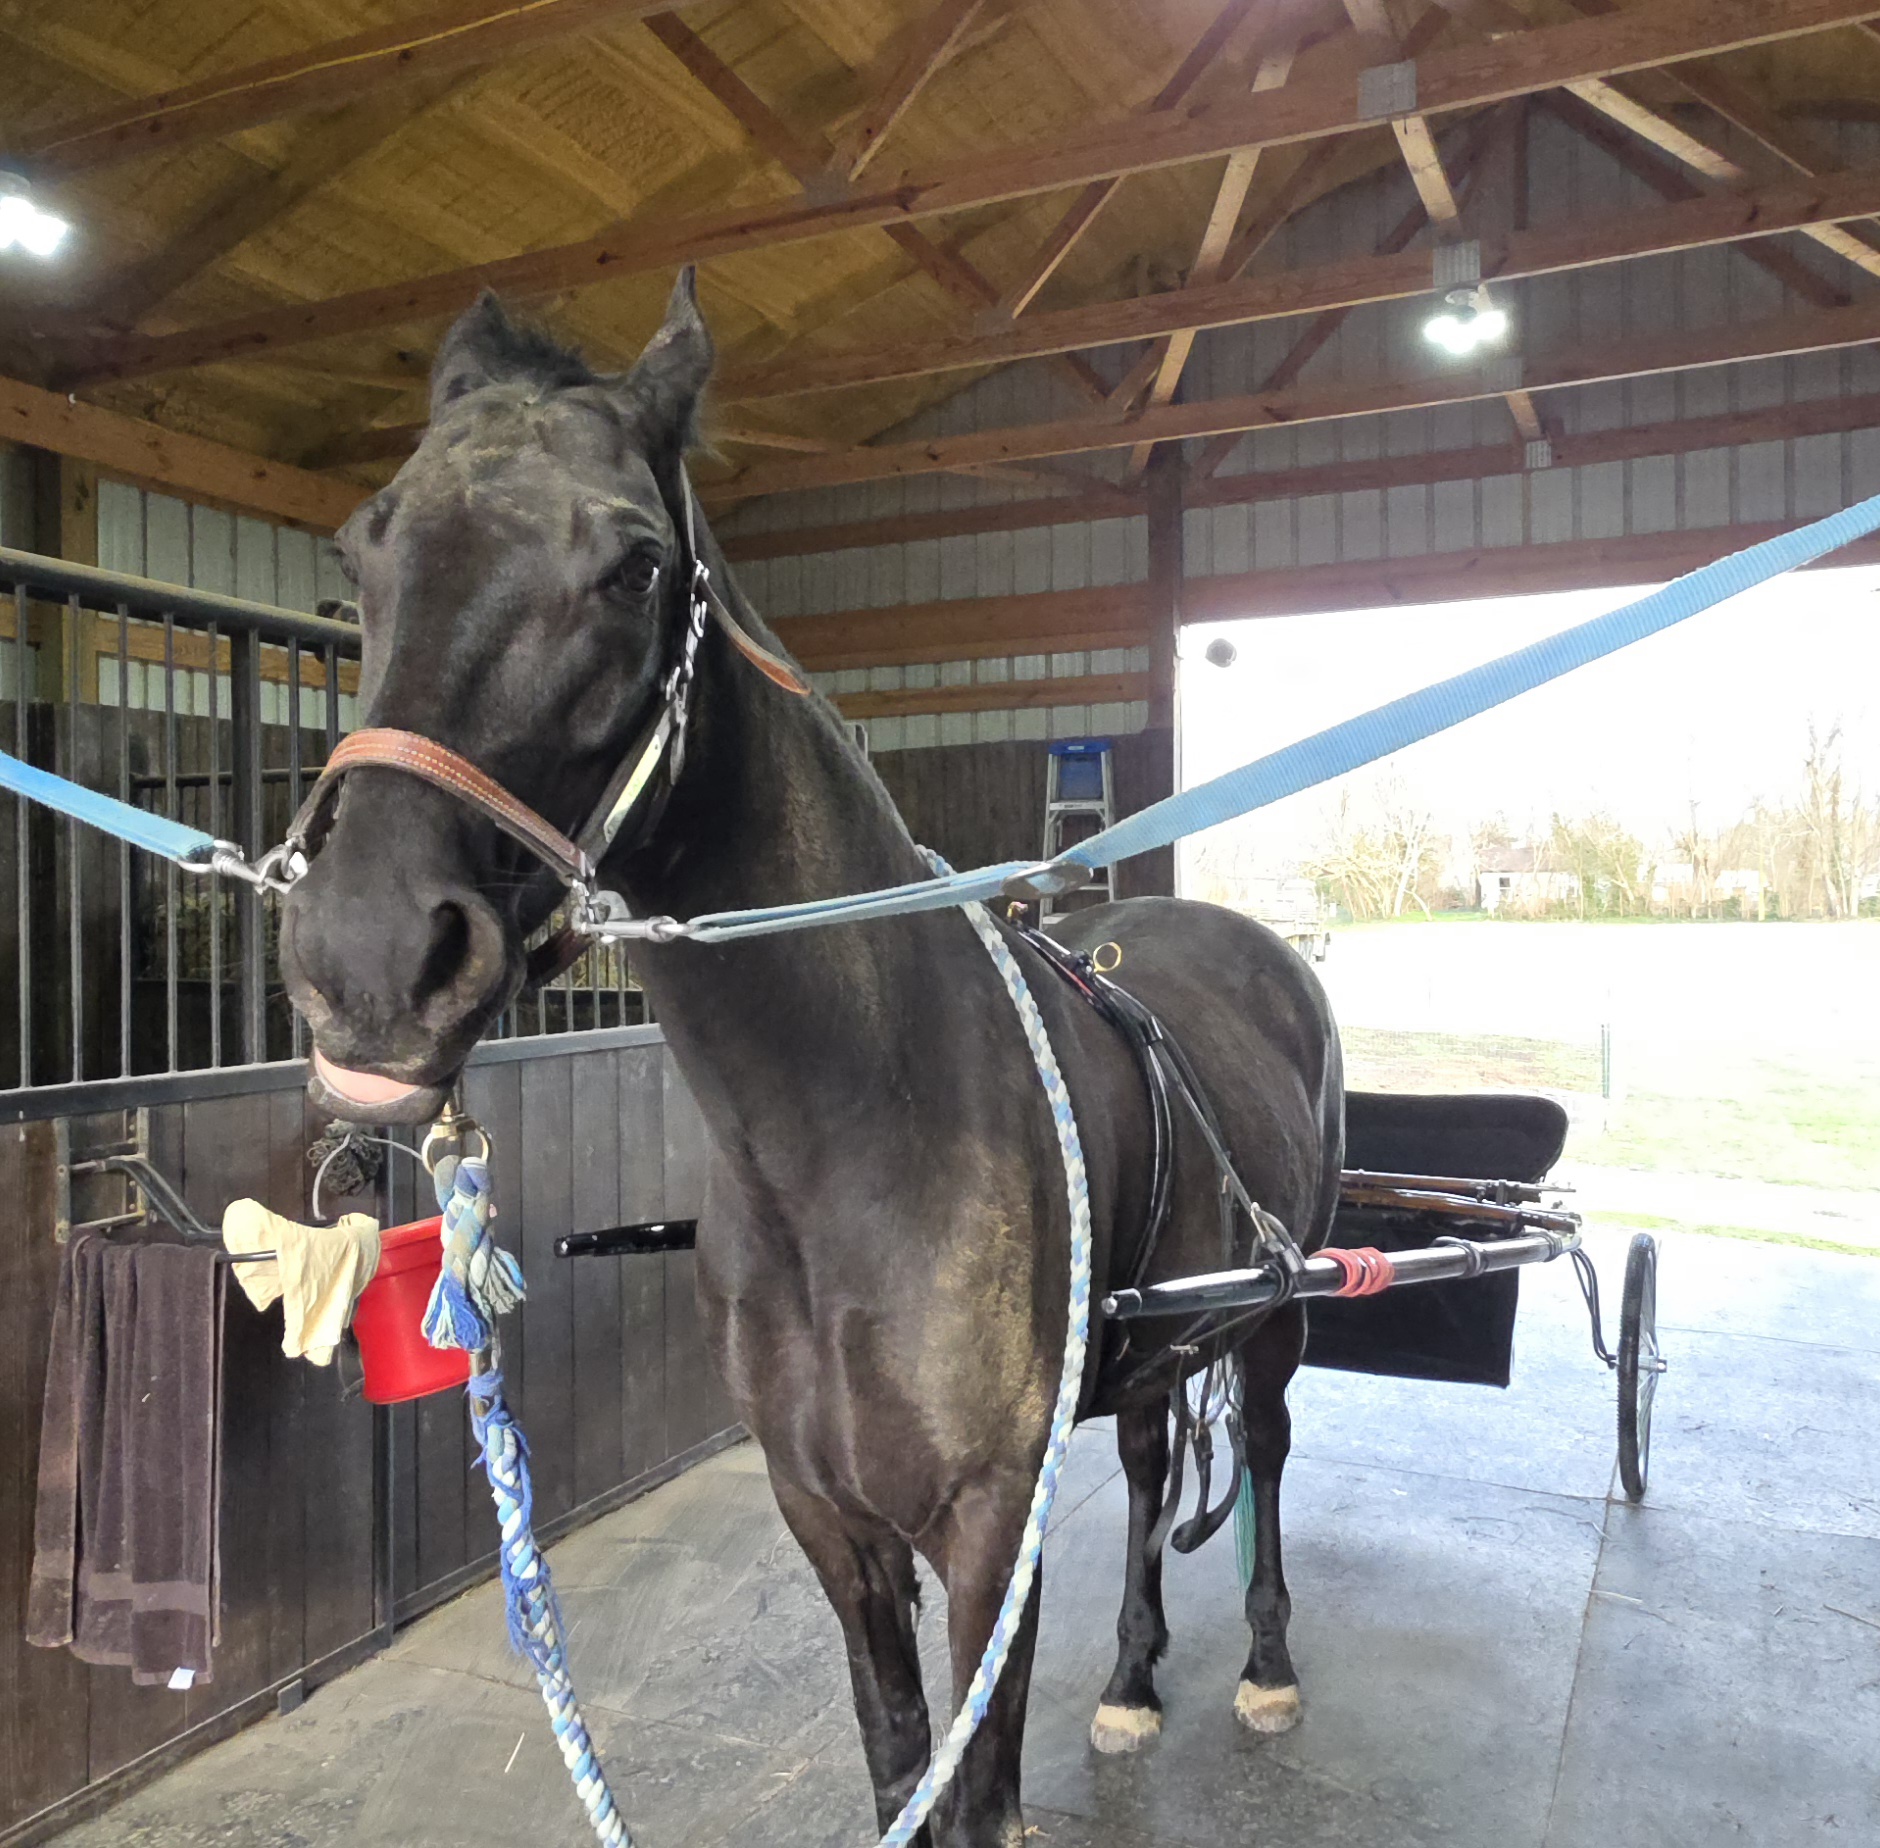
He looks so excited for his new wheels, doesn’t he? Test fitting here for where the tug stops should go. Please just ignore how filthy and feral he looks here! He came in from the field for this test and went right back to the field after!
And done!! All in all, I am SUPER happy with how this turned out. It ended up being quite a lot more money than I anticipated to restore this old cart. Shhhhhh, don’t tell my husband!! However, I still spent a LOT less than I would have on a used show cart with dents and dings and I now have something that looks brand new for a fraction of the cost of brand new! I was thinking under $500 would get this going and ended up spending… well, you saw the list up above if you’ve read this far. Do the math.
Would I do it again? Probably!! Honestly this project has gone pretty smoothly, was fairly simple to complete, and produced an absolutely beautiful cart that I can be REALLY proud to hook to my horses at any show. It was literally my very first time stripping and refinishing wood and I had no trouble. It was also my first time restoring a cart. Never doubt a stubborn woman on a budget with a goal to compete in a rich persons sport. Next time, maybe I won’t wait 10 years after tearing something apart to decide to put it back together and I will do a better job documenting what it looked like and what went where. You know, since there is technology now to help with that!
Stay tuned, I’ll be sure to post a show picture whenever we finally make it to a show!