Trying to find a hunt saddle to fit Fizz, in a price range that I could afford, has proven to be a challenge. I have dealt with the ill fitting one for far too long and finally sold it a few months ago. I have since tried several others, to no true avail, and even sent info to a consignment saddle fitter and they had nothing they thought would work for him in their inventory of over 100 used saddles. I was resigned to the fact that I’d hit show season without a saddle and be stuck not showing. I did a demo a few weeks ago on a brand new Freedman, which fit him beautifully, but I cannot afford to spend nearly 4k on a saddle and fittings after it’s all said and done so I guess I’ll need to start saving my pennies and/or selling some things. (Who am I kidding, I’m a hoarder, I don’t really like to sell things…)
BUT, I am one lucky son of a gun, I picked up what I now know is a 2002 model Freedman hunt style saddle the same weekend. This came from the famed Walnut Way dispersal sale, how lucky am I? The only thing that is really wrong with it is that the knee roll foam is basically disintegrated. But, for $200, I could not say no to a saddle that had good potential to fit him. And guess what? It fits pretty decent, not perfect but better than the one I sold. For being over 20 years old, it’s in surprisingly great shape overall.
Since I am not in love with the reddish color of the leather, it does not match his Freedman show bridle or breast plate, and I have decided that I cannot afford the new one that I am in love with at this time, I have to make this one work for now. SO, I set out to find a solution to the color problem and I might be crazy, but I’m going to DIY dye this saddle. Yes, I could pay someone. But then I’d have less money to save for a new saddle while still having to use this one.
Products I used:
- Fiebings Deglazer (this is probably acetone based on online research, but better safe than sorry)
- Fiebings Pro Leather Dye: Chocolate color
- Wool Dobbers (some online sources have said the “applicator” doesn’t come with the dye so I just ordered some myself to be safe) Low and behold, no applicator came with the dye.
- Passier Lederbalsam- I have read that this is a great alternative to use for a top coat (like resolene) since it is heavy in beeswax, but still allows you to condition the leather (unlike resolene).

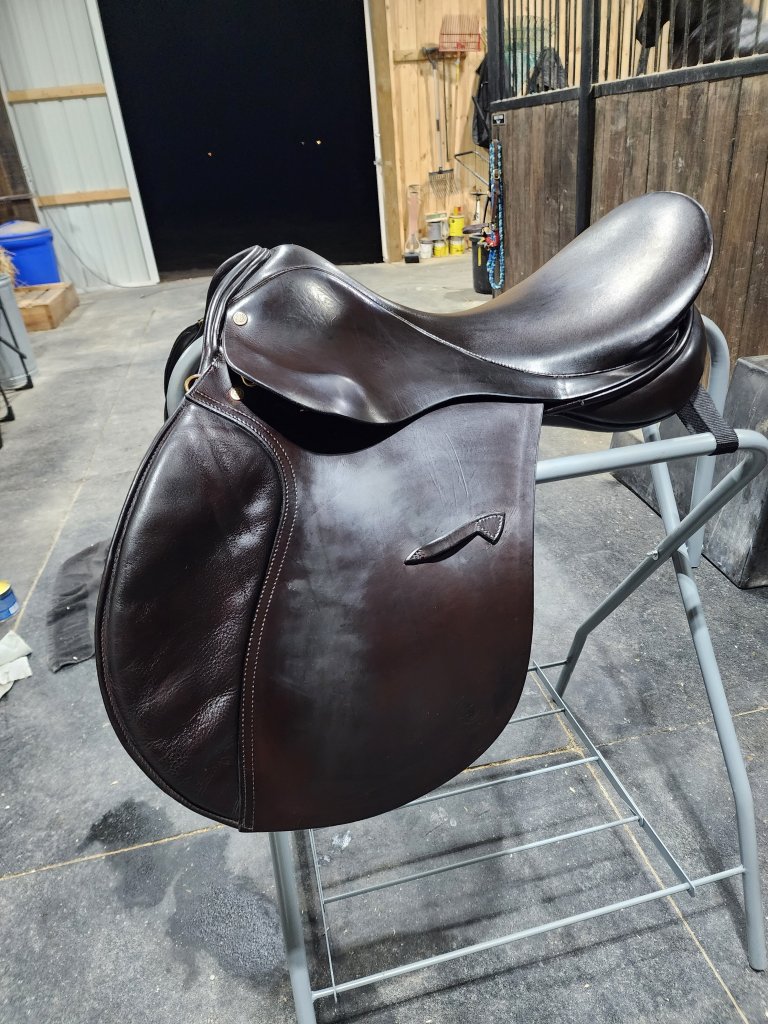
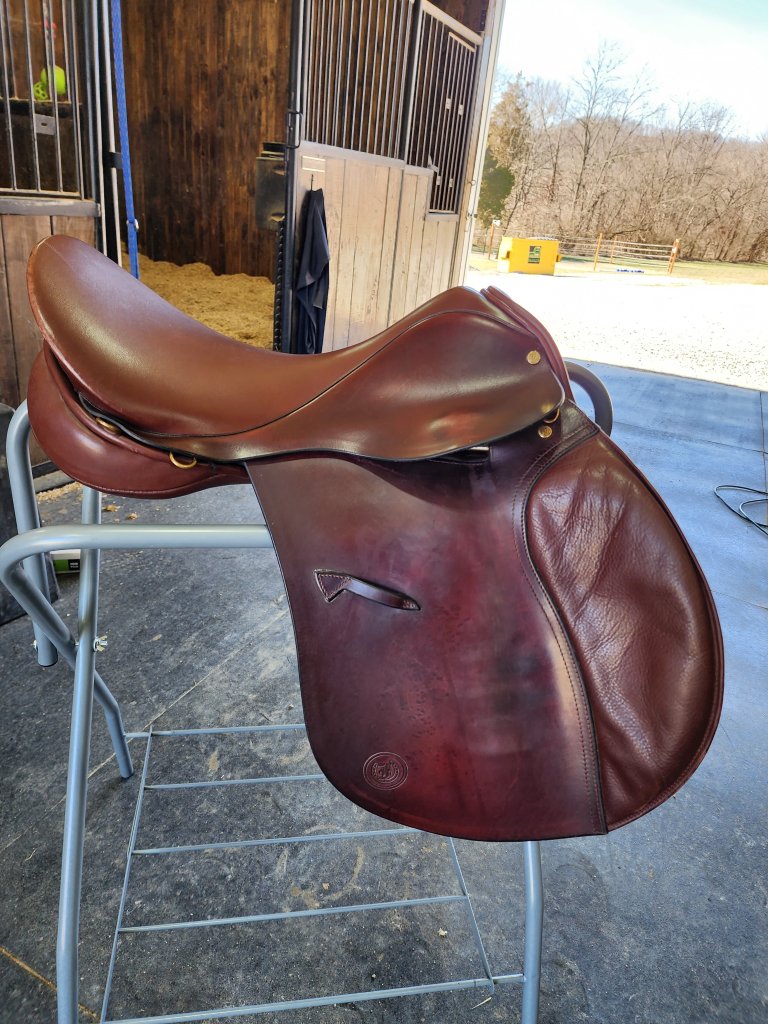
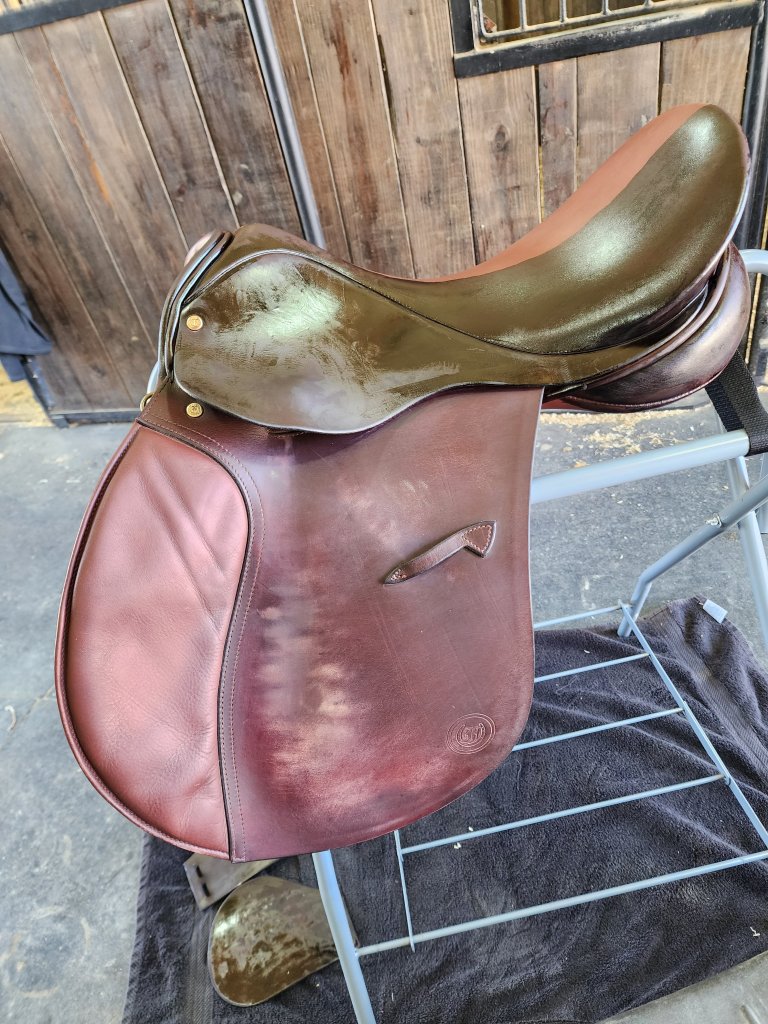
Here is what we are starting with, color wise. I prefer darker brown leathers and this orange/red is just not my style. Also note the wear marks on the flaps where it’s faded/discolored.


Step 1: find a well ventilated area to work and gather your supplies. Believe me you don’t want your house smelling like this stuff. I used my barn, with the horses outside for the day. It was a breezy day so I didn’t really notice the smell until I left the saddle in the tack room to dry overnight.
Step 2: Deglazing. This is to remove any top coat and oils so that the dye is able to penetrate the leather. It is scary. No one likes dull, spotty, dried out leather! But, it’s necessary so try to keep from cringing and keep going. Put your deglazer on a rag or piece of cotton and rub in circles everywhere you plan to dye. For me, it was everywhere with leather that I could get to, top and bottom. After deglazing, notice how everything looks extremely dull and discolored. Not that it wasn’t discolored before, but now it’s worse.


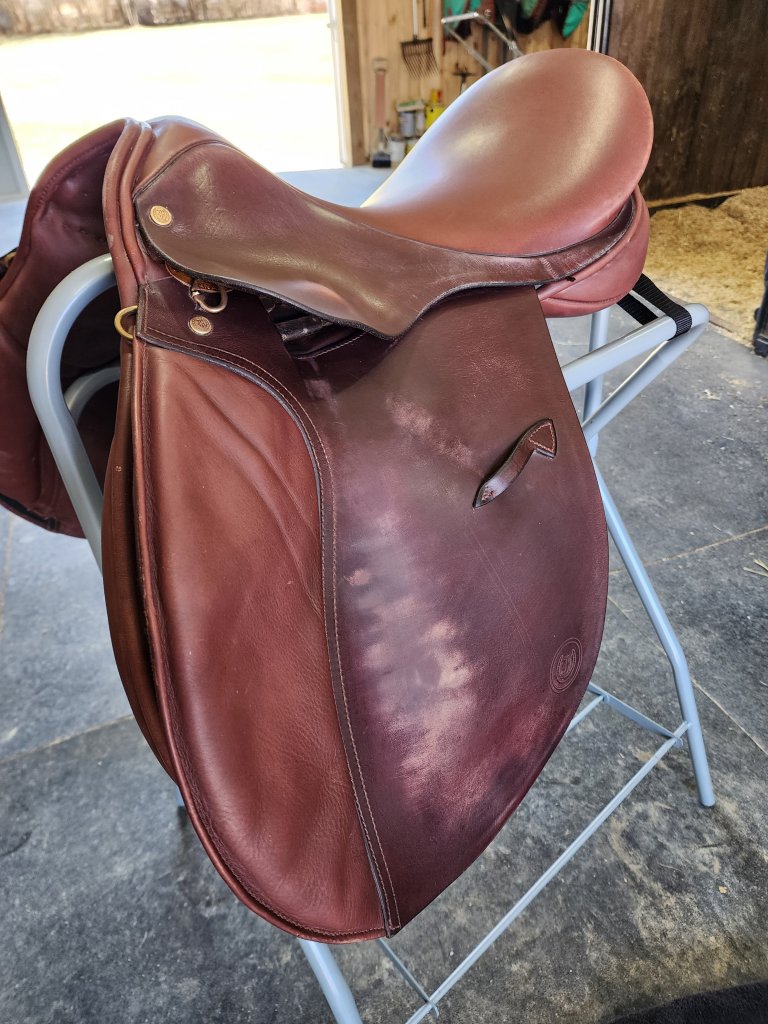


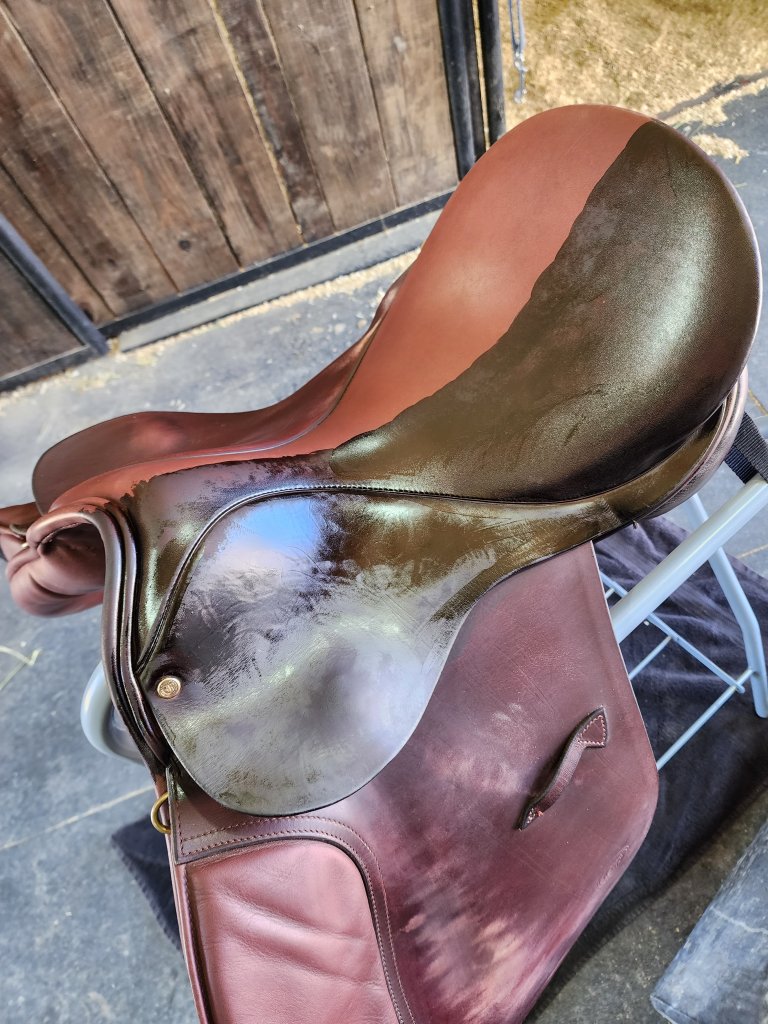
Step 2: Dye and buff!! Here is where you start to see the transformation, but again, it’s scary too!! Due to the dullness/dryness of the leather, the dye coat will look uneven. Do not fear. Just stick the coarse. Use the dobber and apply a thin coat. Don’t worry if it isn’t perfect, you’ll be doing more coats. After coat 1, I let it dry for about an hour, then went over it buffing with a rag to remove excess dye. Use the same circular motion like with the deglazer, and use a fresh rag. Microfiber works well and won’t scratch the leather.


Steps 3 (and 4?) Repeat step 2 until you get the desired color and coverage with your dye (or until you run out like I did). I was able to do 3 thin coats on top, and 2 thin coats underneath with 1 dye bottle.


After coat 3 I left it outside in the sun for the rest of the daylight I had left for the dye to soak in and dry. Then once it got dark I moved it inside the tack room to lock up, and left it there overnight (and most of the next day because, real adult jobs get in the way of fun horsey things).
Step 5: BUFF until you think your arms might fall off. OR until you come up with a better way to buff.
Step 6: Apply the lederbalsam. Slather that stuff on there like its going out of style and leave it to soak. Then again, buff buff buff.
Step 7: Repeat step 6.
Step 8: Repeat step 6 again!! Yes. At this point you may not have working arms. Haha but rest assured the end result will be worth the personal torture. I ran out of weekend and had to do this over the course of the next few weeks. Any time I’d get a few spare minutes, I’d just buff on the saddle some. I really think leaving it alone though let the dye set in really well, so points for procrastination.
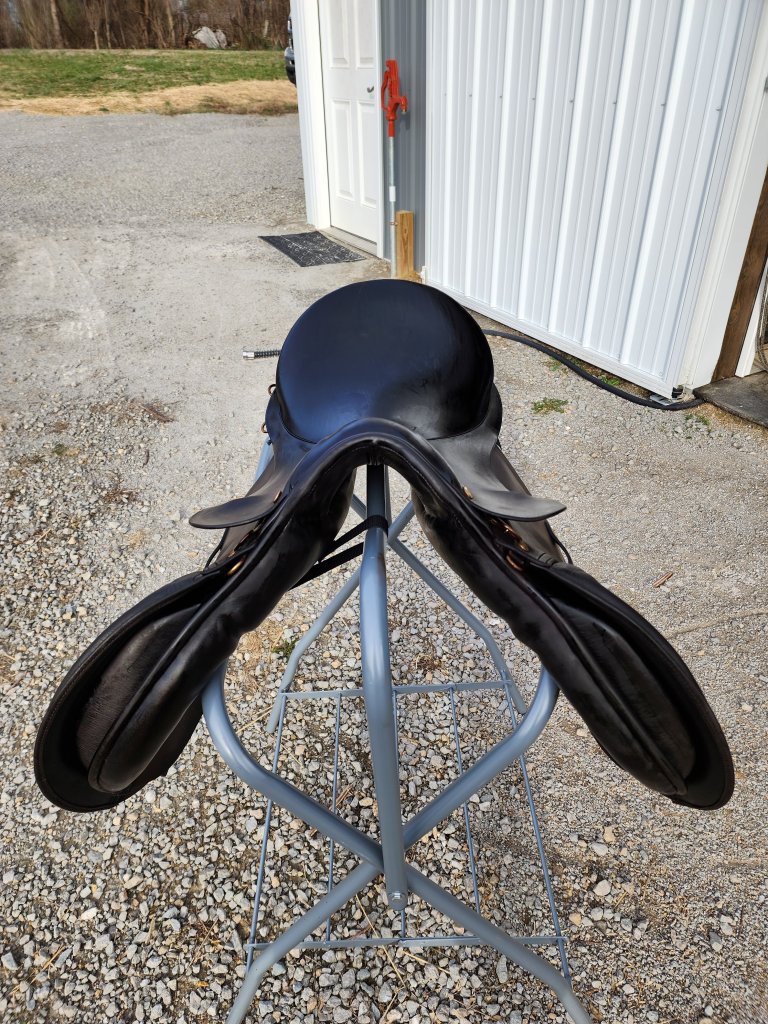
Here is the finished product!!! I am pretty happy with how it turned out. I am not sure how it will hold up over time, but for now, I am pretty darn satisfied. The last photo shows how the color matches his new Freedman bridle and breast plate. Pretty perfect!! 😍